Hello and welcome to part three of the pattern making basics series! Today’s tutorial is all about making seamless repeats! To print any pattern on a large scale or in a wide format, the image of the pattern needs to be seamless. These kinds of files are created with an image that meets at all four edges in a perfect match to create an endless repeat.
This tutorial is how to make seamless repeats in Photoshop, but note that Adobe Illustrator has a pattern making function that allows you to layer artwork and see the pattern as it develops. You’ve got to be proficient with Illustrator to use that function, but there is a basic way to create a seamless repeat in Photoshop. At the end, I’ll show you the simple way to check the edges of your pattern and confirm it is seamless, and also a basic way to look at the pattern’s horizontal and vertical repeat.

To explaing the technique, I’ll be using these four watercolor leaf stems, turning them into a simple botanical print using a very cool tool in Photoshop to make a seamless repeat. Are you ready to learn it? Let’s do it!
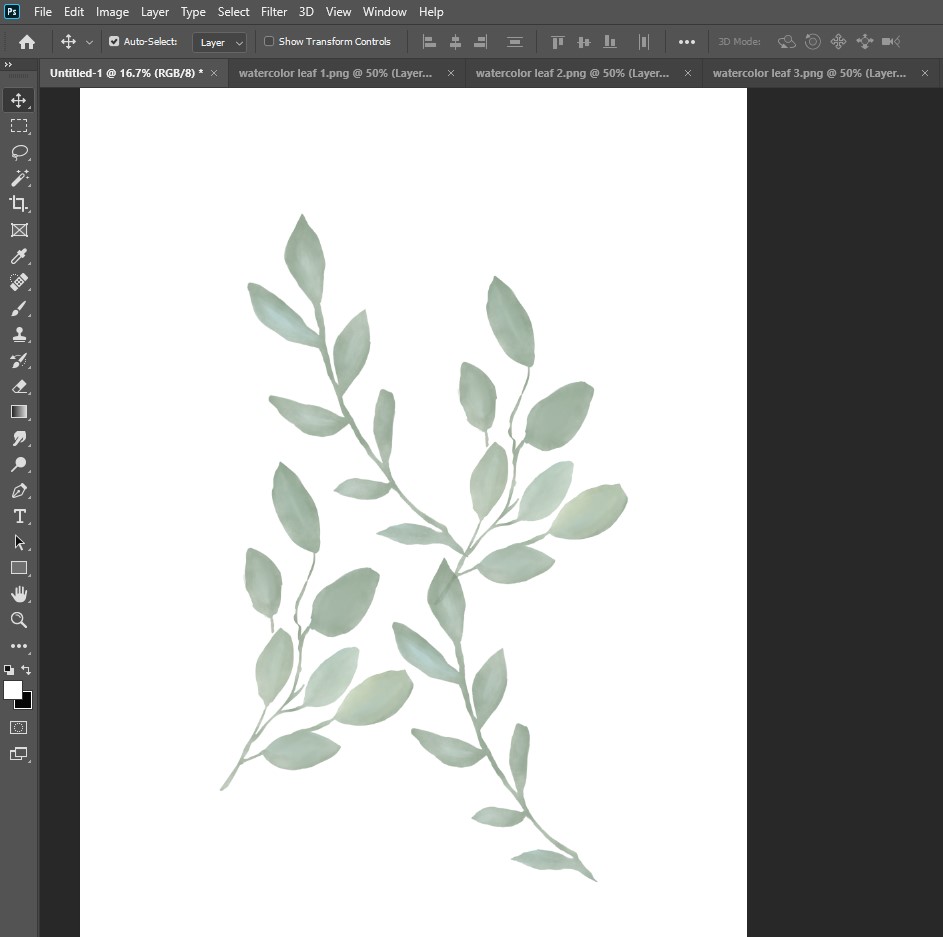
Here are the four images I’m working with, they are very basic watercolor leaf stems I created.

All of the tools I’m referring to I covered in Part One: tools to know, so refer back to that post if you need a refresher on these Photoshop tools I’m referring to. For this pattern I’m using artwork I created, but refer to Part Two: sources for artwork for a list of additional resources for making patterns using Photoshop.
To begin, I created a New Document, 4000 px x 6000 px at 300 dpi with a transparent background. Sizes and transparency and .dpi will matter later, and I’ll cover the reasons why in part four of this series on the topic of uploading and printing with print-on-demand sites.
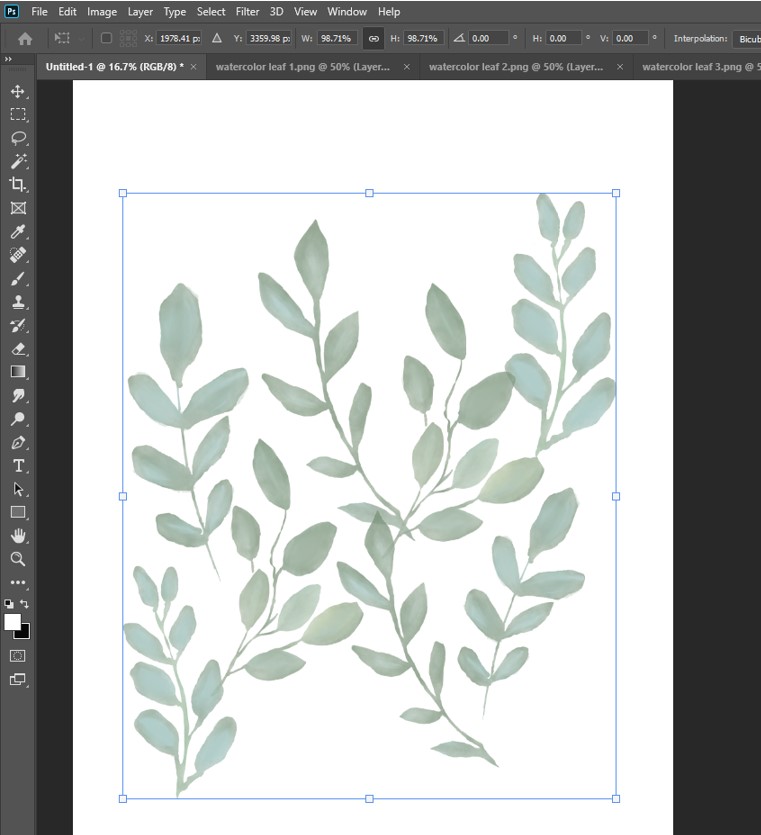
To layer the leaf artwork I used or Select > Copy > Paste (you can also use New > Place Embedded) to add the individual leaves. I used the Transform Tool to rotate and resize them to create a layout I liked.

At this stage, I like to keep the artwork mostly in the middle, allowing for some white space along the edges. To do so, select all the leaf images together and reduce them slightly to create more white space above, below, and on each side.
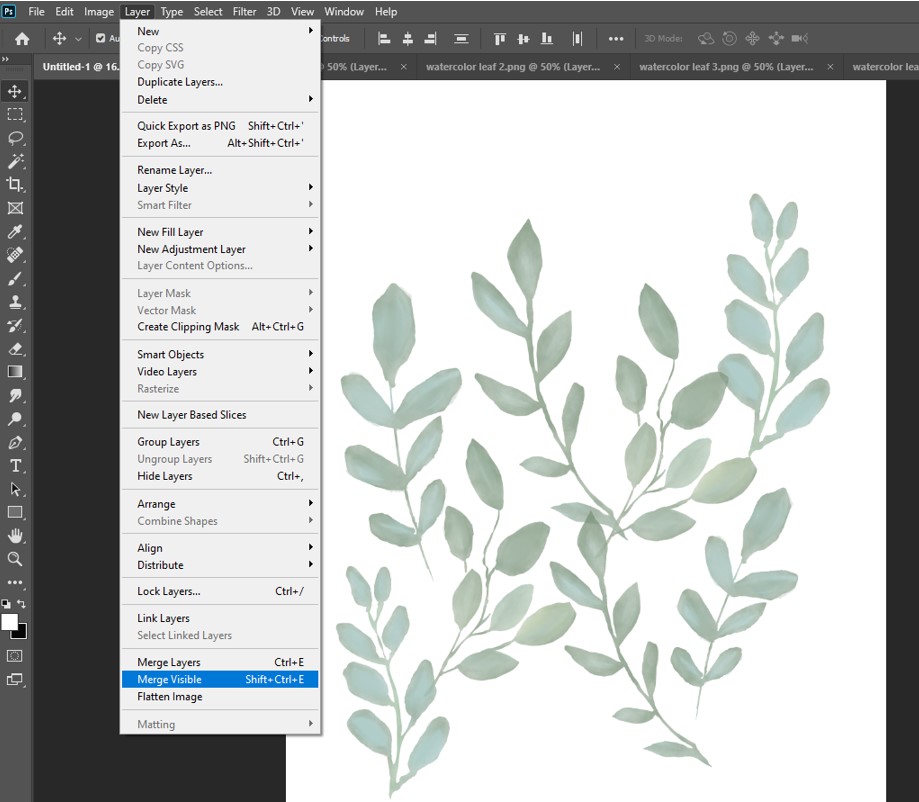
When working with layered artwork, before moving to the tool to create a seamless repeat, it’s necessary to Merge Visible Layers before proceeding. To do this, select Layer > Merge Visible.
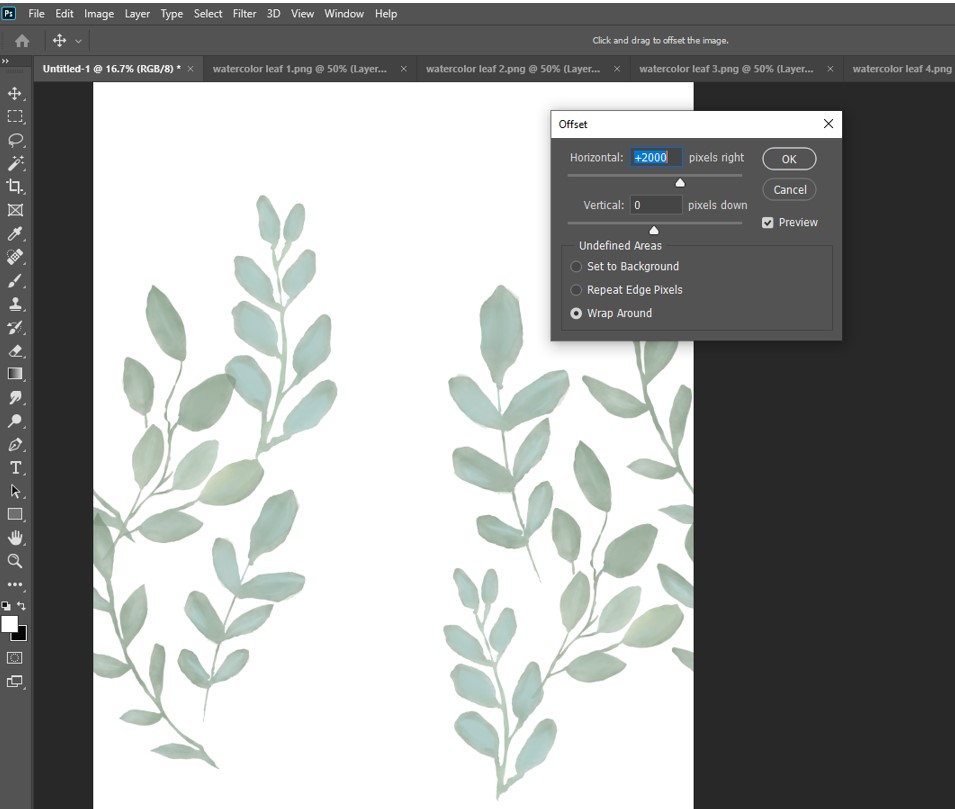
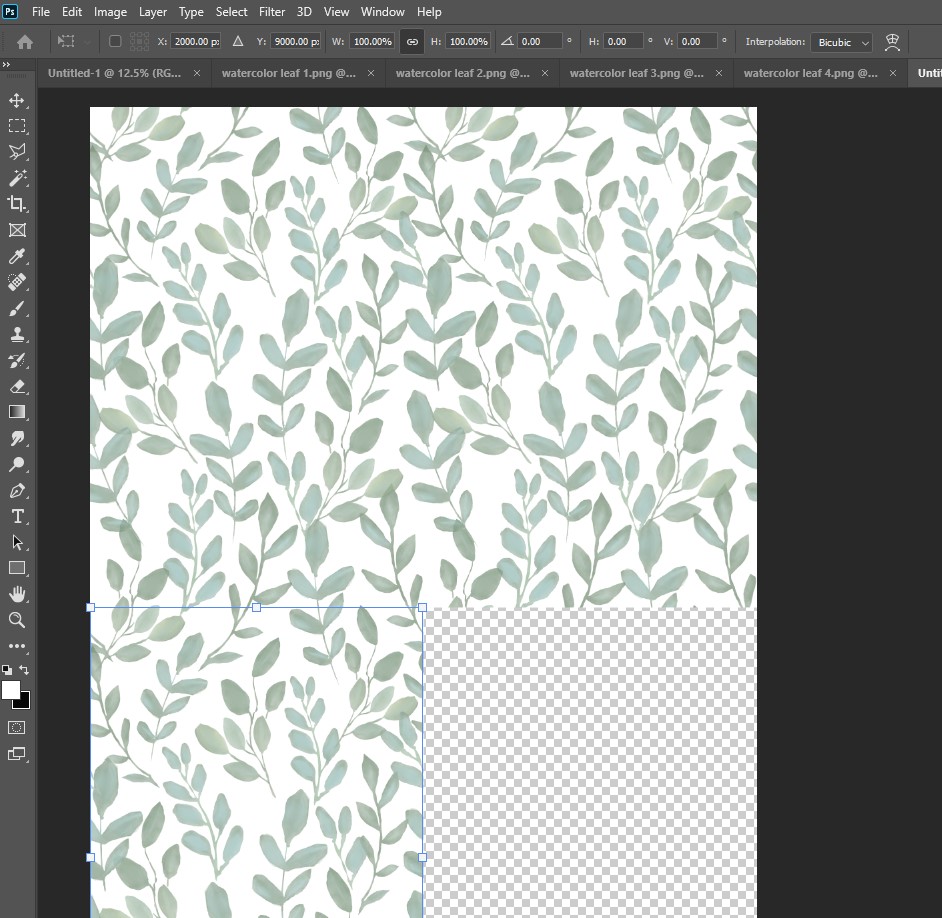
Next, the all important Offset Filter! This is the special function that moves your artwork side to side and up and down but keeps the existing patten in place. Watch this! To move the artwork horizontally, select Filter > Other > Offset.
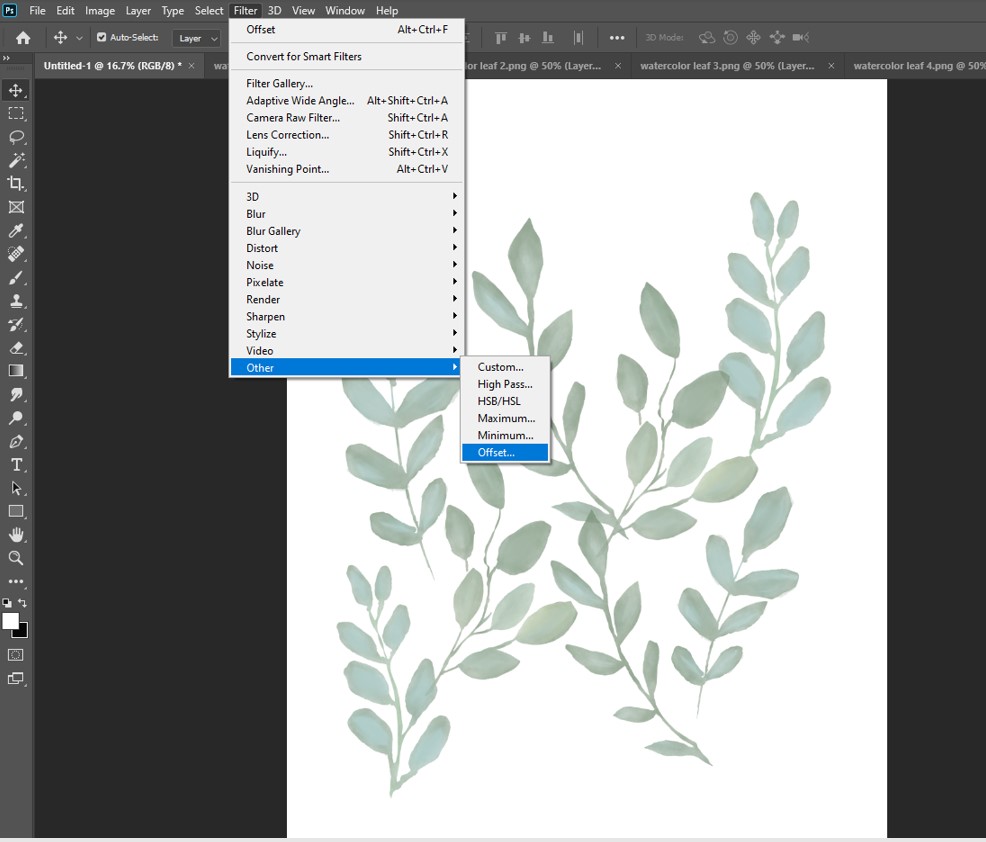
First, I chose to offset the artwork horizontally by half the size of the document. Since this document is 4000 px wide, I chose Offset +2000. Using Offset automatically preserves the pattern and keeps the artwork in its place creating a seamless repeat on both sides.
Notice how the Offset Filter moved all the artwork over by 2000 px now creating a white space in the middle to work with.
Next, I filled that white space with more art, layering a few more leaves with the Transform and Rotate tools to fill the white space. This created a seamless repeat on both sides, but there is still white space above and below.
![]()
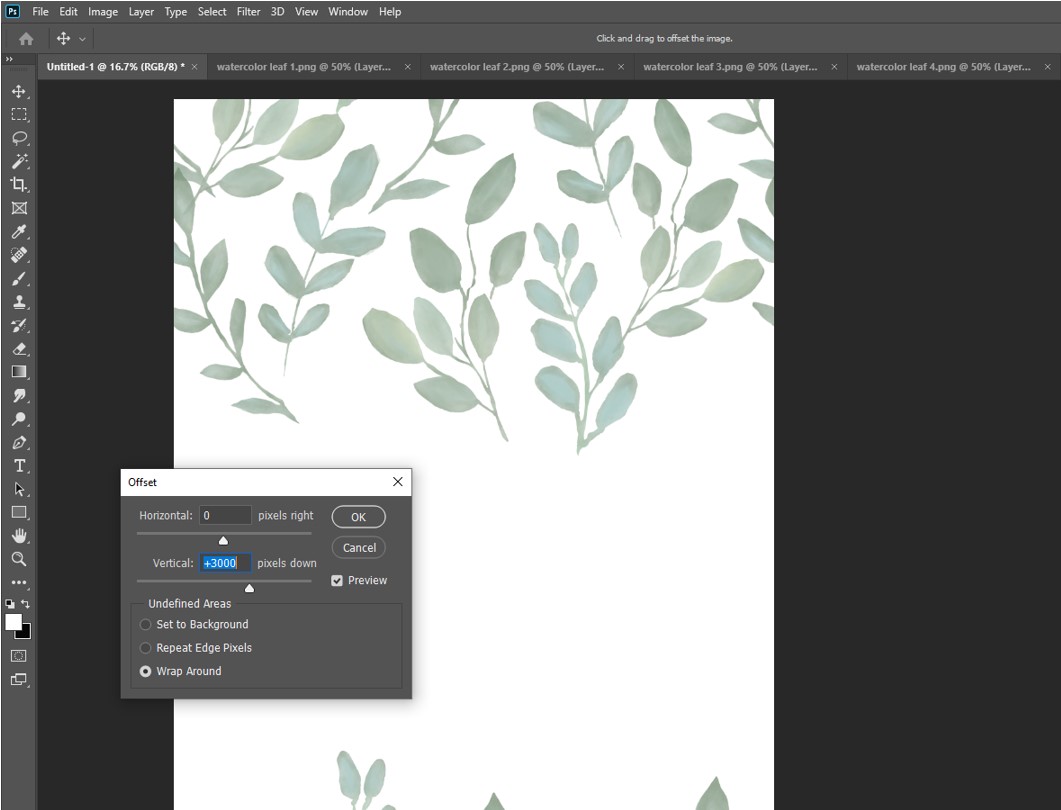
Again, Merge Visible Layers, and repeat the Offset Filter, choosing a Vertical move this time. Since the document is 6000 px in height, I chose +3000 px to isolate the white space that still existed above and below the pattern.
Time to fill in the white space again with the same leaf artwork, using the Transform and Rotate tools to fill it in.
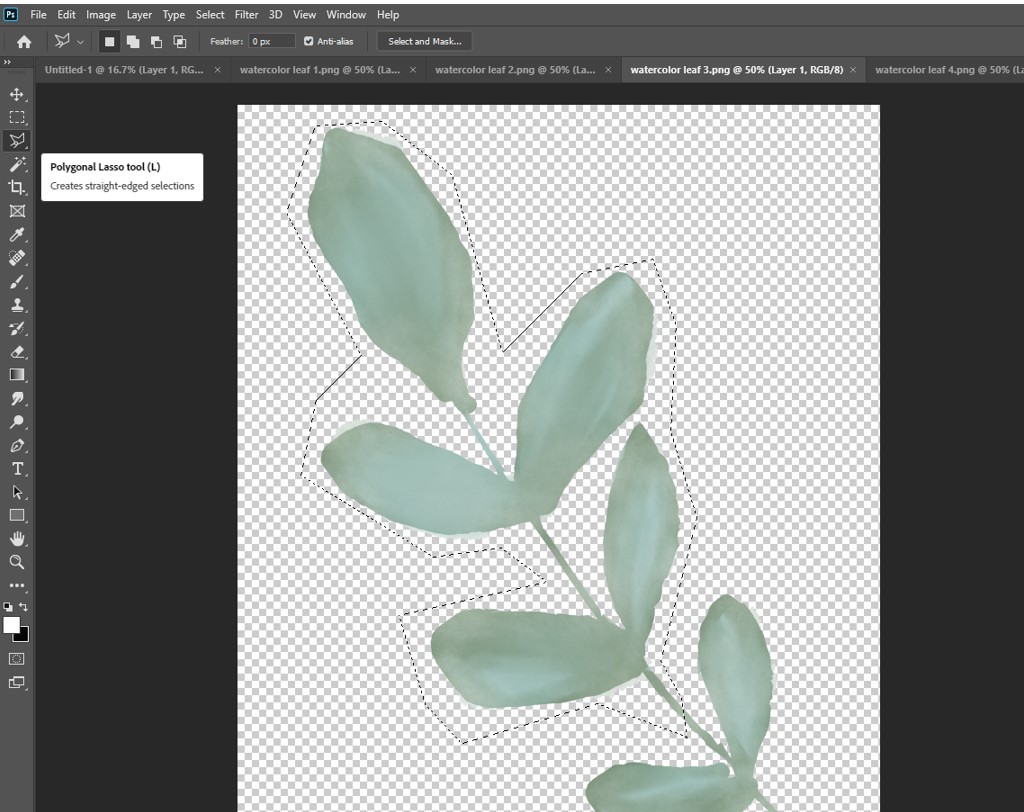
At this point, the pattern is nearing completion, but you’ll notice there is still white space that exists in certain parts. To fill that in, continue using the Merge Visible + Filter Offset tools to isolate white space and fill it in. I often use the Polygonal Tool to select smaller pieces of artwork and then Copy + Paste it into white spaces to fill in where larger art won’t fit.

And that’s how it’s done! If you’ve used the Offset Filter correctly you’ve just created a seamless repeat!!
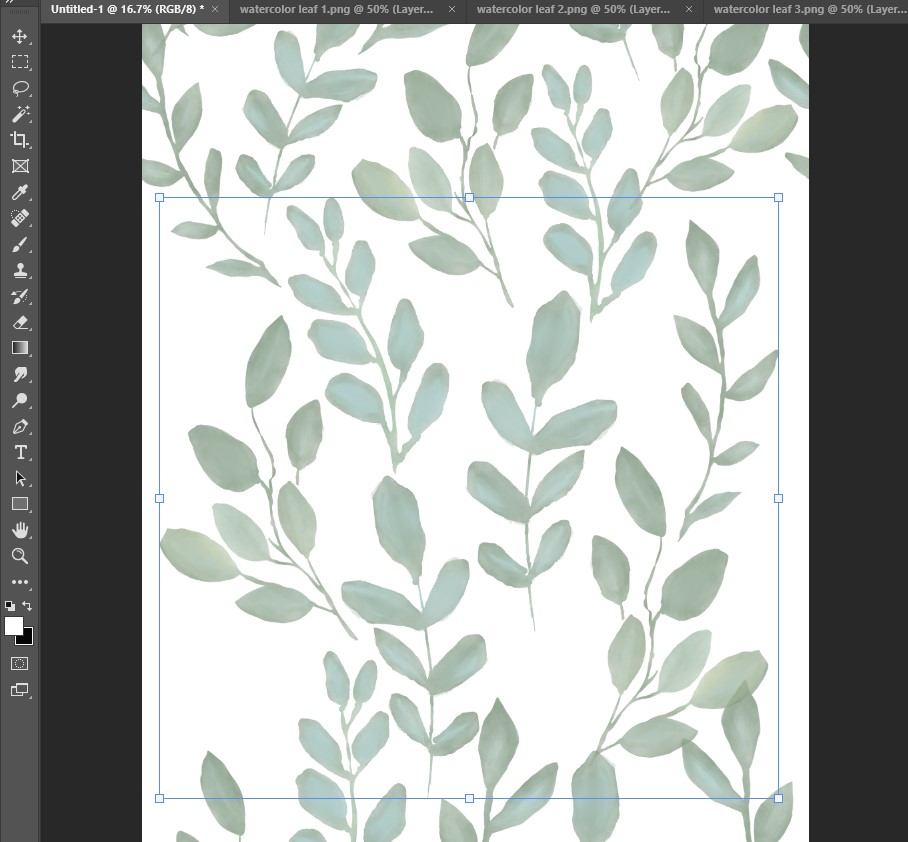
One way to look at the pattern in a repeat is to create a New Document that is twice the width and height of the new pattern you’ve created and copy and paste four sections of it into the New Document. In this case, I created a document that was 8000 px wide x 12000 px high… see how when you copy and paste the new pattern, you can see the edges are all seamless.
Yay ! Happy dance !!
And that’s how you create a seamless repeat using artwork! But here’s another fun way…
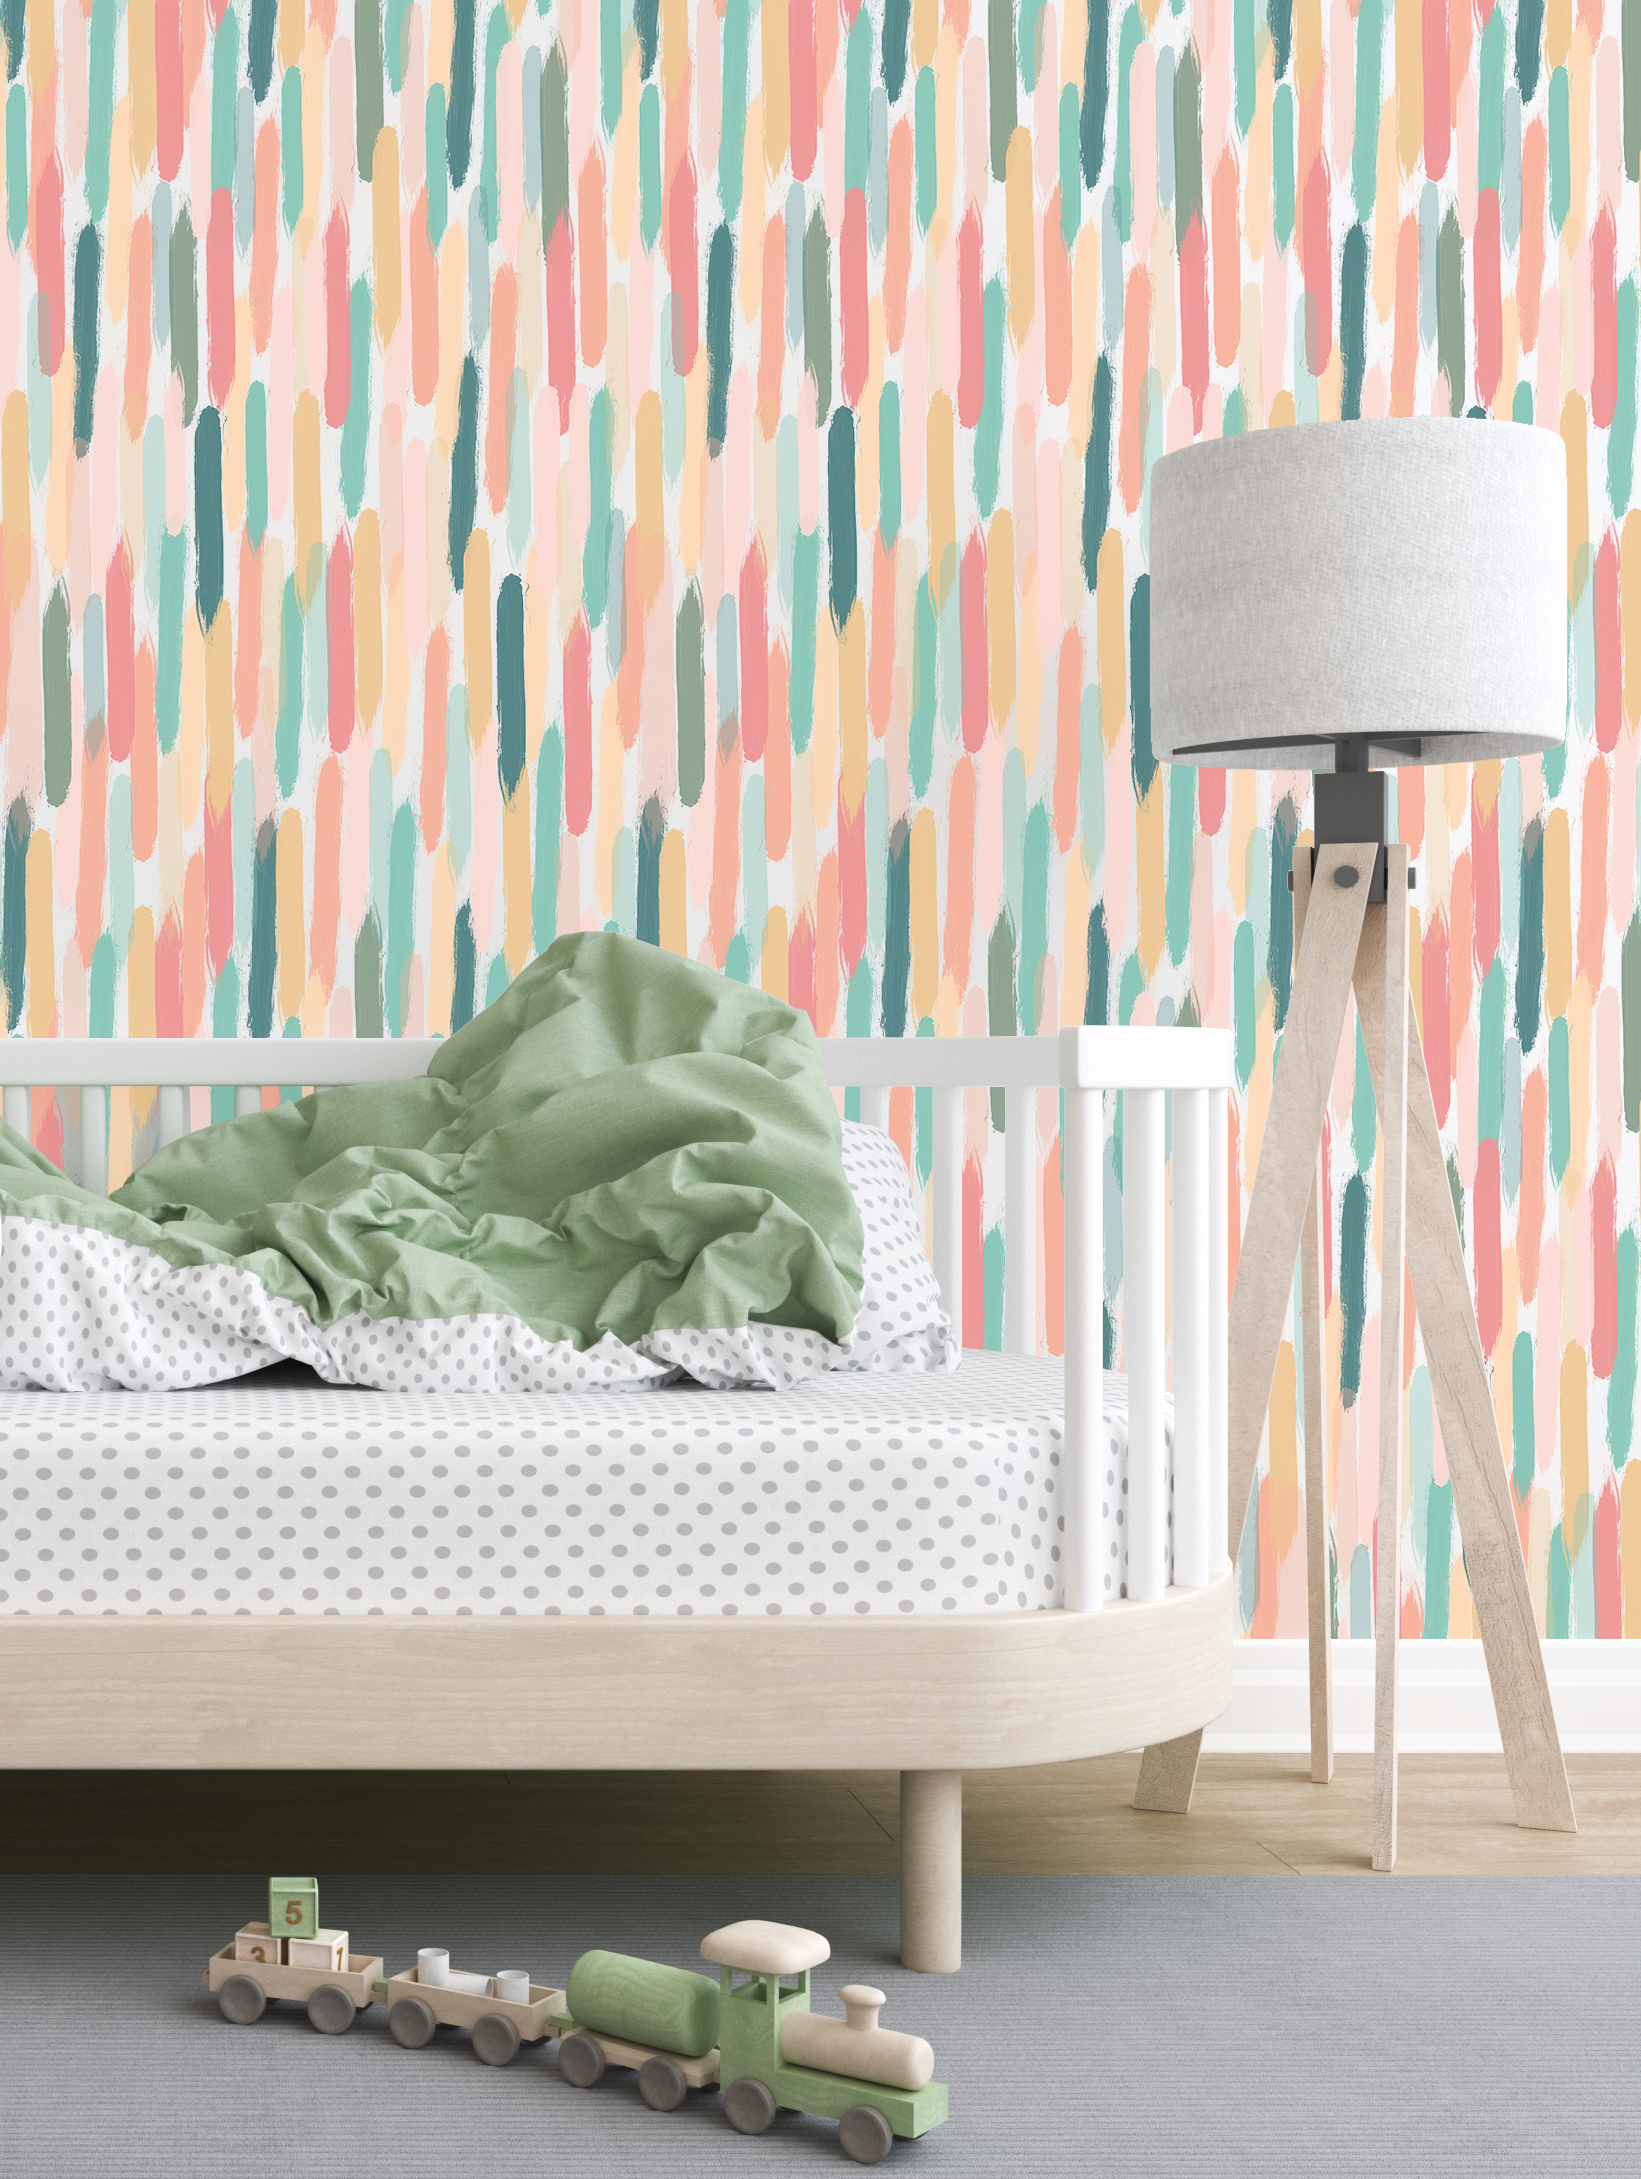
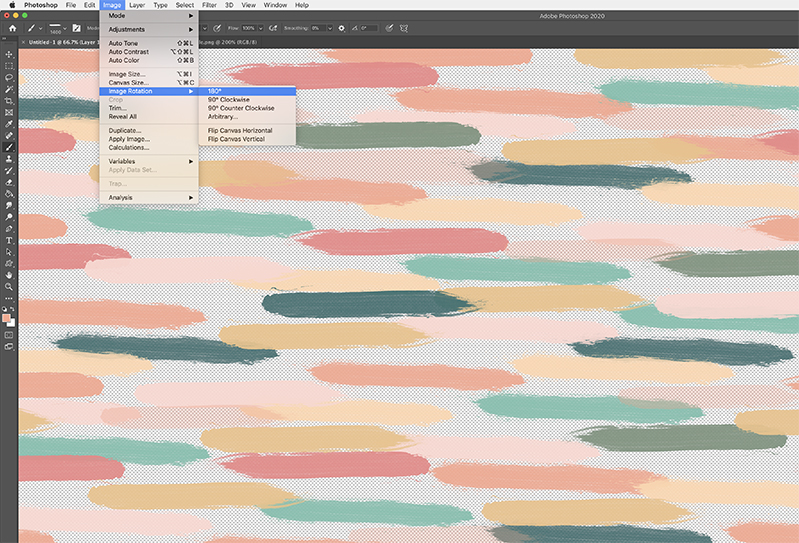
Last week I mentioned there are brushes you can import into Photoshop to make patterns. I created this colorful brushstroke pattern by importing these free brushes into Photoshop and I used this color palette as a jumping off point, then added a few new colors of my own.
When working with imported brushes, I chose the brushstroke color by selecting from a preexisting palette using the Pen Dropper tool, this automatically changes the imported brush color. From that point, I created the pattern by layering two different brushstrokes in several different colors in a random pattern, using Image > Image Rotation and Filter > Offset function to create the variation. Note when working with Brushes you don’t need to Merge Layers before using Offset like you do with layered artwork.

Isn’t that fun! My friends, there are endless possibilities to create seamless patterns once you practice this technique! I’d love to see what you create using these steps!
Next week I’ll wrap up this series with a few tips on uploading, printing, and selling for on demand sites like Spoonflower, Zazzle, and Society 6. Stay tuned!

