A few days ago I was in a really bad place with quarantine life. I had enjoyed a few days of being super lazy and zoning out, but then I began to feel restless and irritable. I totally get the science and the reasons why we’re all staying home, but I did hit a low point. There’s a very strong streak in me that doesn’t like being kept in place. I love my freedom, I like planning trips, I miss my friends. I’m growing tired of looking at the same streets in my neighborhood. I hate that the beaches are closed and the local high school track where I like to jog is closed. Everything is closed, and it’s getting to me.
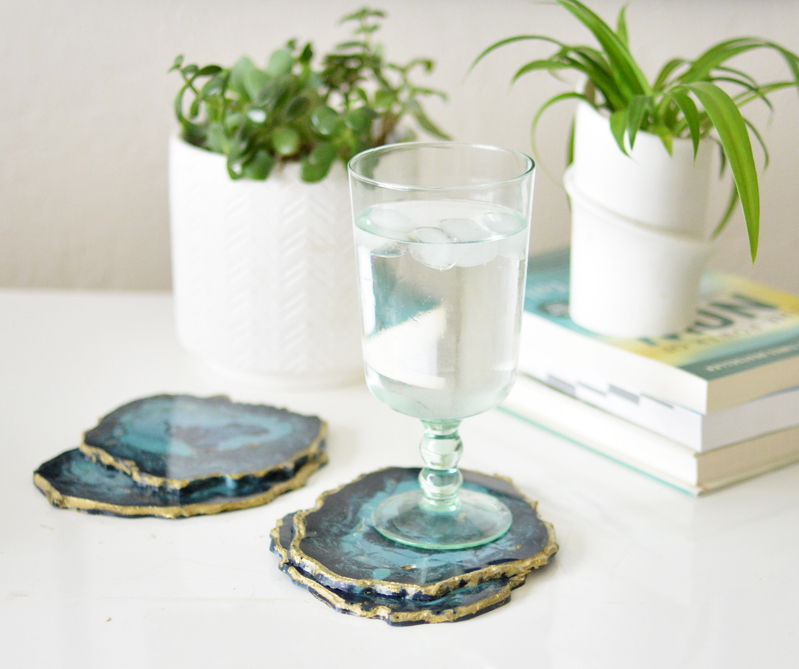
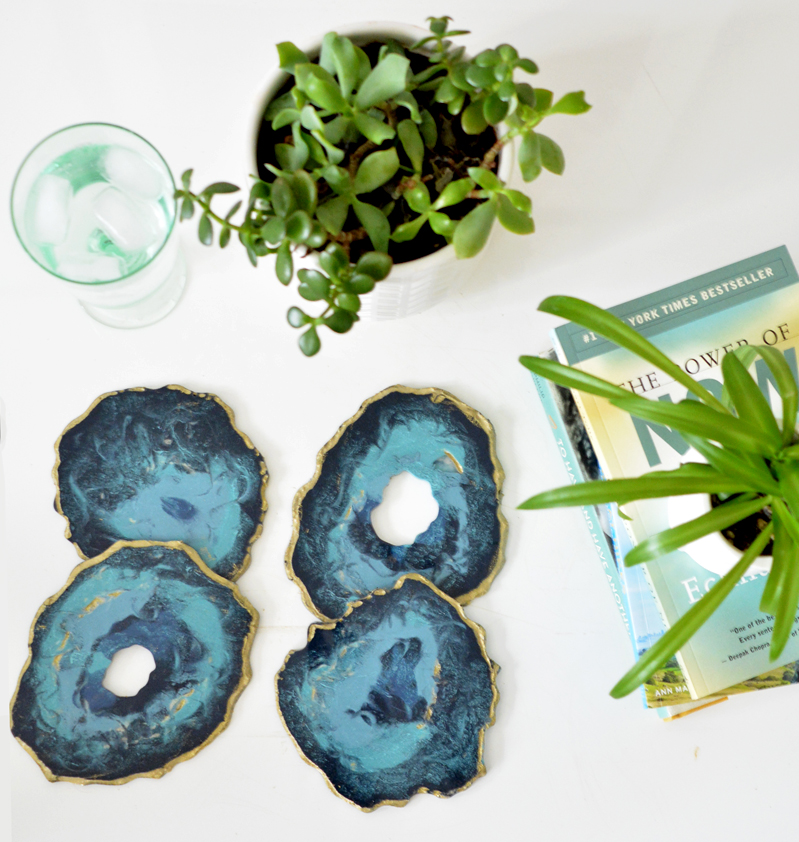
I realized there are two ways to handle this. To pout and complain and binge watch TV, or to turn to the things that alter my mindset: get outside, talk to a friend, exercise, clean, and then do something creative. That always works. So yesterday morning I dug into my stash of DIY supplies and created these agate resin coasters in my favorite colors. The process of making them was therapeutic and they turned out better than I expected.
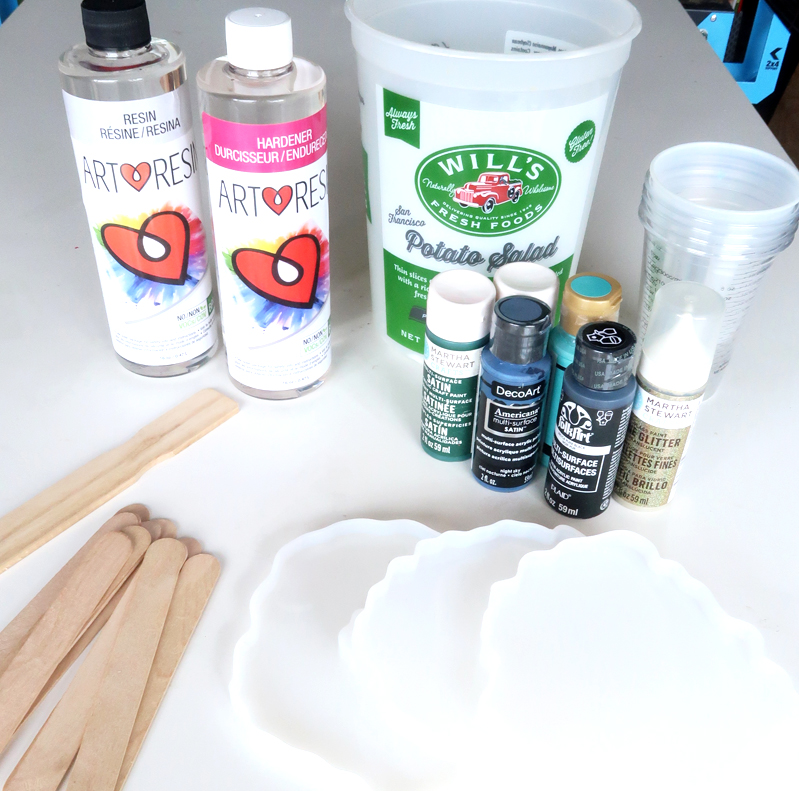
I had some art resin in my stash from when I ordered it last year with the intention of making more resin artwork that I never got around to making. I have always loved the glossy smooth finish of resin and I’m still loving my DIY resin desktop! A month ago I ordered silicone resin molds on Amazon and I pulled those out and my craft paints and I got busy making.
Resin is fun to work with but the way it flows is a little unpredictable so you just have to go with what patterns emerge and be cool with it!
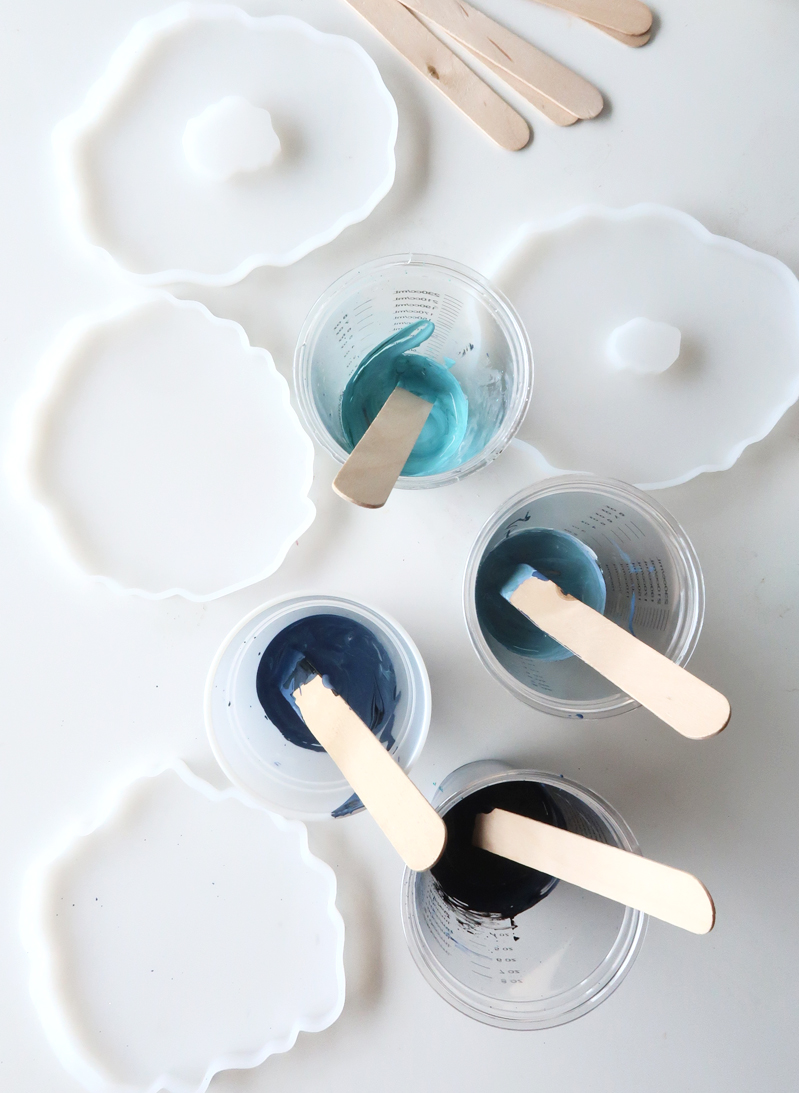
Supplies to recreate: art resin, silicone molds, stir sticks, small plastic cups, larger plastic bucket for mixing resin, paint stir stick, acrylic paint or resin tints, gold paint, latex gloves.
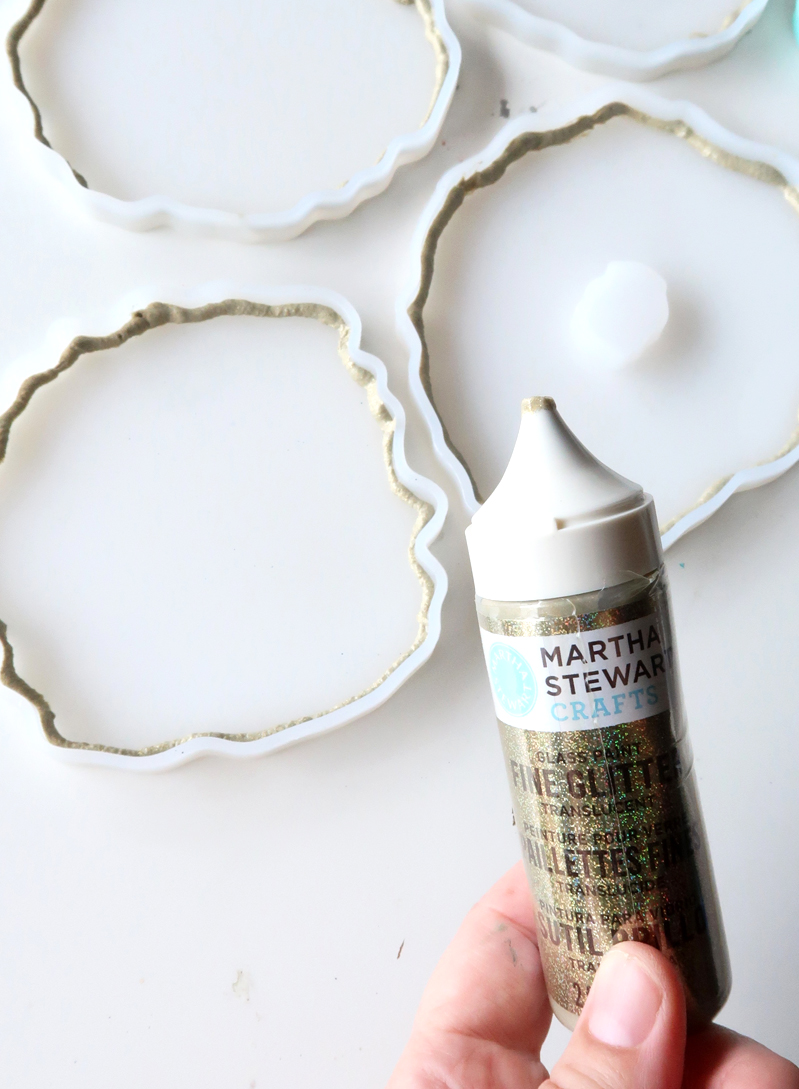
To create the gold border, I used Martha’s gold fine glitter paint around the edges of the mold. You can add gold to the edges of your coasters at the end of the project after the resin is hardened using paint/glue/glitter but I did it first. Either way works.
I also mixed four paint colors with the craft paints I had on hand. You only need a few drops of paint to colorize resin, maybe a teaspoon or so, so go easy. I mixed dark navy, mid tone marine blue, lighter slate blue, and turquoise.
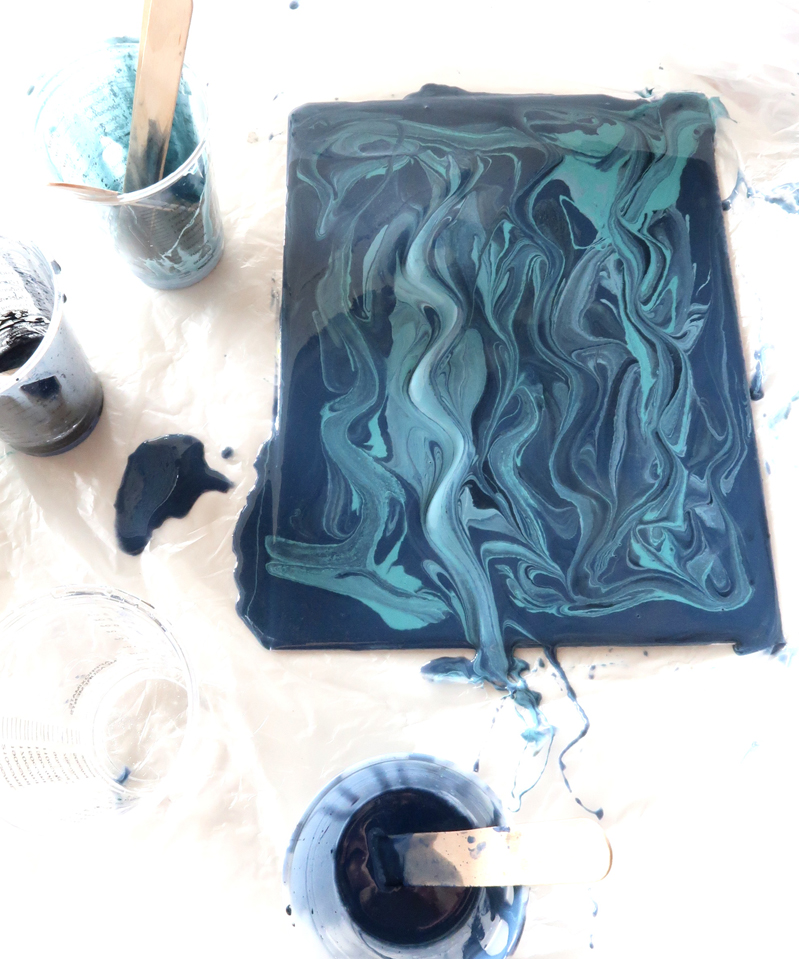
When colors are ready to go, mix the resin and hardener as directed in the larger plastic bucket, stirring the mixture together for 3 minutes with a paint stir stick. Pour separate amounts of resin into the cups of color, keeping one separate cup for clear resin for layering on top in the end. One tip, try to keep the circle layers not too thick and not too thin. You can see in the top left mold I poured a little too much navy. The mold on the bottom left is a better pour.
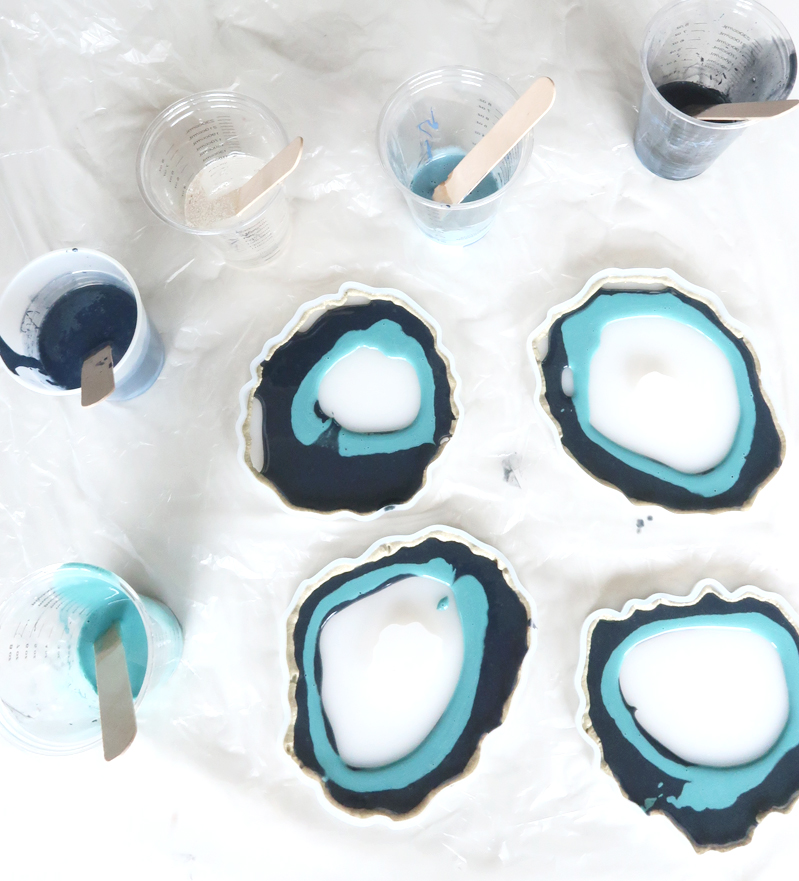
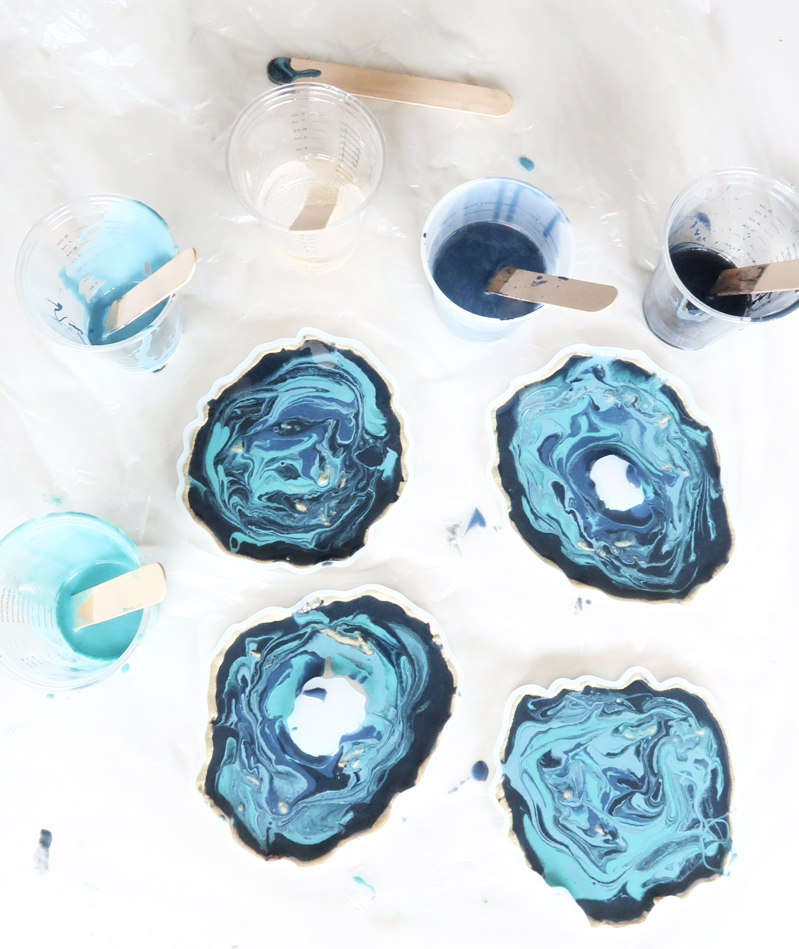
Continue pouring circles of resin in various colors working toward the middle until the molds are full. Using a clean stir stick, gently mix the colors together in a circular swaying motion (see video on Instagram for example).
I used only half of my 32 oz. size of art resin, so I can repeat this project again with different colors. You can definitely complete this project with the smaller 16 oz. size of art resin.
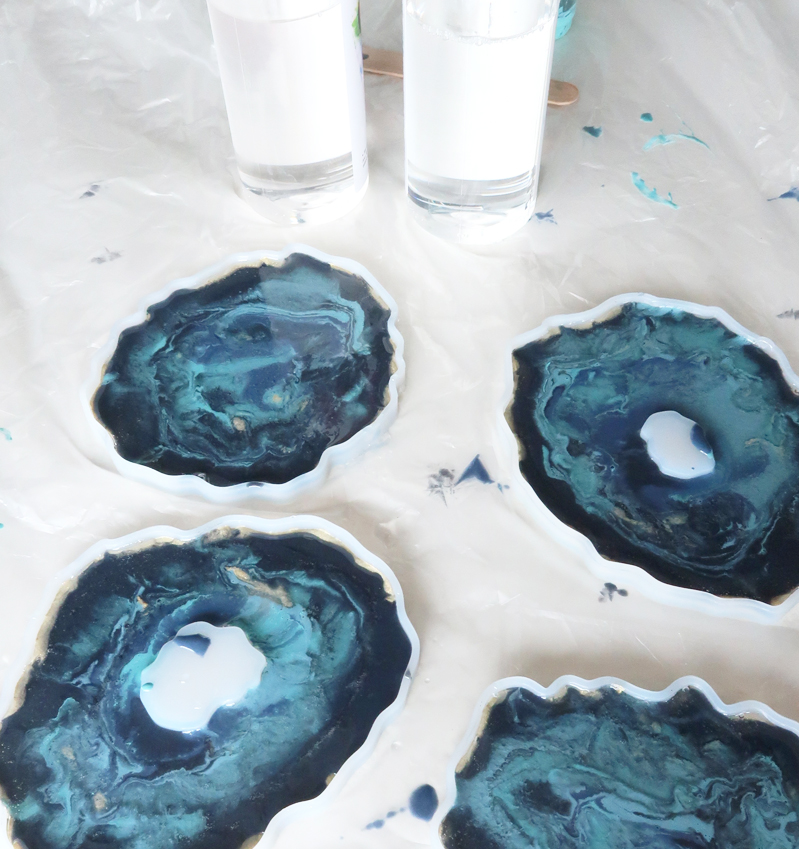
Allow the mixed colors to set for about 15 minutes, then use the remainder of the clear resin to pour on top to thicken the coasters. Have a small piece of cardboard or a 8×10 canvas nearby so you can pour your remaining resin on it and create a bonus piece of marbleized art! Here’s mine.
Now leave them in place and let the resin do its magic, which is to slowly solidify. You can pop them out of the molds after about 16 hours but the resin needs 24 hours to fully cure.

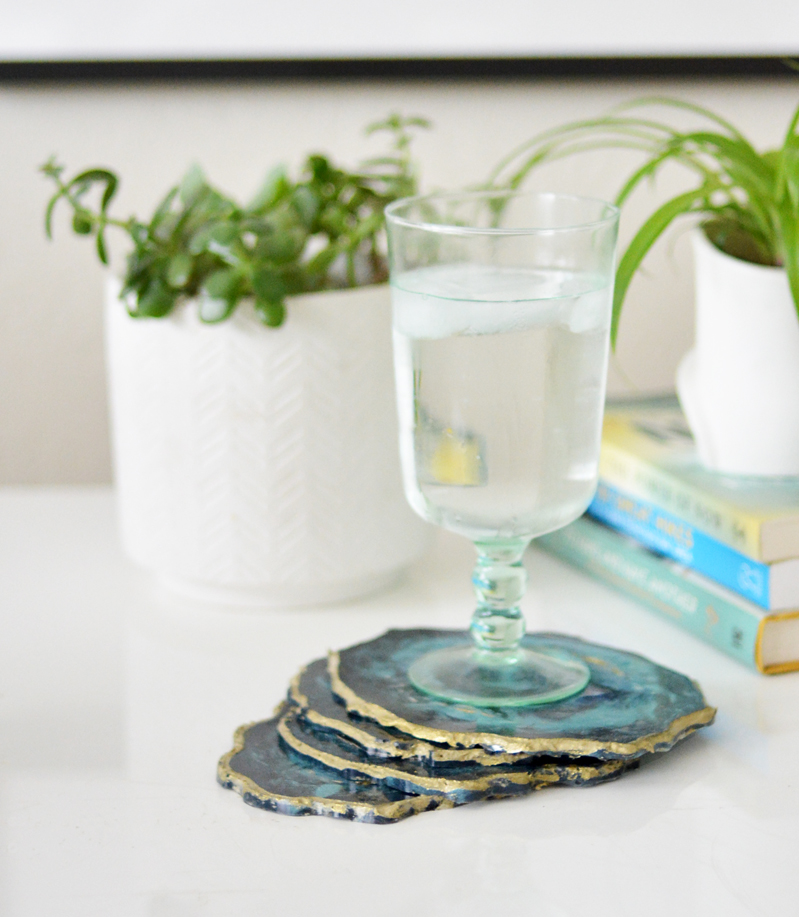
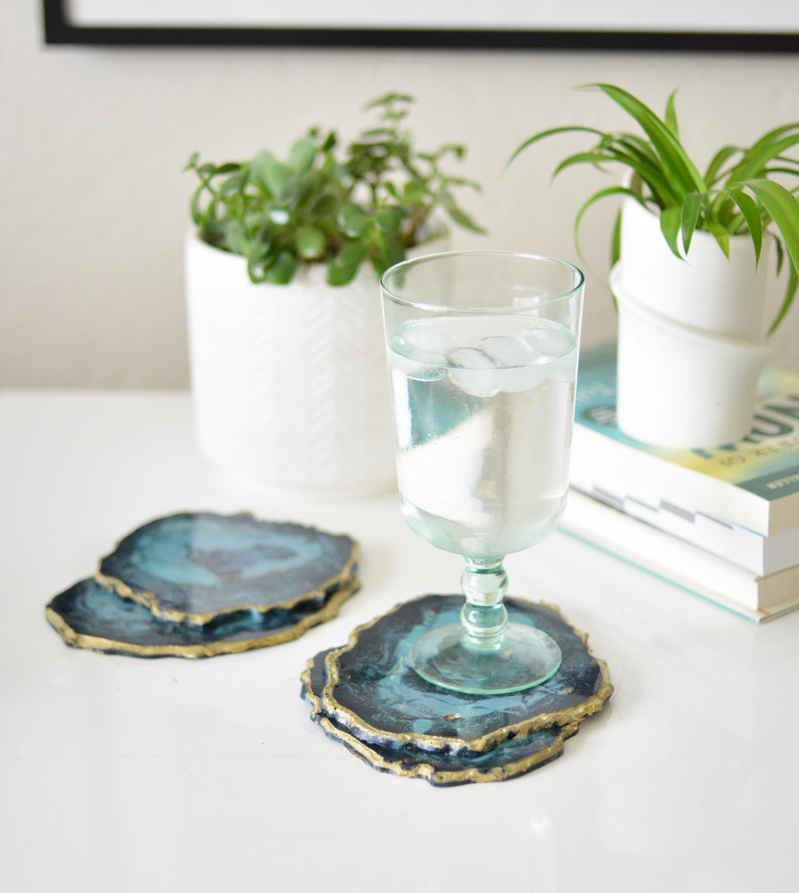
These would make a great gift to send to friends while they nest at home, or they make a nice Mother’s Day gift. Mine I made just for me! Call it self care. :) They’re a gift to myself and a reminder not just that I’m creative, but I’m lucky to be safe and healthy, and I can do hard things like staying home as long as necessary. Cheers friends.


This is an excellent post! You truly expressed my thoughts and feelings. Hang in there and this too shall pass. I’ve found a grateful heart is a happy heart and that is where our focus can help. God bless you Kate. I love your blog and insights so much. Cheers! Maudie
Thank you so much Maudie!
Beautiful! I totally understand your frustrations I had the same kind of week. Time to regroup and be positive counting all my Blessings on this Easter weekend! I enjoy reading your blog. Have a great weekend!
Happy Easter to you too Pam!
Wow! These looked real to me. Was surprised as I read farther. Well Done:)
thank you!
Oh, my gosh, I so hear you! I thought I was doing ok with this, and then had myself a little meltdown. This morning I decide to take charge of myself- the only thing in my control right now- and made up an exercise/cleaning/menu/rest and meditation schedule to try. Thanks so much for coming up with creative ideas to get us through this.
Would you believe today I am going to paint an old faux flowering bush I found last year at a thrift store, and had stored in my shed? It was faded and sprayed a pale blue- now it is going to get a more natural (maybe) look in colors that go with my décor.
Hang in there.
Thanks Sue! Have fun painting! xo
How do you deal with the bubbles that surface? These coasters are beautiful and look like the real thing!
Thank you!
With such a thin layer I didn’t have an issue with bubbles! If you experience them, let them just be part of the creation.
Awesome work! How do we purchase the molds?
So, im a little confused to the process. When you first get your colors together, what do you mix them with (before you add the resin)? It looks like you’ve mixed them with something but what?
Thank you,
Jennifer
I didn’t mix the colors with anything other than each other to change the tint, such as adding a little white paint to the dark blue to lighten it. Once the acrylic paints were the hue I was looking for inside the cups, then I added the resin on top and mixed them together. You don’t need much paint, only about a tablespoon or so.
Thank you so much! I had no clue you could do this with acrylic paints!!
Can you tint the resin with any kind of paint or goes it have to be acrylic paint? Also, where did you buy the molds? These are beautiful.
Hi Shirley! The link to the molds is in the post. I only used craft paint so I don’t know how any other paints will react. :)
Hello Kate !
I was wondering if you had ever tried doing this with a heating tool or if I could go without one ? :) thanks !!
yes I’ve used the heating tool with previous resin projects :)