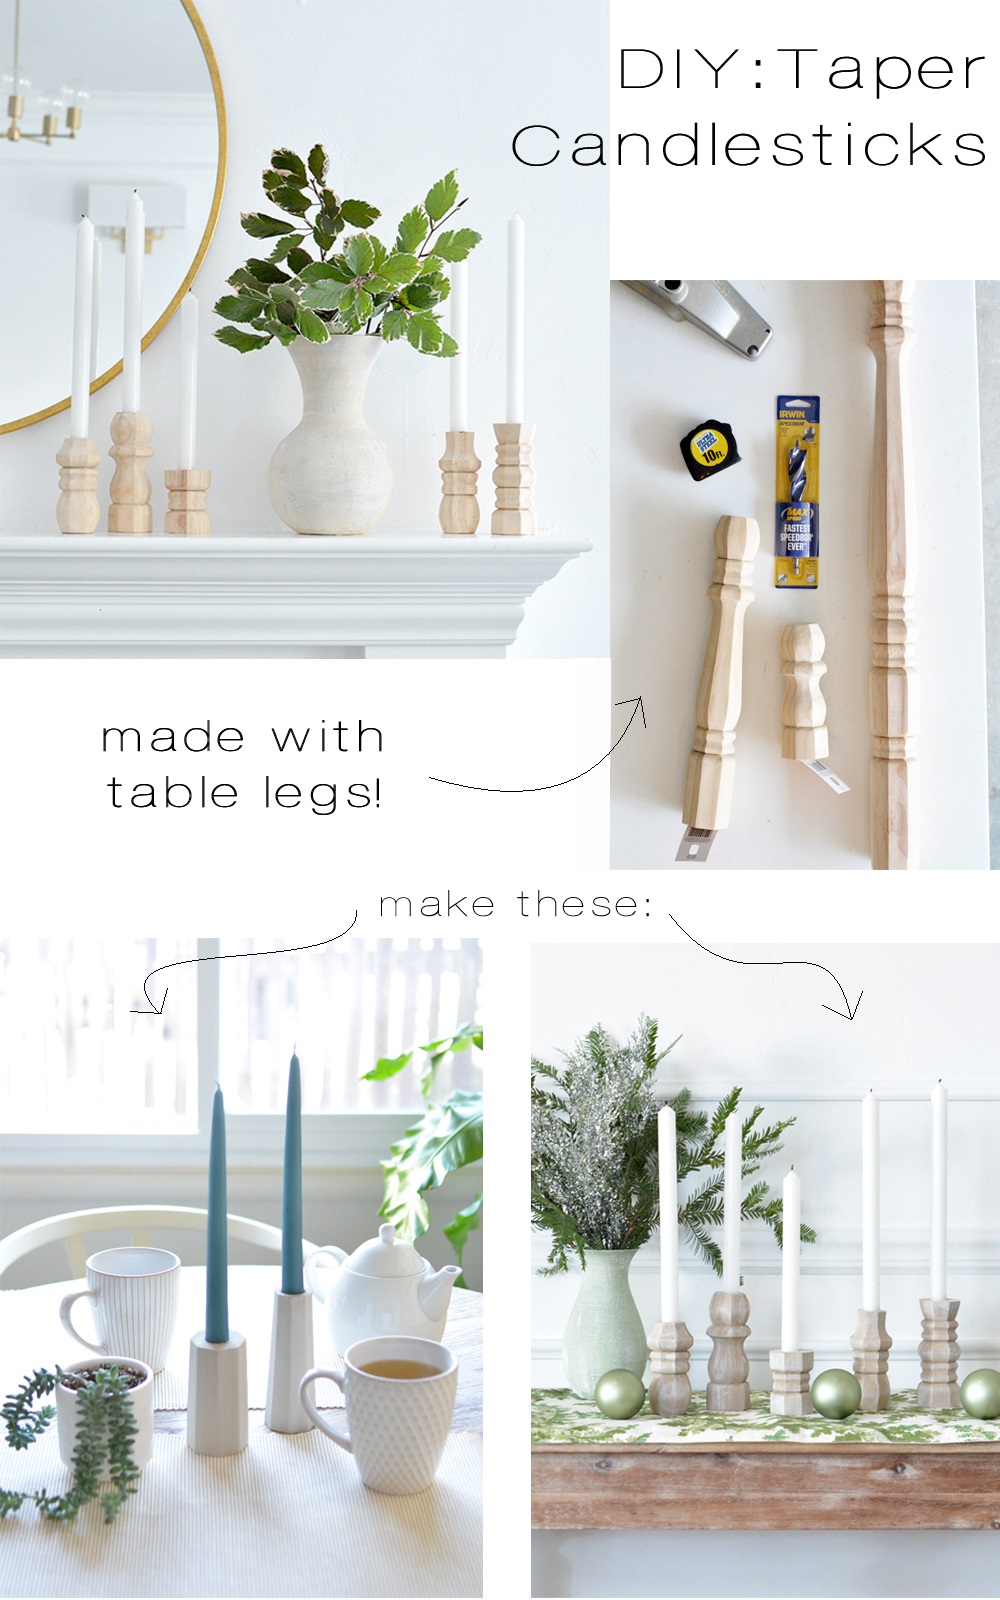
I was shopping at Lowes and passed the wood section where they sell furniture legs. I spied three lengths of curved traditional legs and thought to myself, if I cut those just right, those legs would make really cool candlesticks.
I bought three unfinished wood legs, one 6” small, one 14” medium, one 28” tall leg. At first, I envisioned making one trio with a 5 inch, 6 inch, and 7 inch candlestick, but after analyzing and measuring, I ended up with six curved candlesticks and a modern geometric set of two.
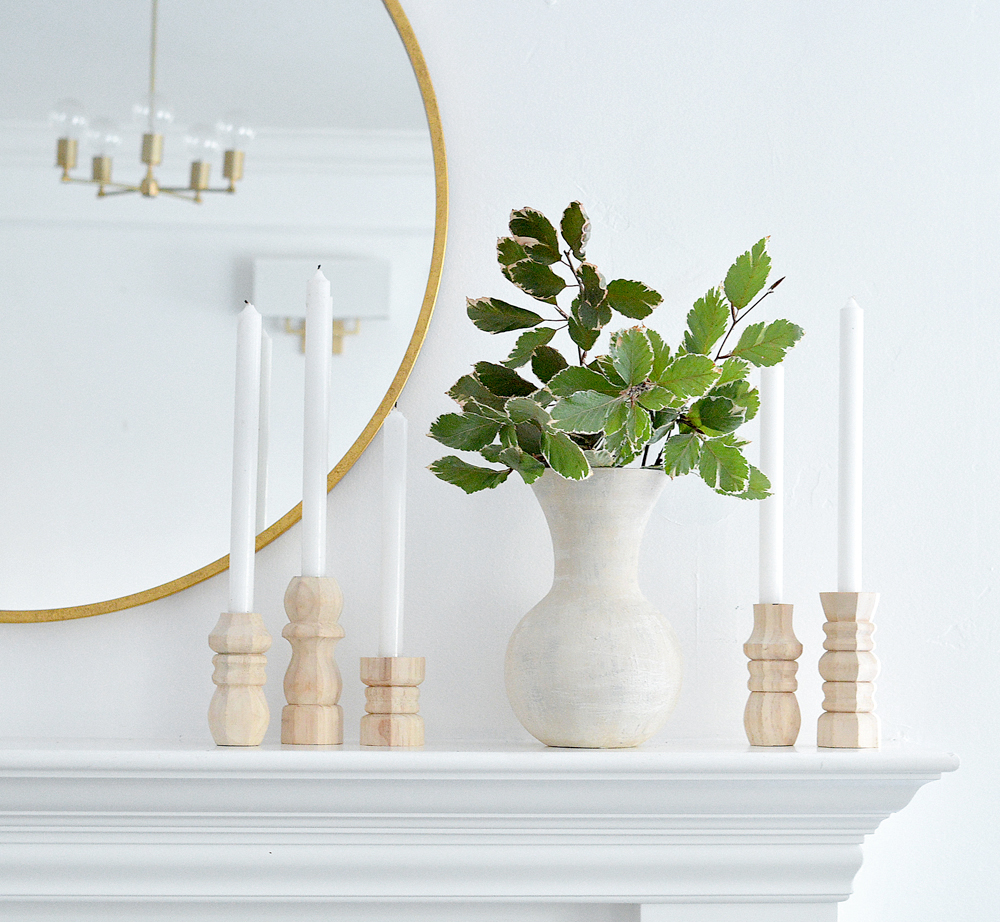
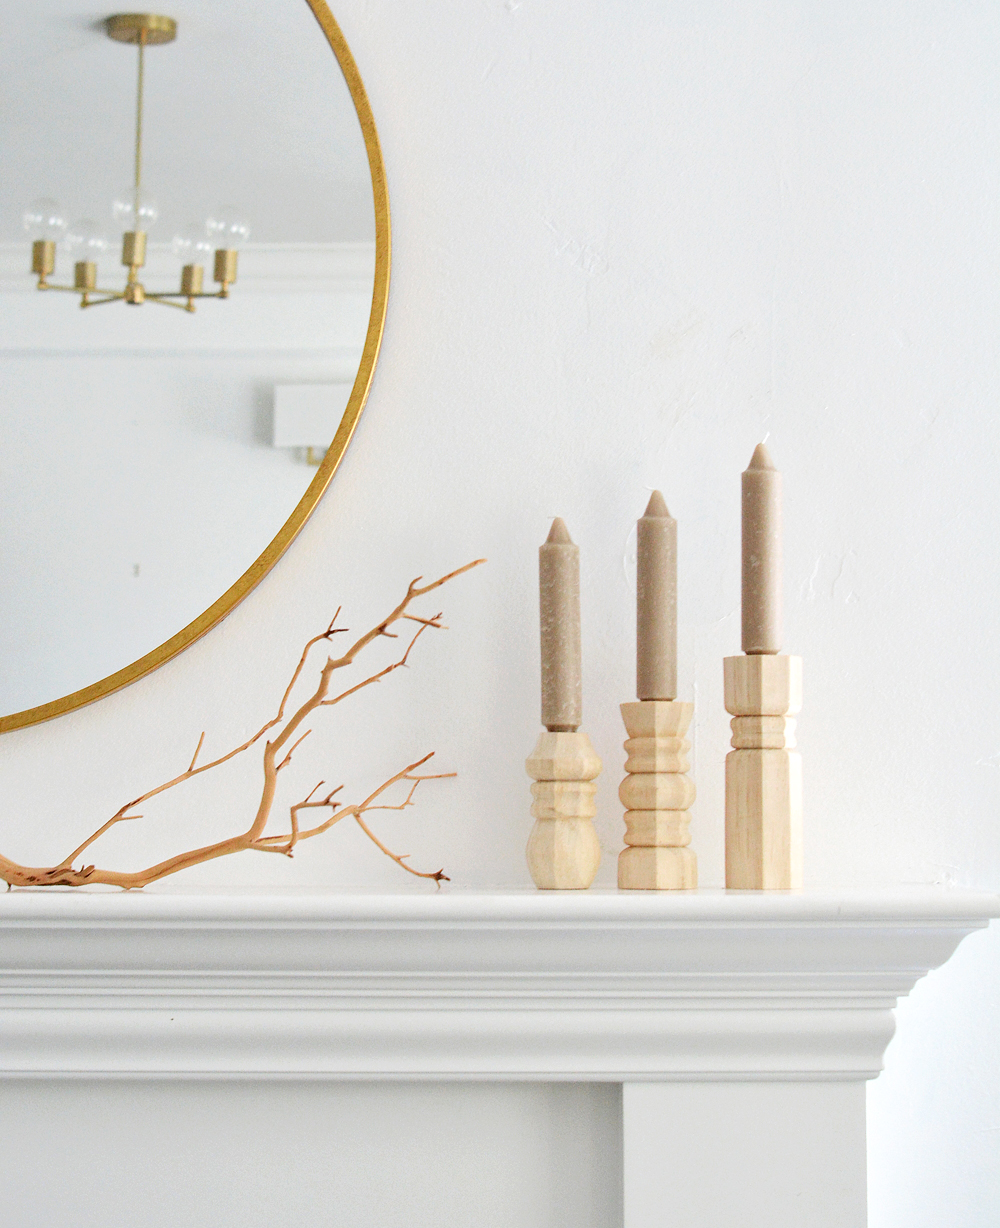
Above are five of the six curvy candlesticks that made I with all three of the legs, and below is the trio I made with just the small and medium legs.
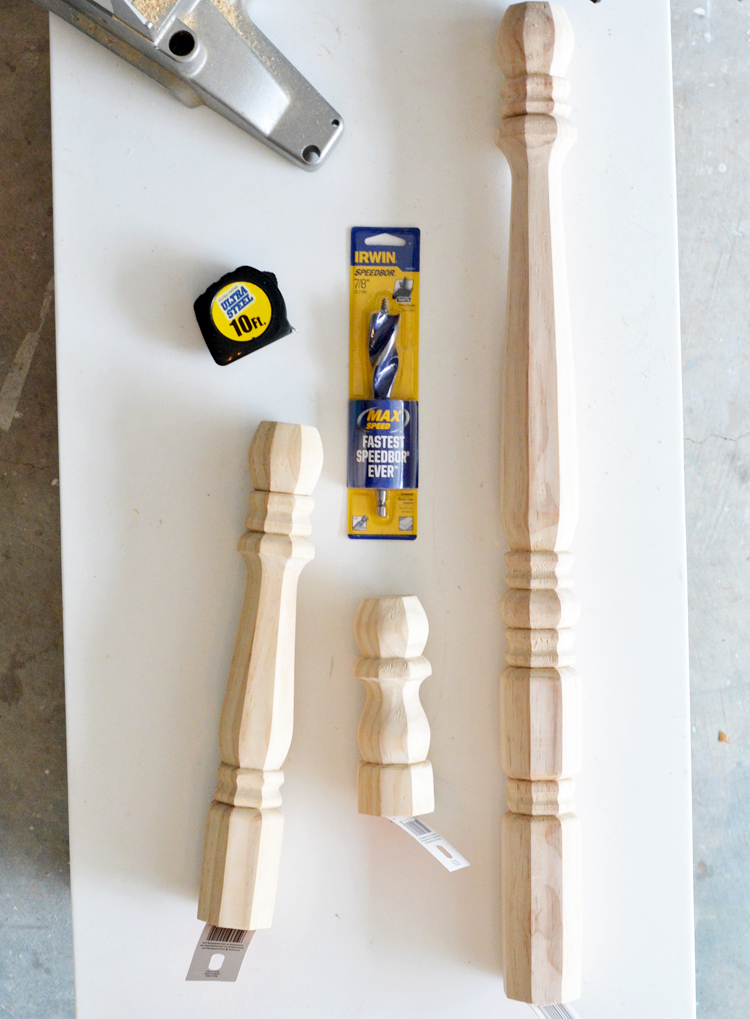
I’ll explain how this all happened, but first here’s the list of supplies should you wish to recreate these yourself: miter saw; 7/8” boring drill bit; sanding wedge; power drill & drill bits; measuring tape; pliers; clamp set; small and medium unfinished table legs (for trio); large unfinished table leg (additional candlestick trio + geometric duo).
Here are the three legs I bought, small, medium, and large, and the boring drill bit I also bought to drill the taper holders.
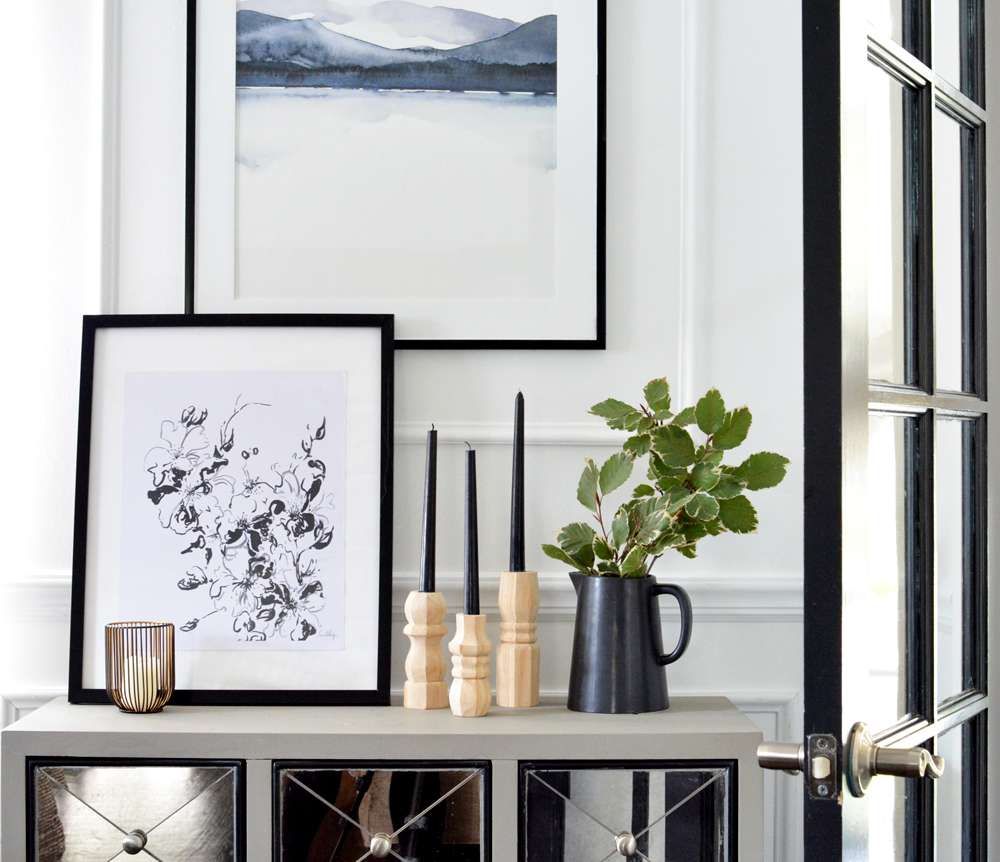
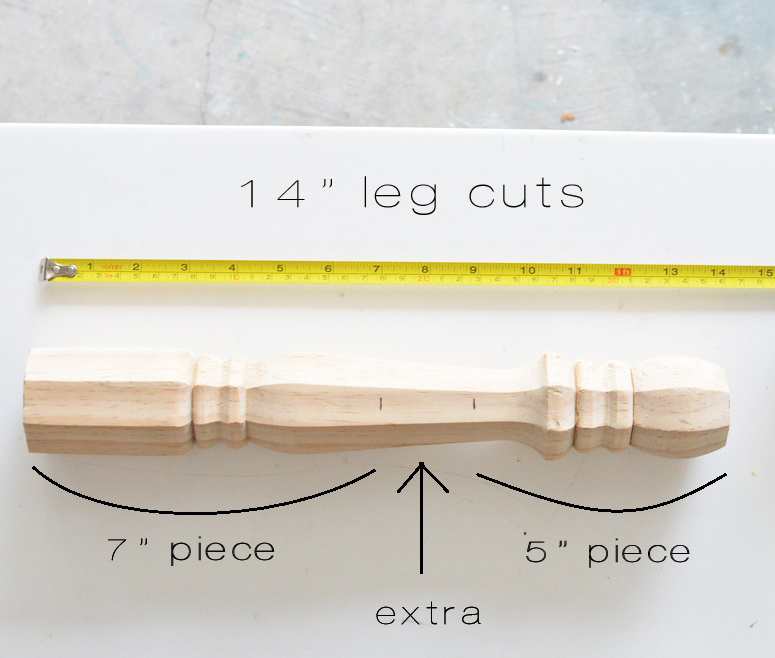
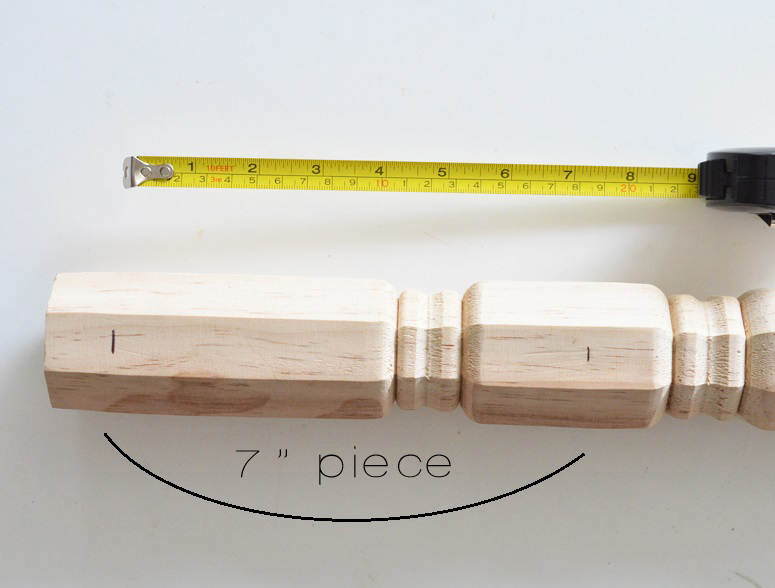
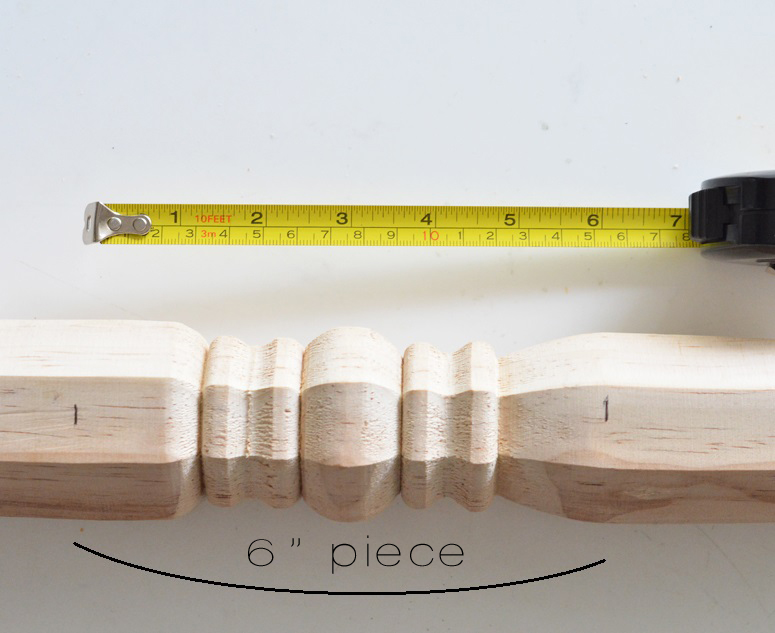
The small leg and the medium leg form a trio that’s created by cutting the 14” medium leg to 5” and 7” candlesticks and drilling the holes for the tapers.
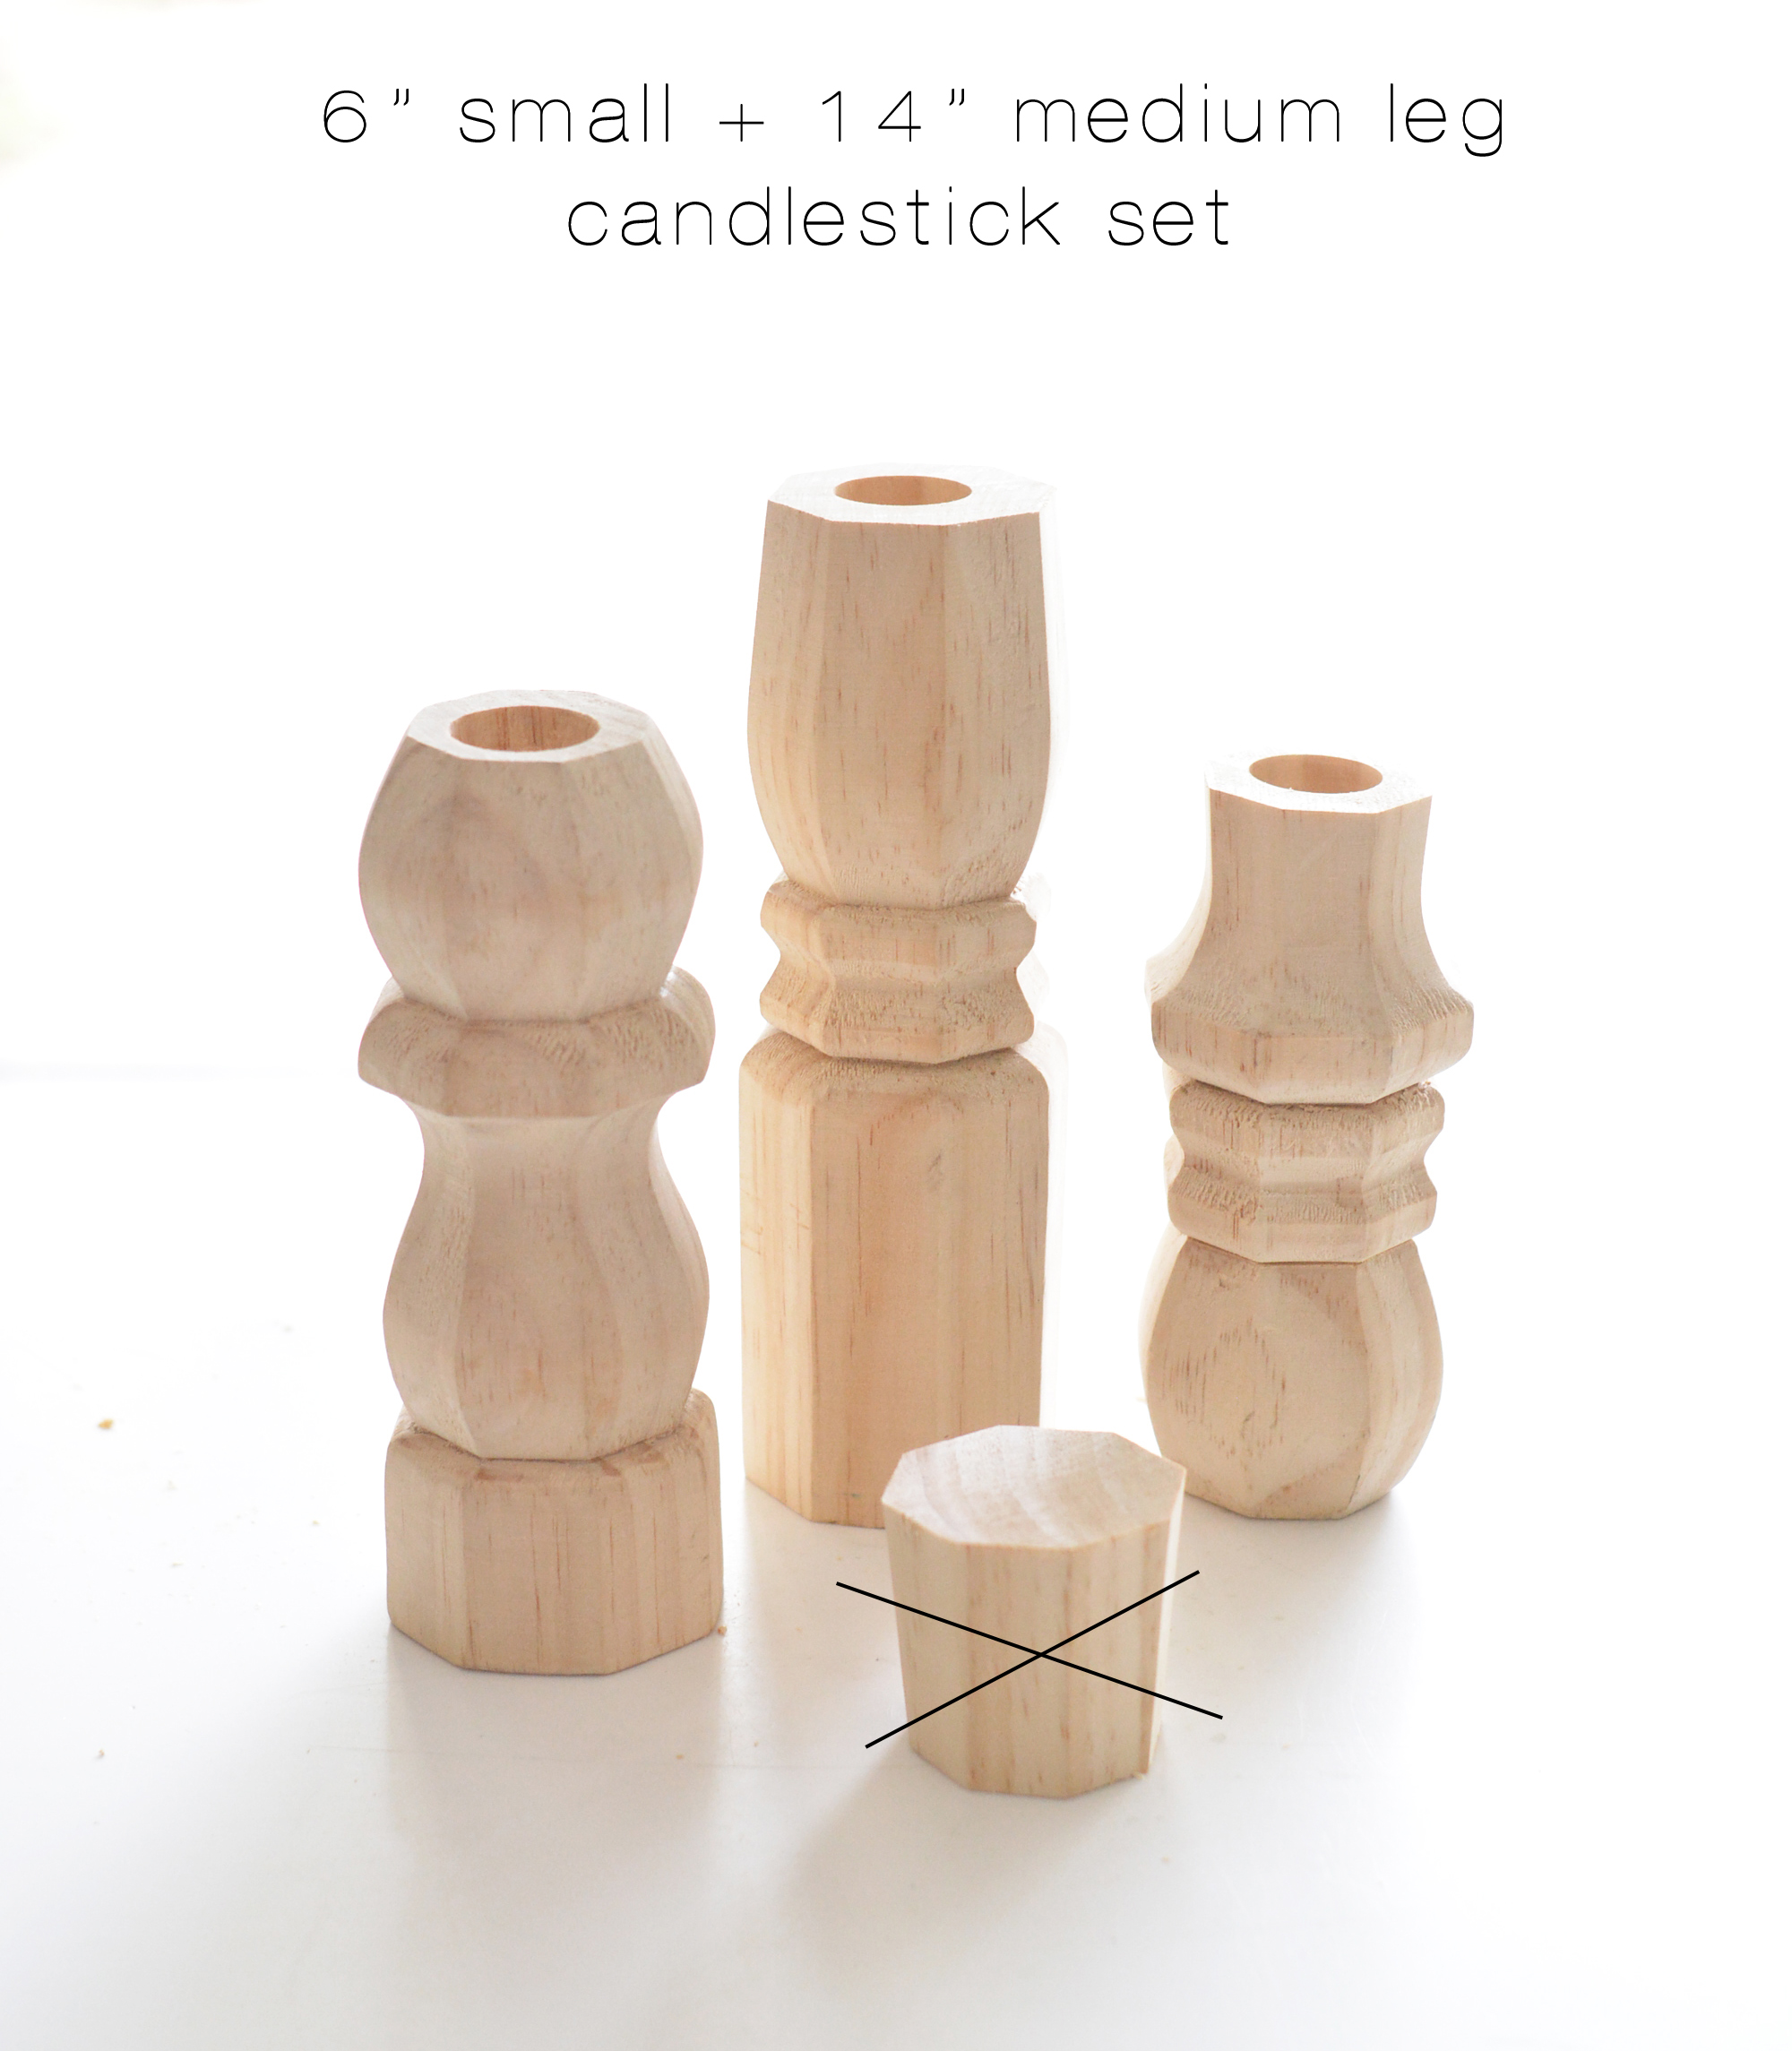
I didn’t need to cut the small leg, just drill a hole in it. But I did cut the 14” medium leg into two candlesticks, one at 5” and another at 7” leaving a small extra midsection I discarded.
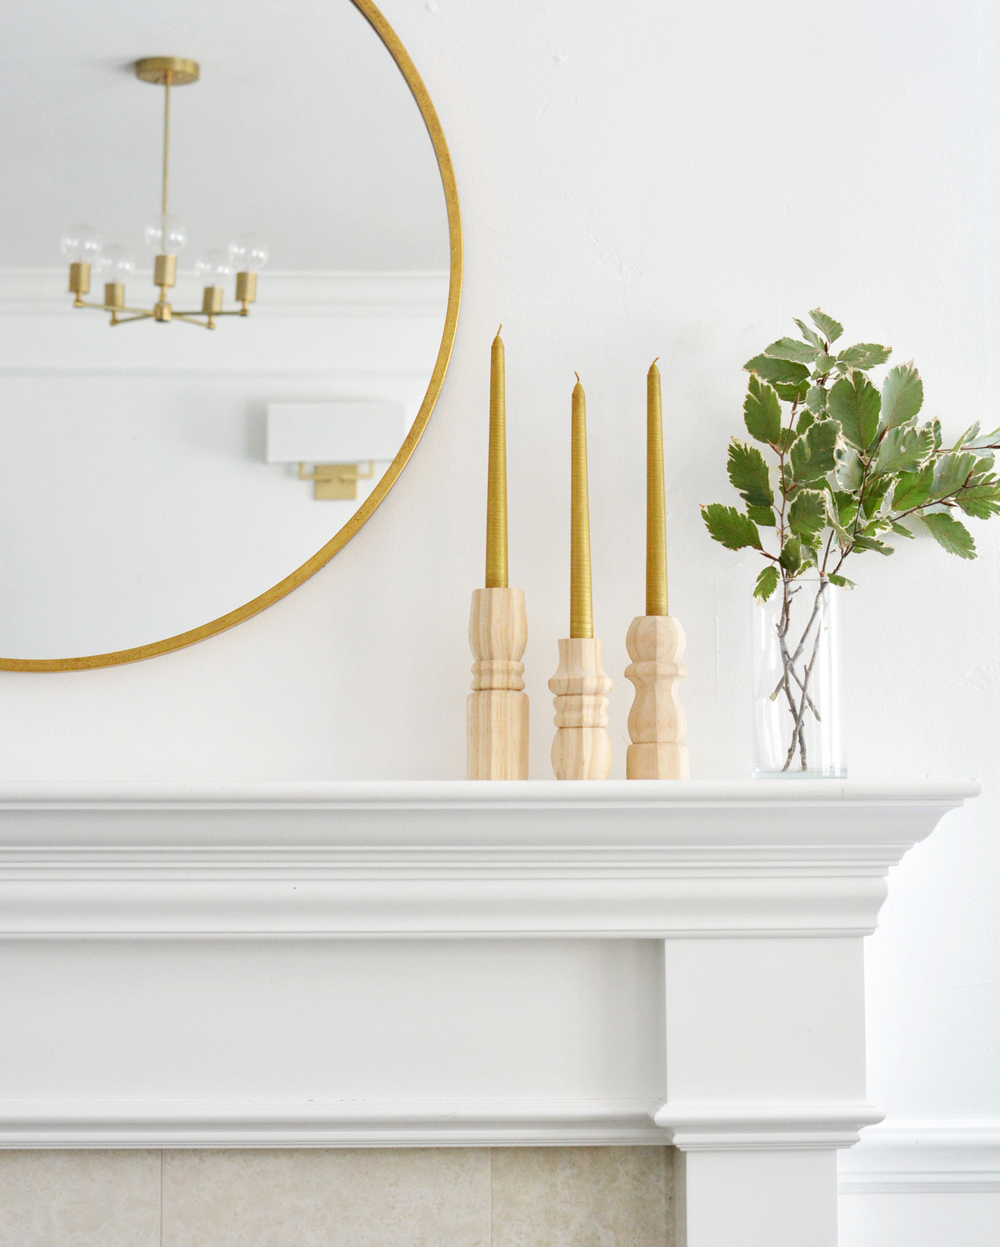
Pictured below is the set of three candlesticks I made with the small and medium legs on my mantel in their unfinished wood state.
When cut, the large wood leg will give you a curved set of three and bonus… a modern geometric duet too.
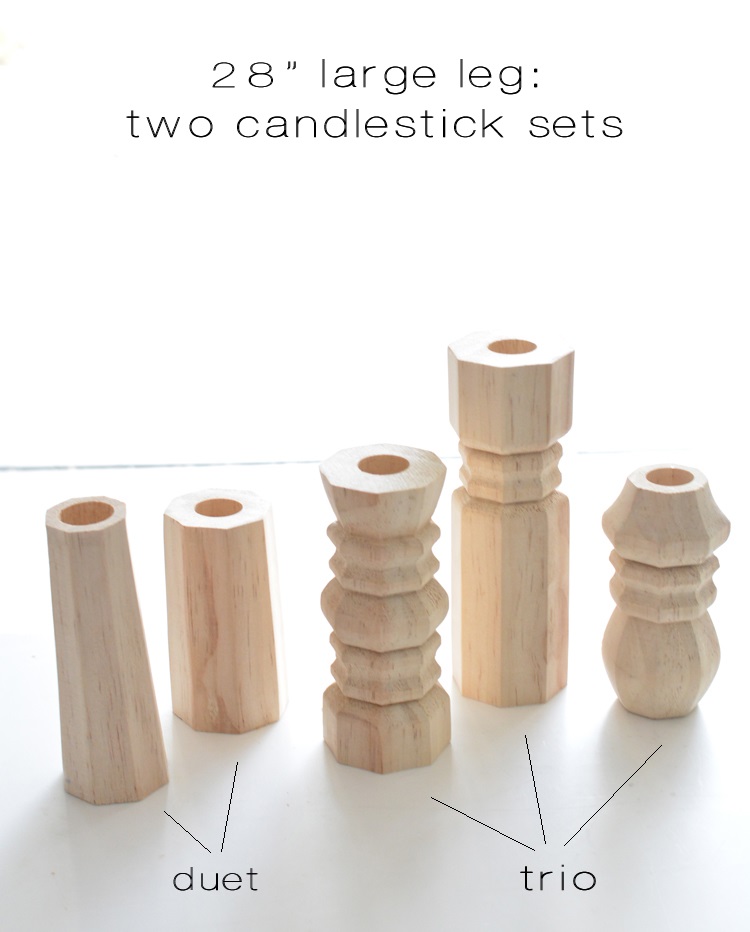
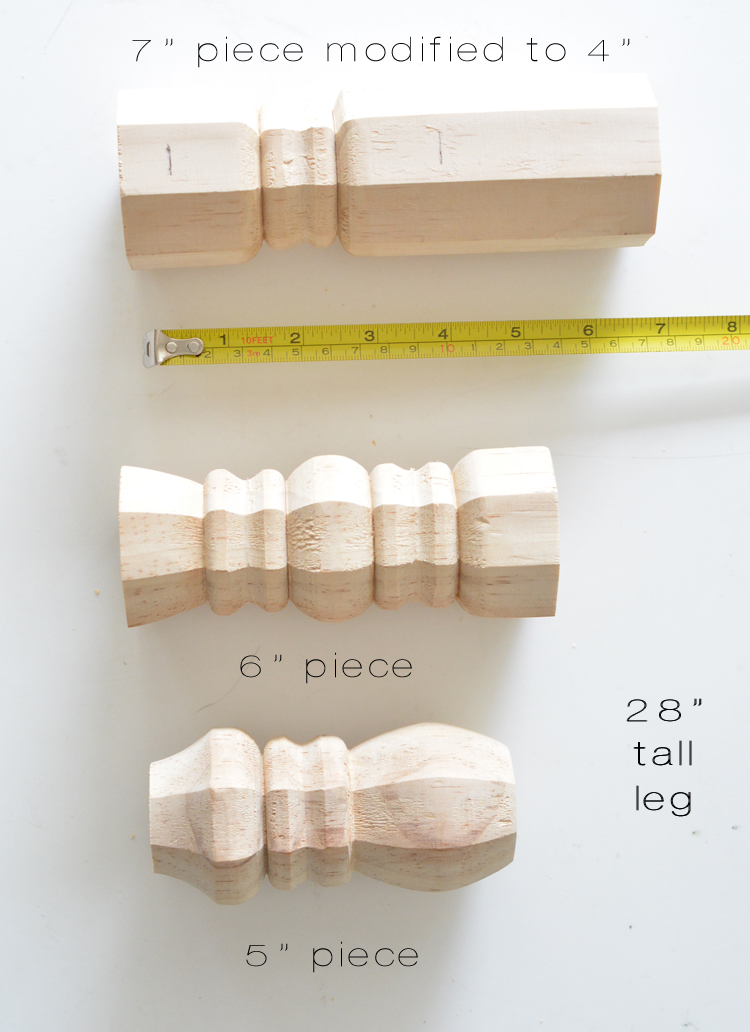
These are the cuts to create the trio shown above, made with the tall 28” leg.
The 5” piece is just the bottom of the 28″ leg (shown below).
From those cuts mentioned above came this trio of candlesticks made with the tall 28” leg…
I decided I wanted to cut the tall 7” one down to 4” so the focus was more about the carved details.
Here are the six unfinished candlesticks created with the small, medium, and large/tall legs. I love how they are all slightly different in shape and curve.
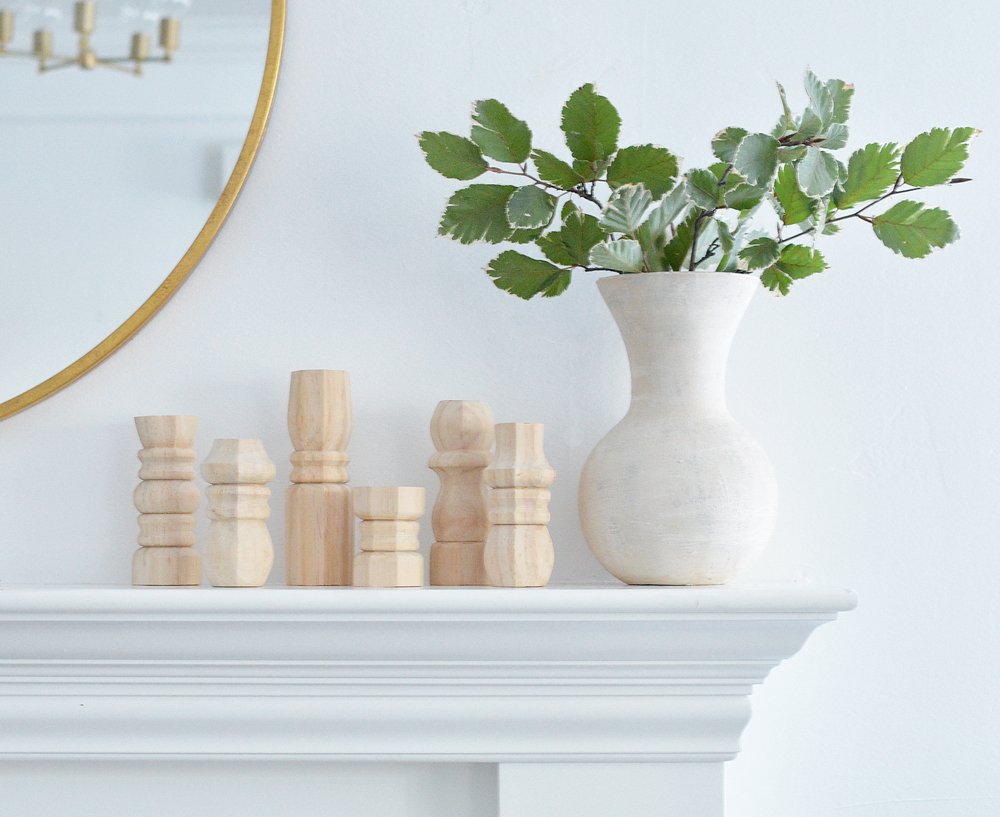
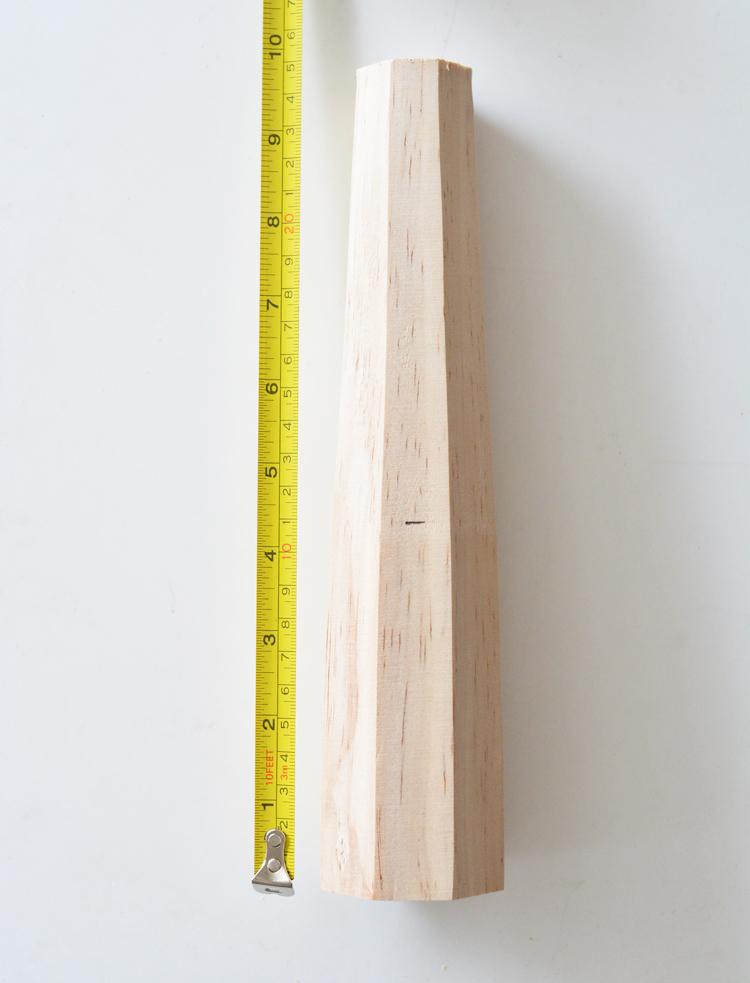
Finally with the middle of the unused portion of the 28” leg, I created an elongated modern set, cut as shown. The smaller wider one is 4 1/4” and the taller thinner one is 5 1/2” in height.
Here is that set as unfinished wood.
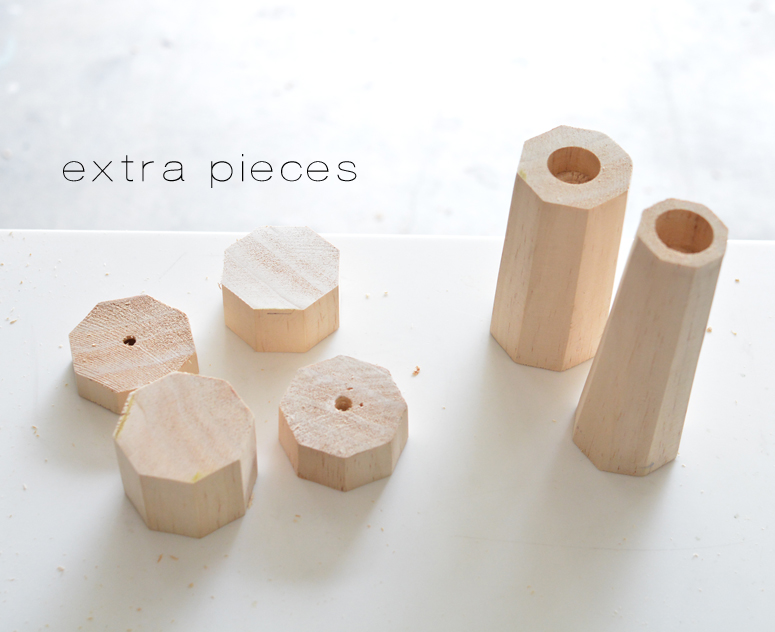
With this project I ended up with a few extra pieces which you could also use to make another set of short taper holders…. but I didn’t.
The simple steps I used for all 8 candlesticks are the following. First remove the table leg screw with pliers.
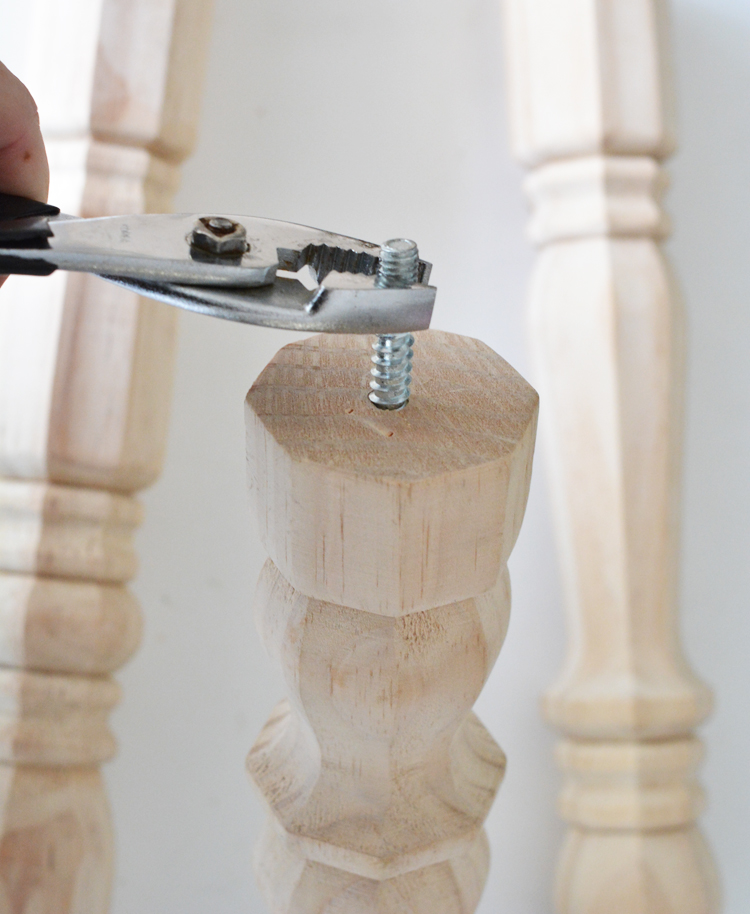
Next, determine where you want to cut the legs (see above measurements) and cut the legs with a miter saw.
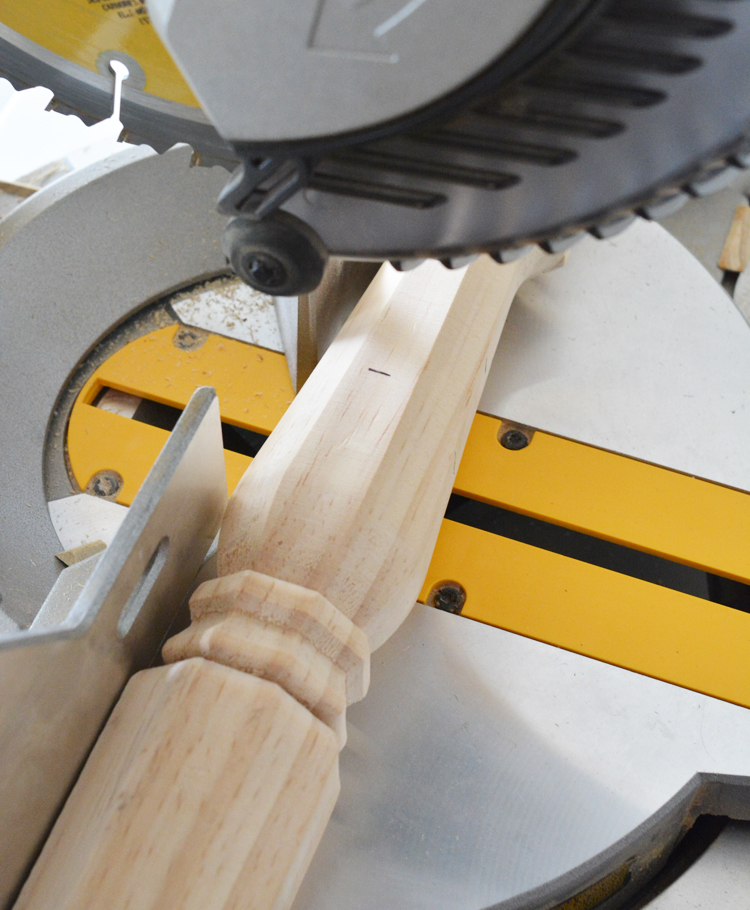
Sand any rough edges or leftover marks, then drill a small pilot hole in the center (this helps the boring drill bit stay centered.)
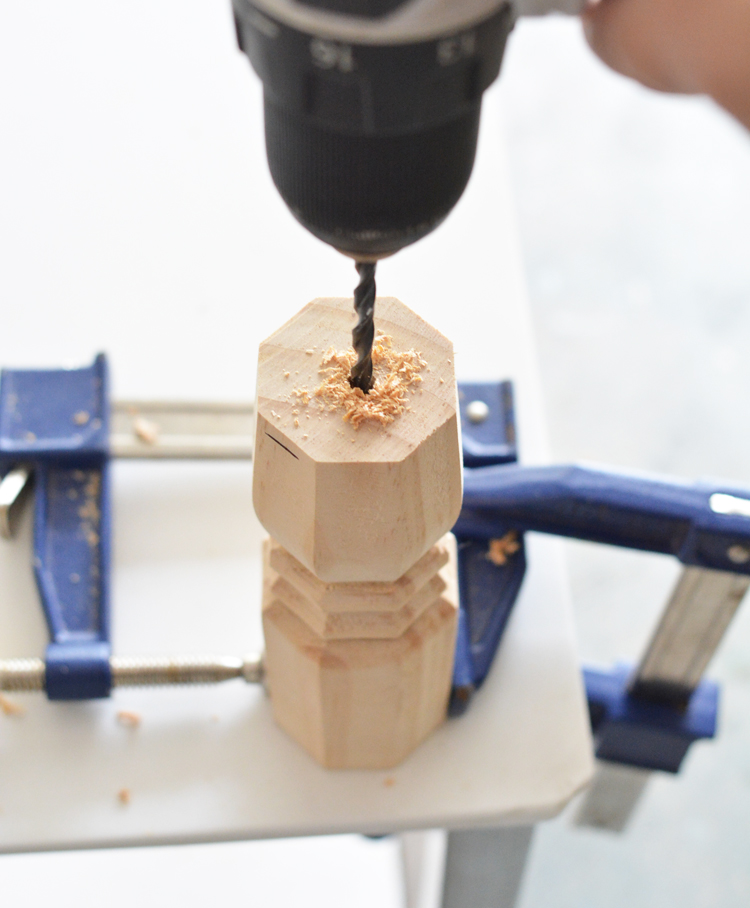
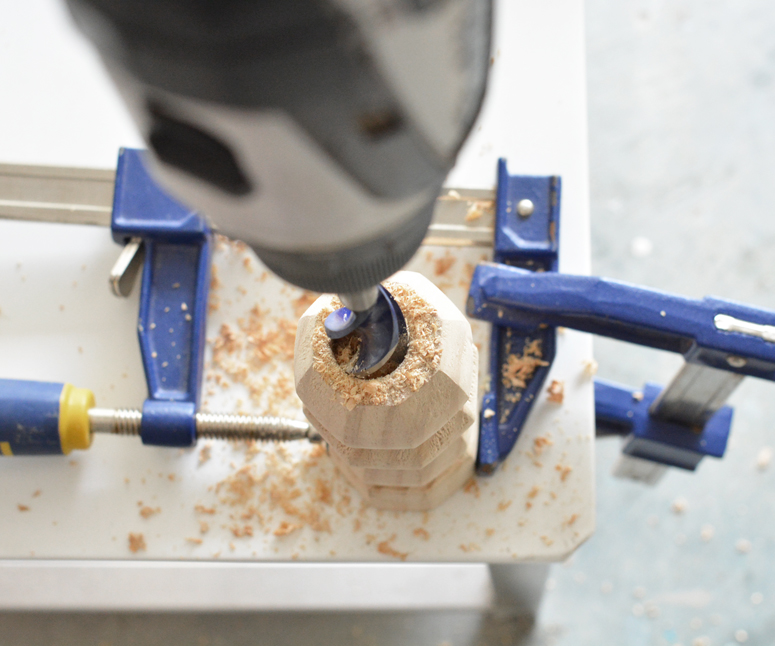
Below shows the 7/8” boring bit used to create a 3/4” inch deep hole – the 7/8” bit creates the perfect size for a taper candle base.
Notice I’m using two clamps, one to hold the candlestick straight so it doesn’t spin or move, and a second clamp to secure the first clamp to my work surface and hold it in place. Using clamps makes the process easier (and a lot safer) to drill a straight hole for the taper candle with the boring drill bit.
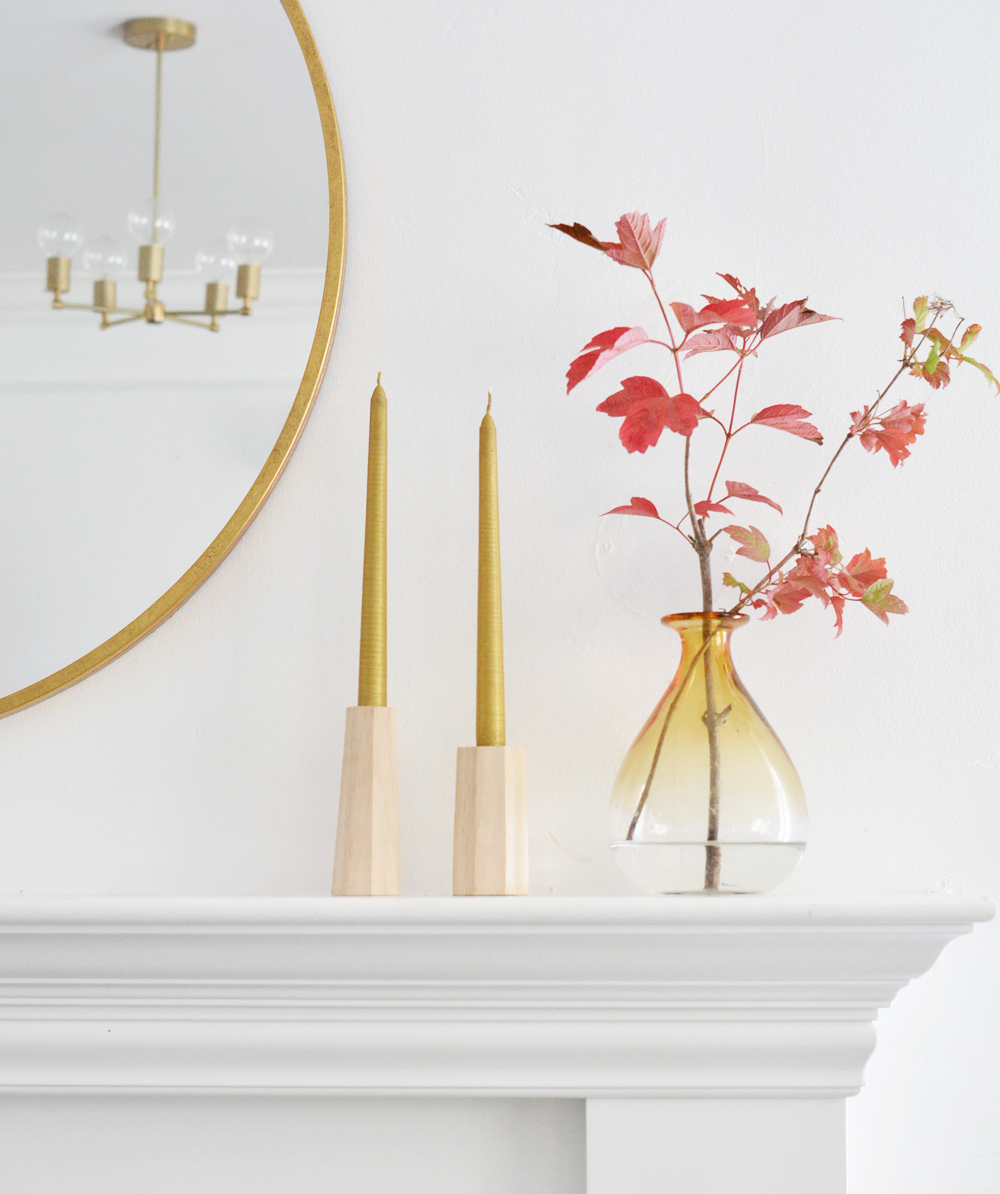
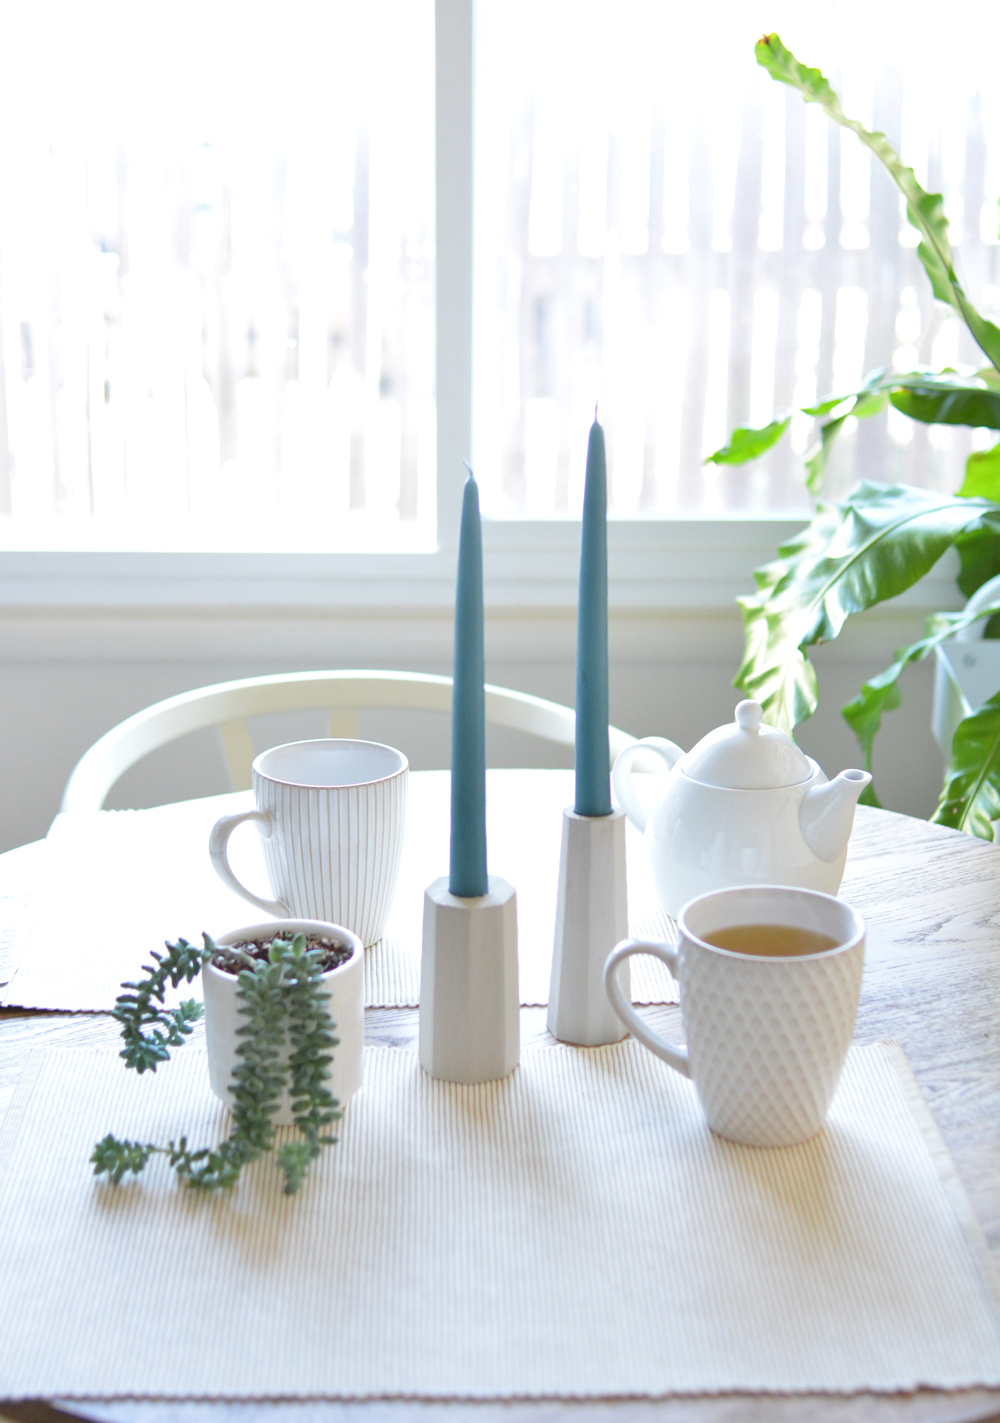
For their finishes, I chose neutral hues. I used a very pale gray watered down craft paint and painted two light coats on the modern set so that I could swap out colorful tapers. Tea for two?
On the curvier set of six, I used a taupe craft paint and dry brushed some white details to give them an old world finish. I’m only displaying five. The neutral colors work for all the upcoming holidays. :)
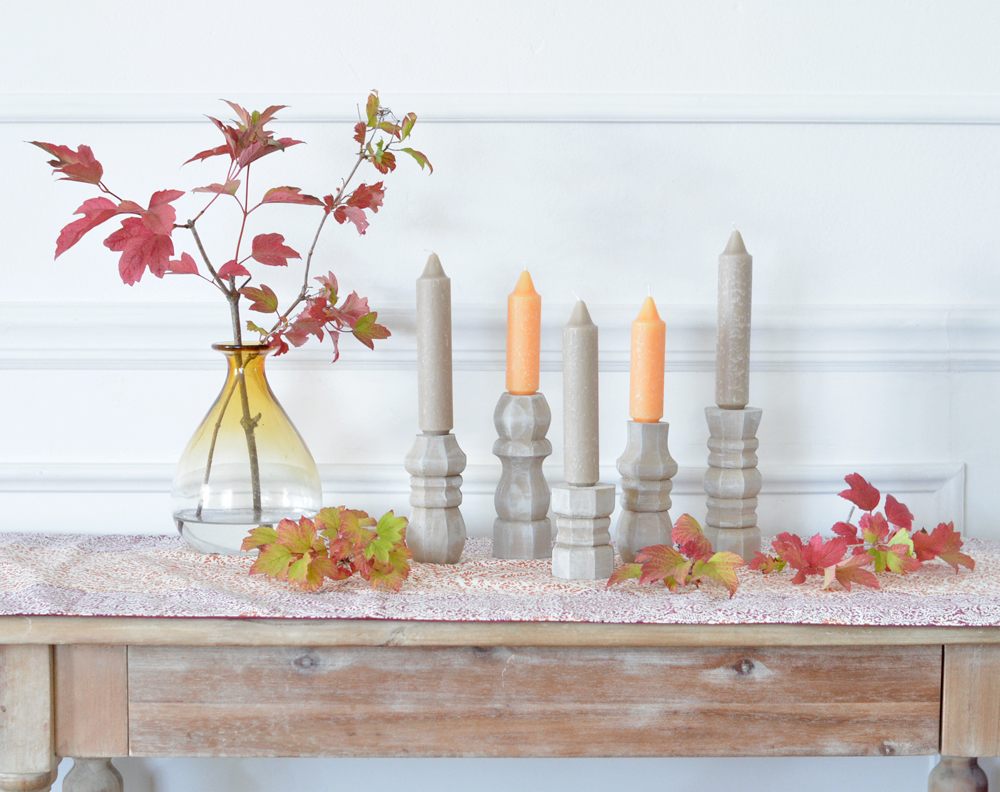

colored taper sources: slate blue candles / taupe collenette / mandarin collenette candles
There are so many different ways you can finish these wood candlesticks. You can get really creative with paint and/or stain.
I can see them in bright colors for a fun tablescape, or in matte black to use as dramatic sculptural pieces for a bookcase or mantel. What color paint or stain would you use? Let me know if you recreate this project, and send me pictures if you do!


love these! AND I love the mirror! I’m looking for a round gold one for my powder room. Where did you get yours?? thnx so much!
Thanks, they were so fun to make!
My 30″ mirror is from Lamps Plus, but Lowes also has a 28″ inexpensive gold mirror that’s great too!
Lamps Plus mirror: https://www.lampsplus.com/products/varaluz-casa-cottage-gold-30-inch-round-wall-mirror__86d50.html
Lowe’s mirror: https://www.lowes.com/pd/Enchante-allen-roth-28-in-L-x-28-in-W-Round-Gold-Framed-Wall-Mirror/1000421755
THANK YOU SOOOOOOOOOOOOOOOOOOOOOOOOOOOO MUCH!!!!!
I love this! Thank you for sharing your great (completely doable) idea.
Ha, thanks Kristi!
Fabulous DIY! This would be a great idea for wedding decor – you could enough for several on each banquet table, and stain or whitewash them to match your colors. You are so creative!
Thanks, and yes that’s a great idea!
Isn’t it amazing how the simplest of ideas can turn out so fabulous! Kudos on your creativity. They look great!
Thanks Beth!
Those are so awesome! I am totally going to make some for myself!
I just smile to see ONCE AGAIN how your artist’s eye sees something new and fresh in something simple like a table leg! AND your clear and comprehensive step-by-step photos and how-tos are money. Love these, and am grateful for a new do-able project! Thanks Kate.
How kind Jenni, thank you SO much!
xo
Very cool DIY!!
The geometric shapes would look good gold leafed, I am dying to gold leaf something, anything.