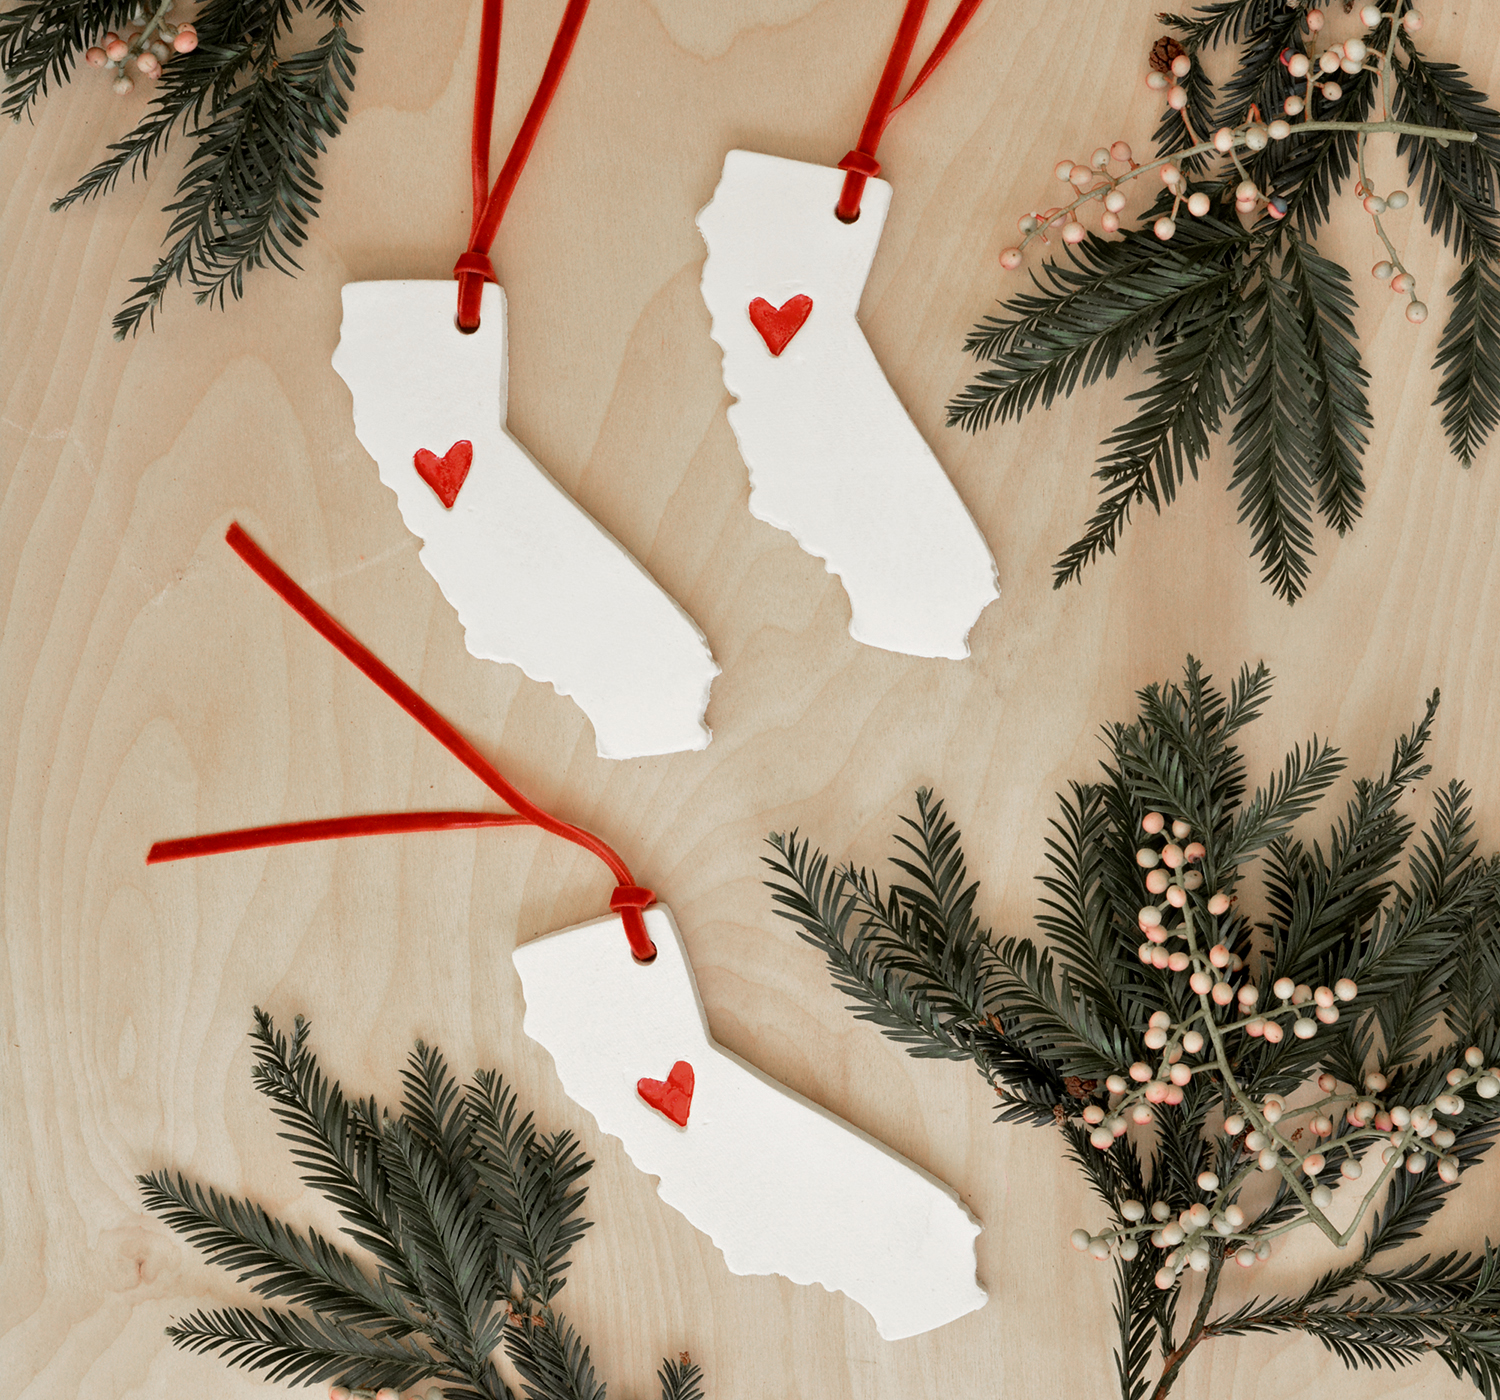
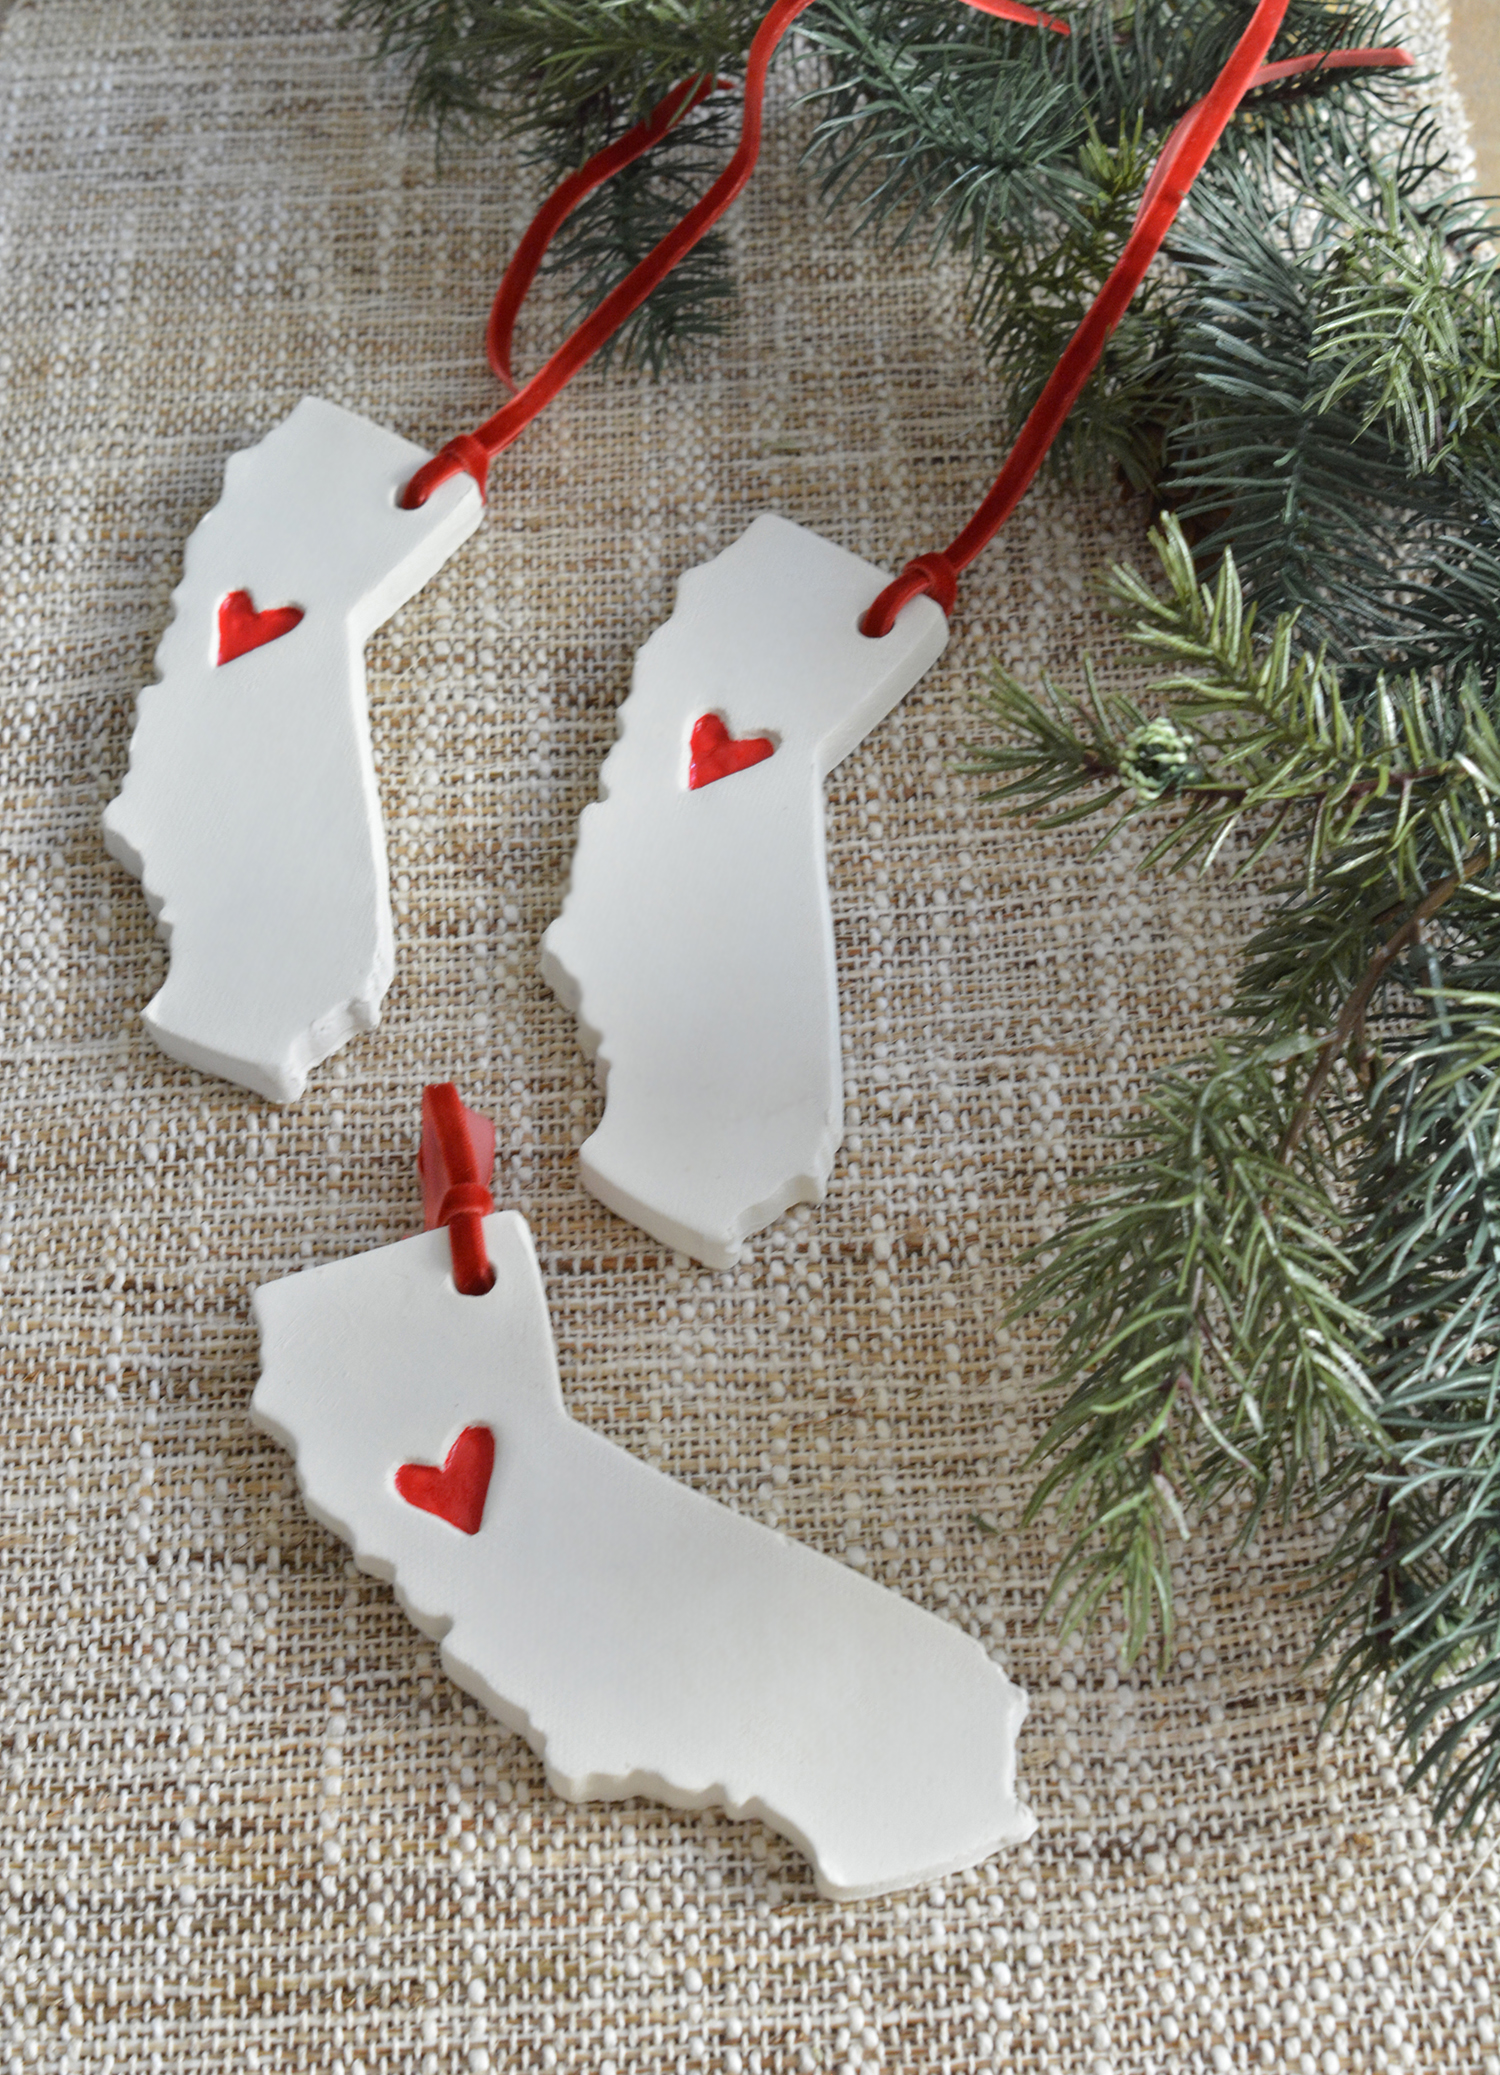
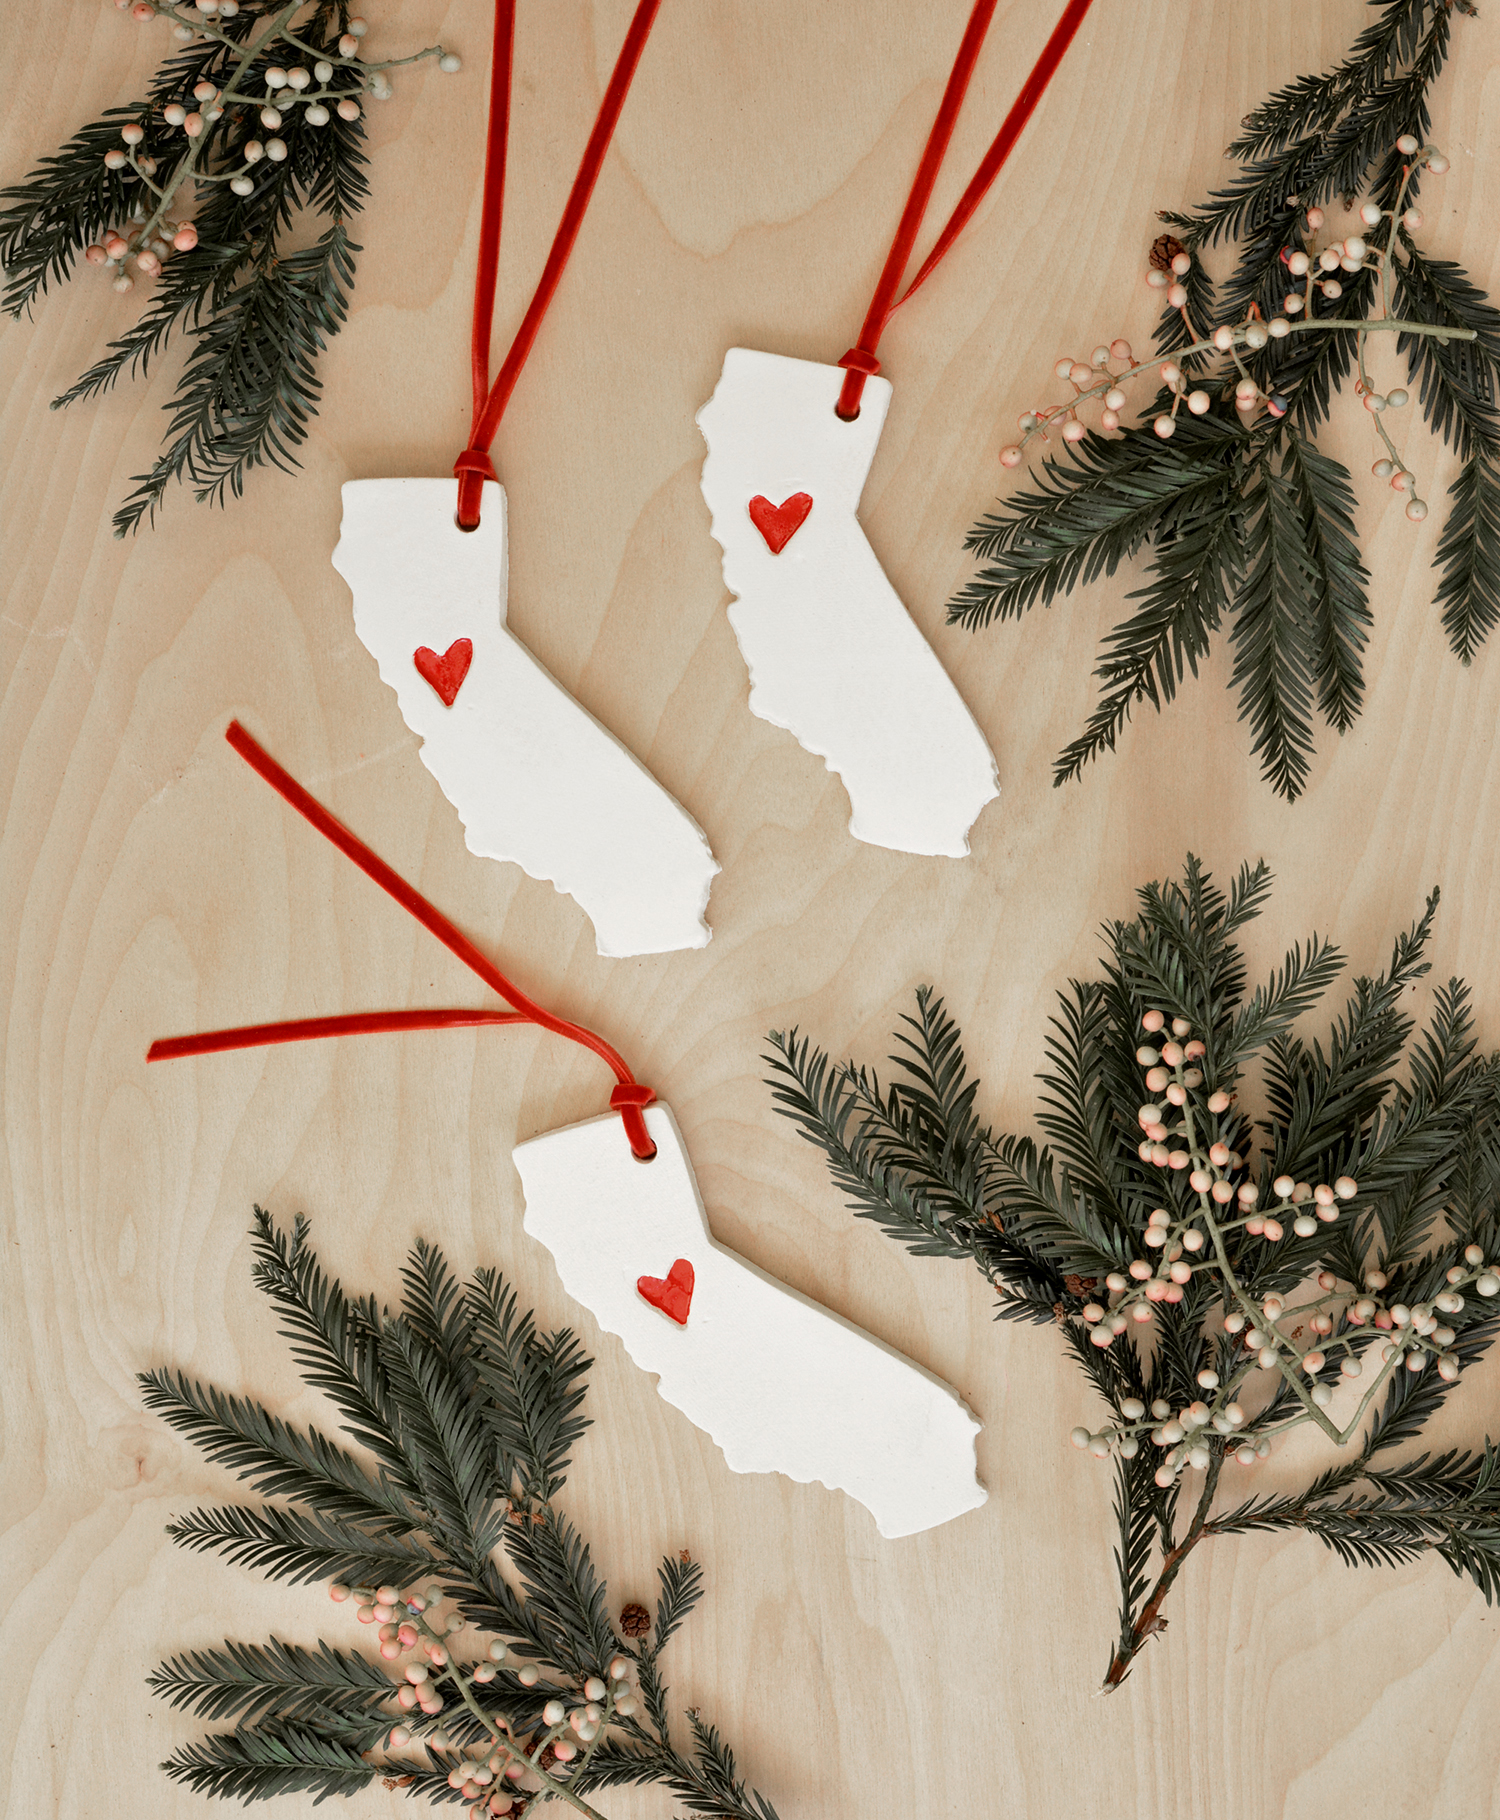
Several months ago I started making state shaped ornaments with raw clay at my ceramics studio for a local market where I’m selling art prints and ceramics in early December. Those ceramic ornaments were fired in a kiln, however I thought to myself perhaps I could recreate them with air dry clay for those who don’t have kiln access and the experiment was successful so good news, you can also make these with air dry clay!
These are simple to make but they do take a little patience. Air dry clay takes a few days to fully dry so if you want to recreate some for friends or family it’s best to start early.

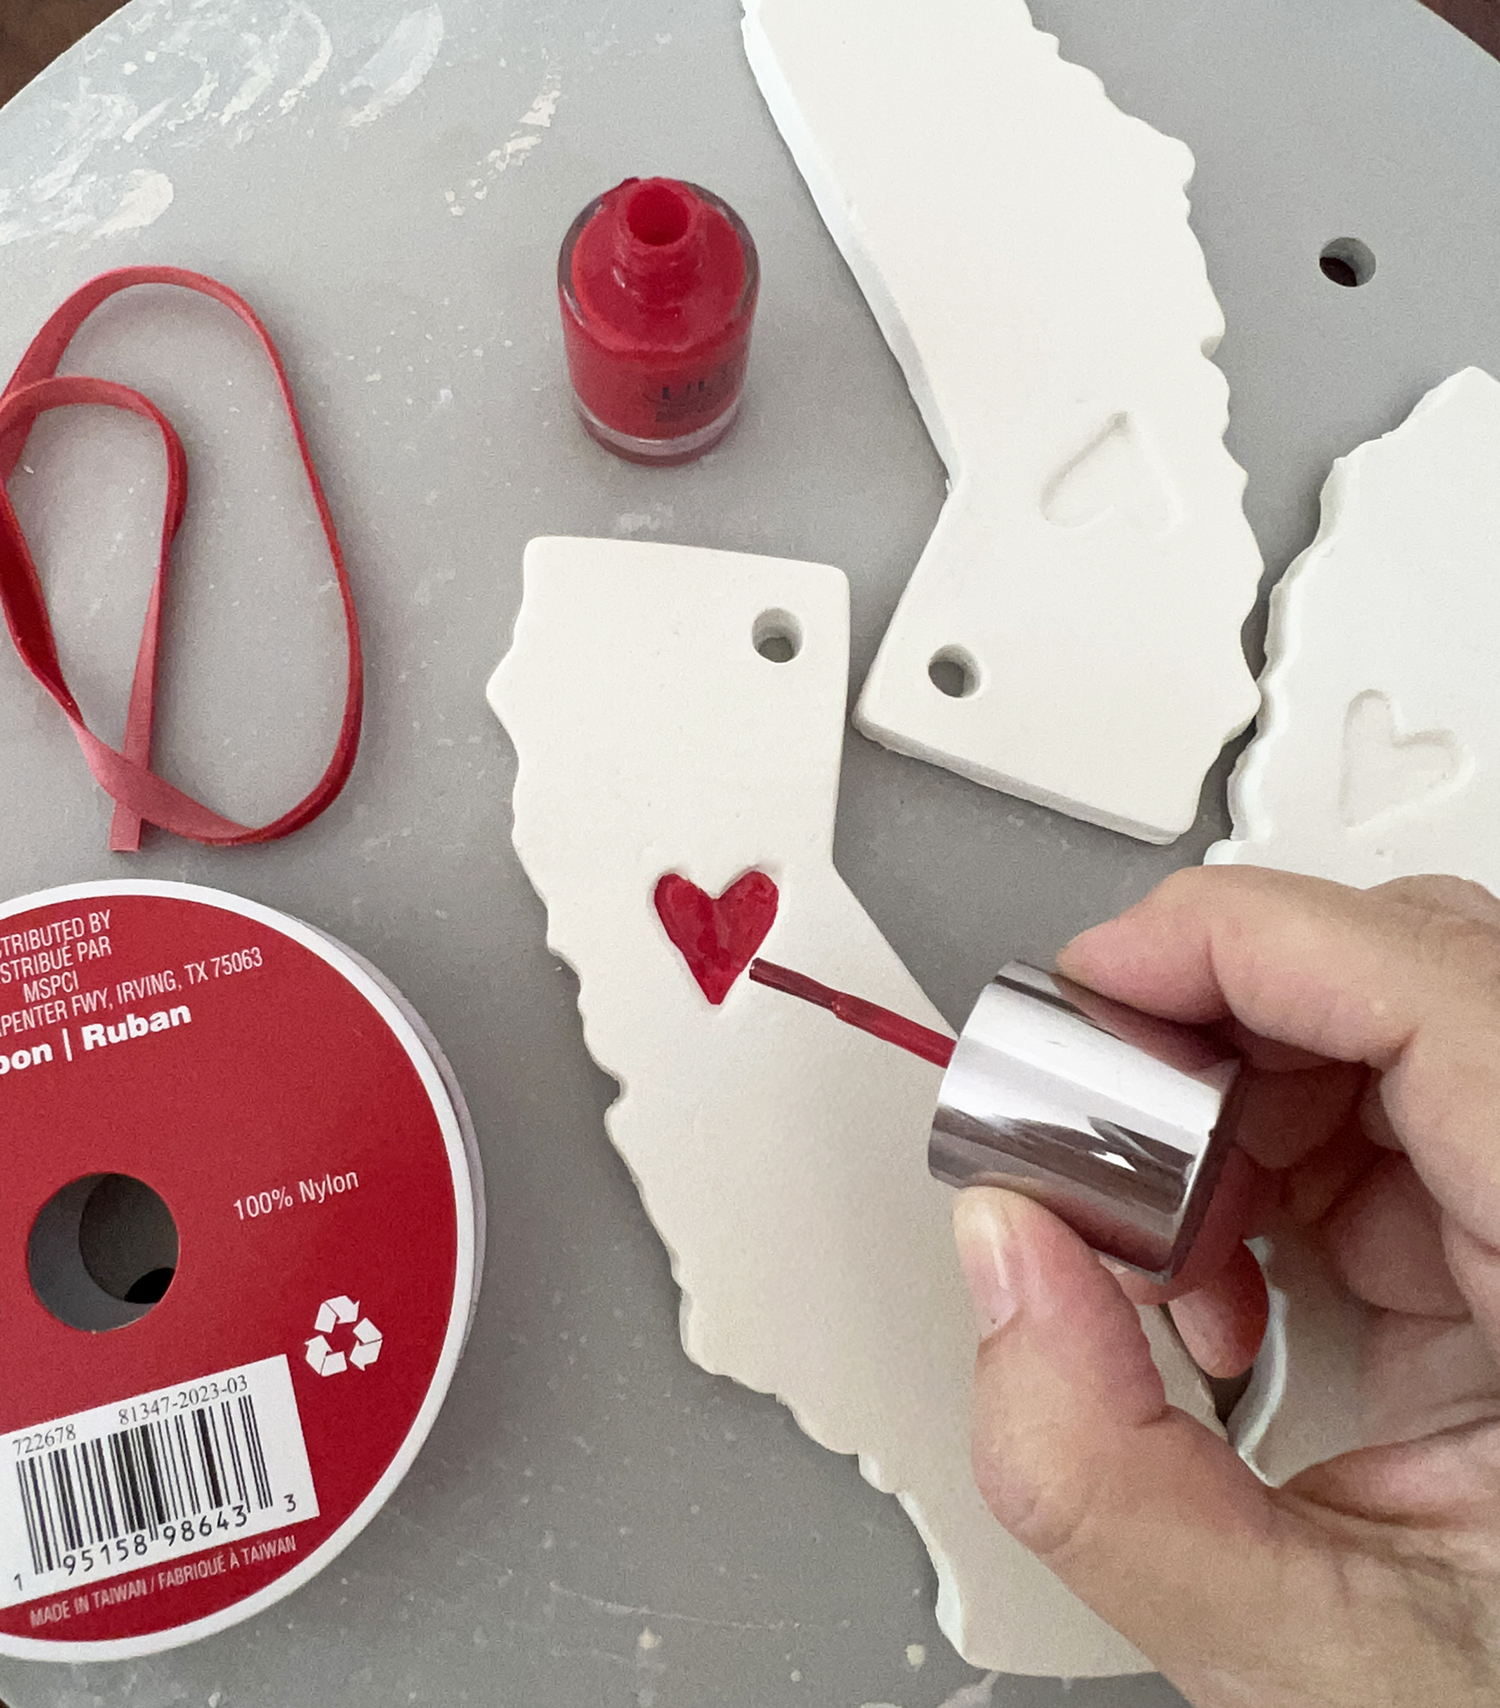
Supplies you’ll need: white air dry clay from craft store (I used one package of this clay); state shape cookie cutter (I bought this one); colorful gloss nail polish; rolling pin; 12x½” inch wood strips or ½” wooden dowels for evenly rolling clay; plastic straw (or circular clay cutting tool); heart shaped stamp purchased or self made; white gloss spray paint (optional); ribbon.
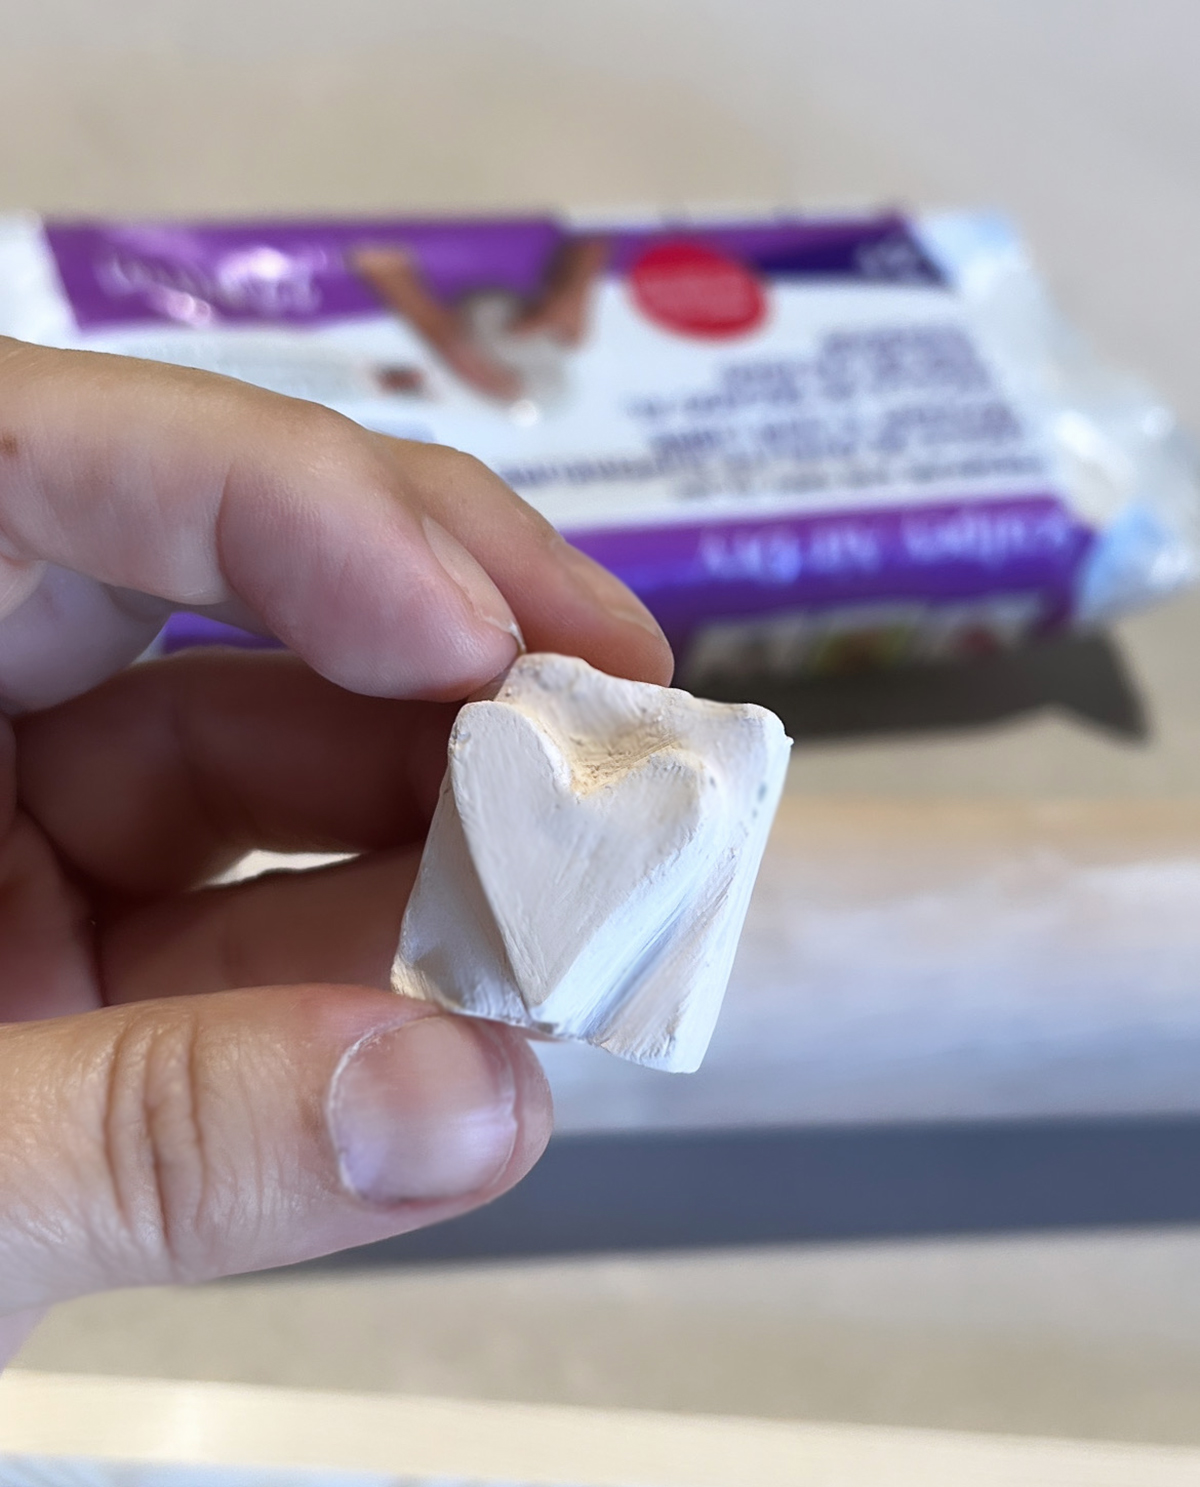
Step One: You have two options for creating the heart shape to imprint inside the state love ornaments, 1) purchase a small heart stamp, or 2) make your own stamp with clay first like I did. If you do the same, cut of a piece of air dry clay, form the shape and allow it to dry for 24 hours. Make sure to seal the remainder of the air dry clay so it stays soft while you wait for the heart shape to harden.
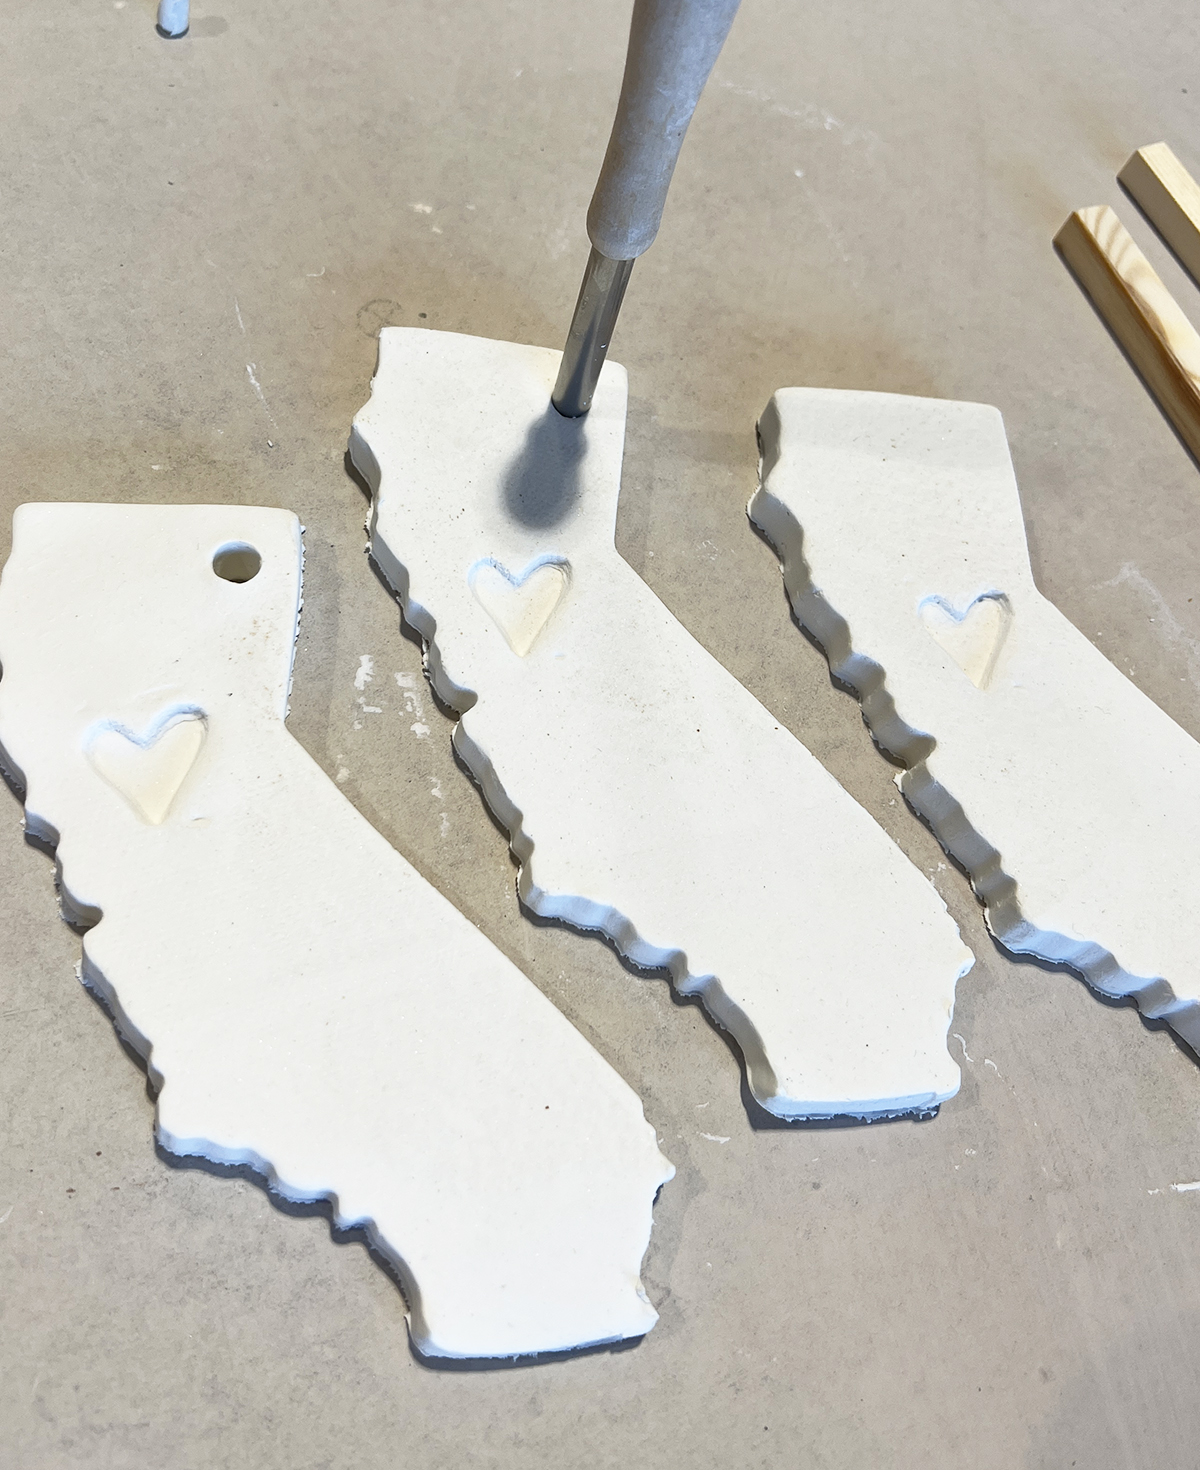
Step Two: Roll the air dry clay flat between two wood strips or dowels. For elongated states like California or Florida, choose a ½” thickness, but for more condensed shapes like Texas or Arizona, you could flatten the clay to a 3/8” thickness. Anything thinner than ¼” risks the clay shape cracking so err on the thicker side.
Step Three: Cut as many state shapes as possible with the state shaped cookie cutter. Stamp clay with purchased or self made heart shape.

Step Four: Cut hole in corner of state where ribbon will be attached. Allow clay shape to dry for 48-72 hours. Be sure to flip the state shapes every 12 hours for even drying and to prevent the clay from curling.
Step Five: Once clay shapes are fully dry, lightly spray paint them with white gloss spray paint (optional) or leave them raw with a matte surface. Next, paint the inside of the heart imprint with two coats of a glossy nailpolish, I chose red to match red velvet ribbon, but you could do pink, mint, forest green, whatever you like.
Attach a ribbon to the inside hole and use the clay ornaments to hang on a tree or as an embellishment on a gift!


LOVE the nail polish trick!
Don’t forget to join us over at the Creatively Crafty Linky Party every Wednesday through Sunday
Followed and Pinned!
Creatively, Beth