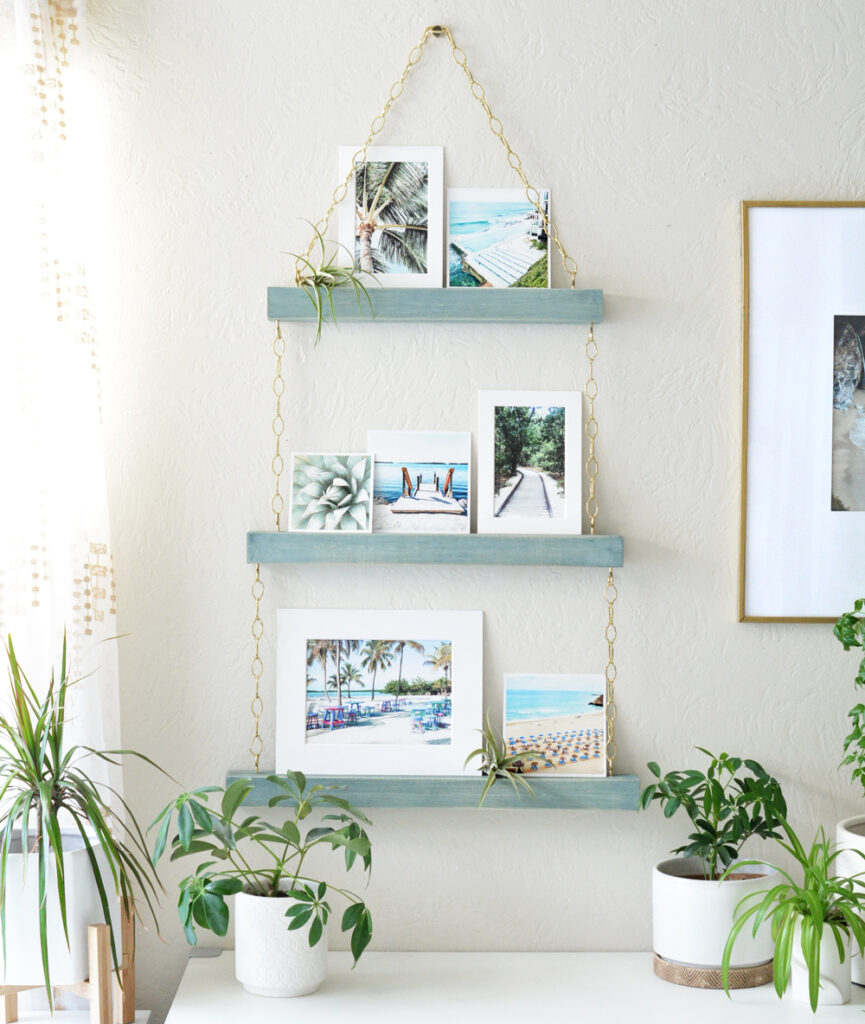
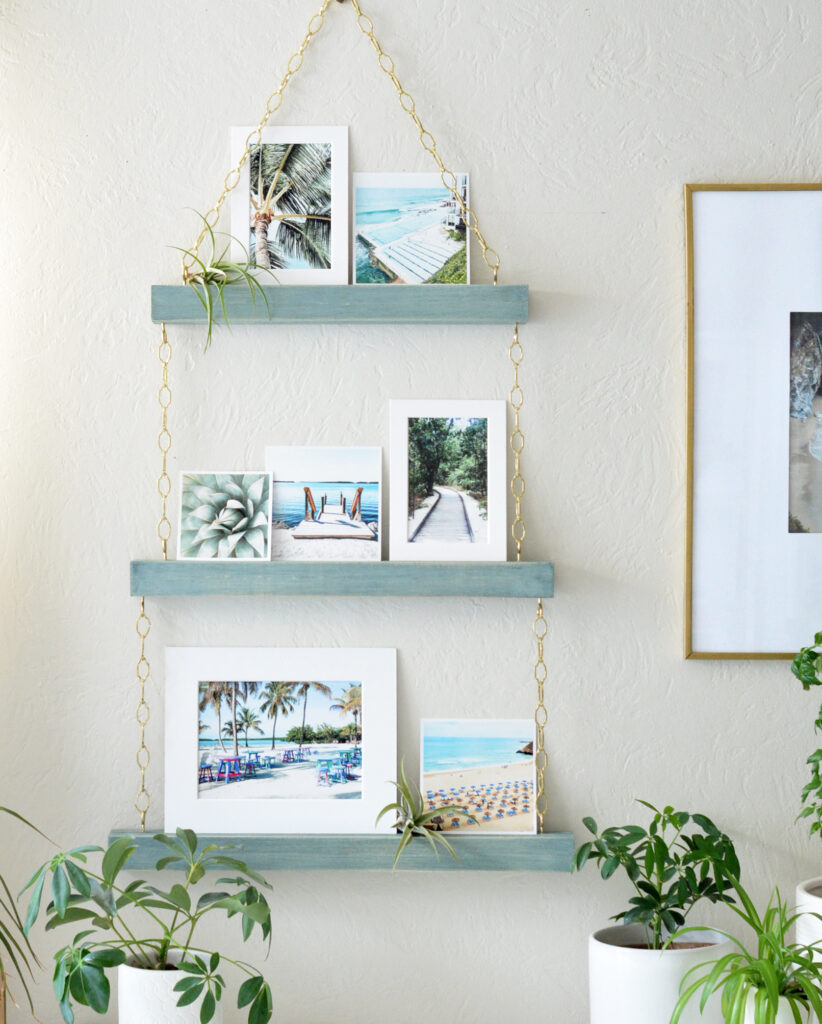
I was feeling sad about summer ending because it’s my favorite season. Due to global circumstances with Covid, like everyone else, I didn’t get to take a beach vacation or travel anywhere far. So I decided to create a little display with some of my favorite destinations that I’ve traveled to in the past. For me, it’s a little reminder that summer will come again next year, and fingers crossed I’ll be free to explore the world in 2021.
The design for this display came to me in a daydream. I didn’t want floating shelves that stuck out or needed to support heavy frames. I wanted to create vertical hanging shelves where I could rotate simple small prints, ones that are nostalgic, and others from my print shop. The original concept included rope and wood beads (which would also look very cool) but I opted for decorative gold chain instead.
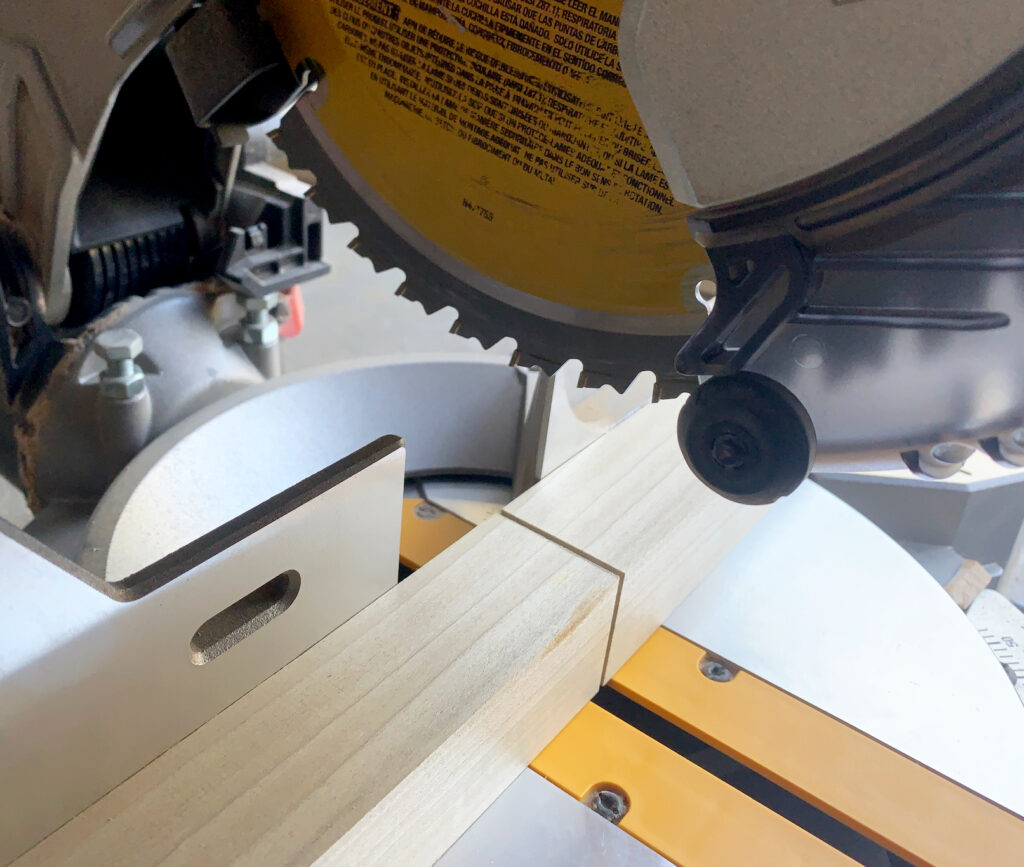
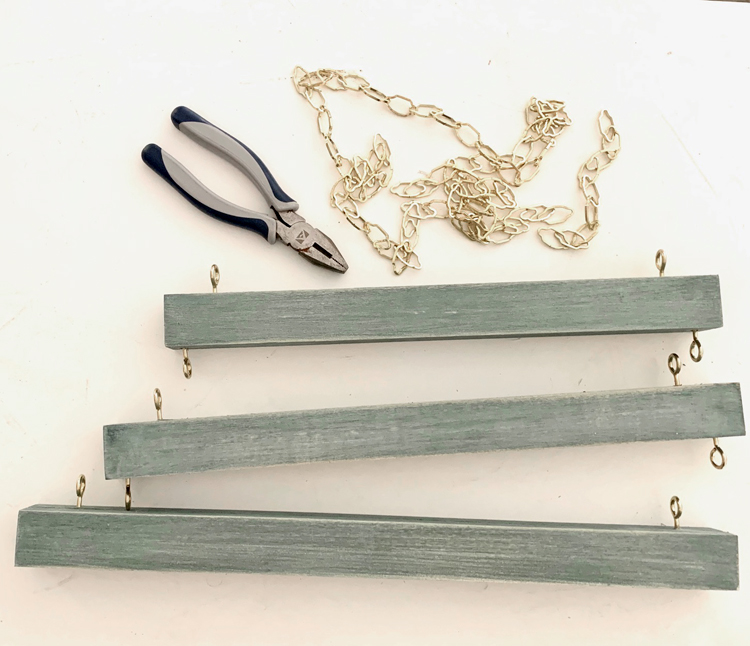
To recreate this project you’ll need the following supplies: two 2x2x36” poplar square boards ($5.34 each at Lowes); stain or paint color of choice, sanding wedge, foam brushes, ruler, brass screw eye hooks, 5 feet decorative brass chain, power drill & bits, wood carving tool (I used a spade drill bit), pliers x 2.
The first step is to cut the poplar. My design is tiered, but you can do the same width for each ledge if you like. I chose 20”, 18” and 16” widths to form my three ledges.
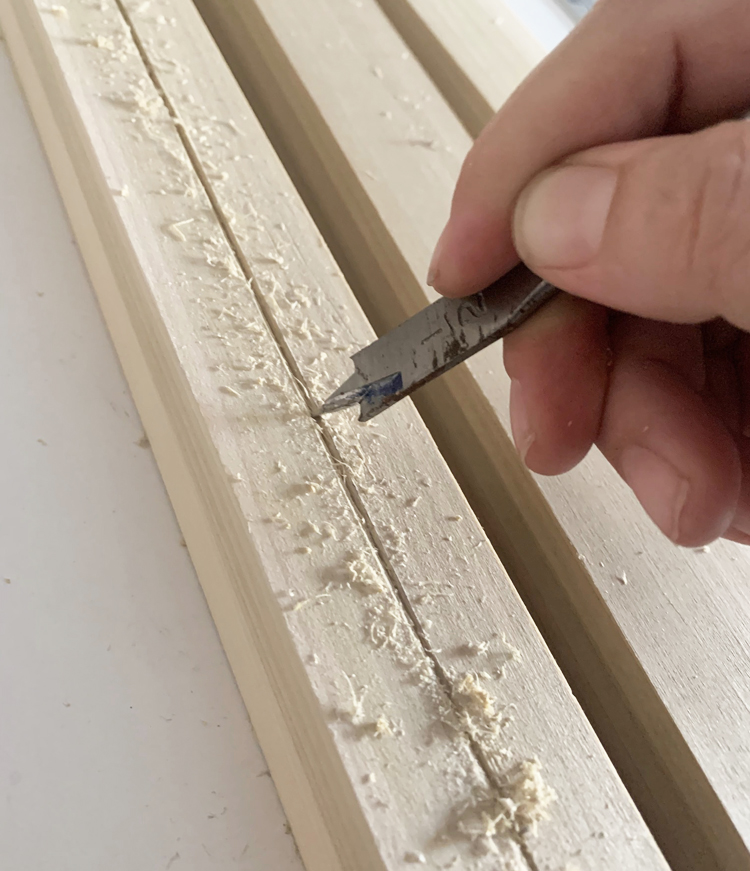
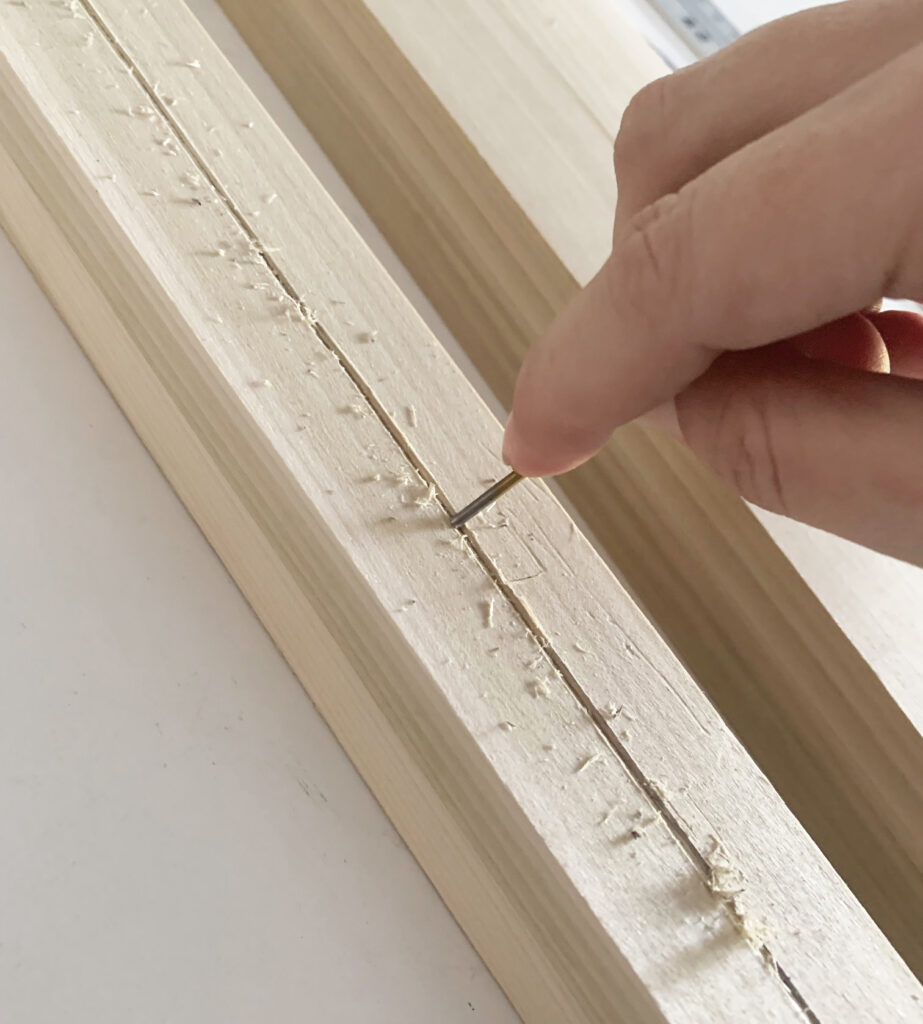
I created a place for the art prints to sit by carving a groove in each ledge. Using a ruler, mark the middle and gently carve the first few lines. I used a spade drill bit with a pointed edge, it takes about 20 passes to get a deep groove. Next I used the rounded backside of a small drill bit to round out the bottom of the picture groove in my ledge. How deep you go is up to you, in hindsight I wish I’d made mine a little deeper.
Next, stain or paint your wood, or leave it natural and just give it a coat of polycrylic to protect it. Wood stain can be temperamental sometimes and I got the color wrong the first time. My original plan was to have ledges be a pale olive green with the wood tone coming through. The stain I ordered was supposed to be translucent and ended up being not so translucent.
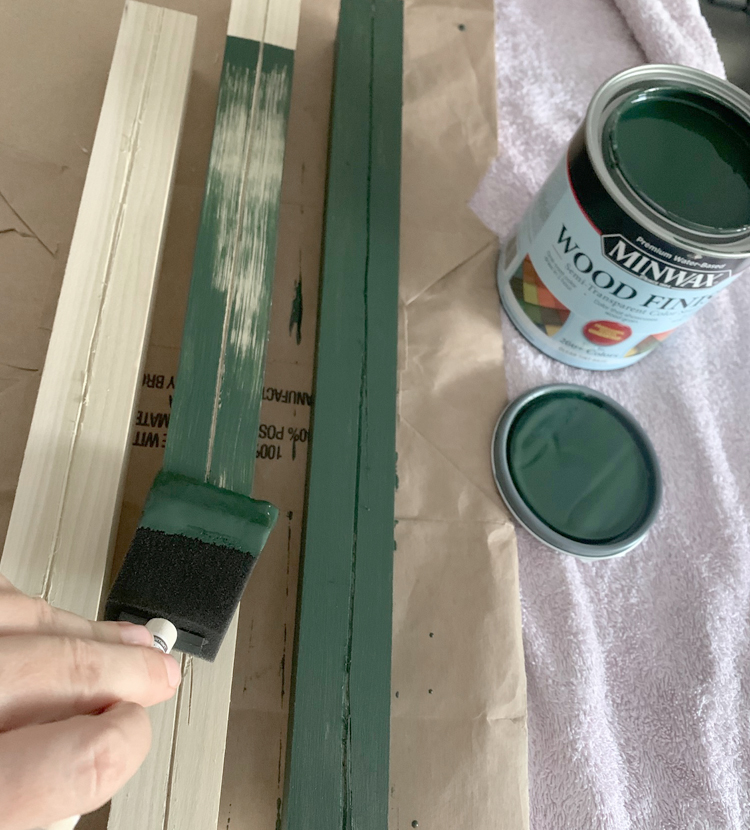
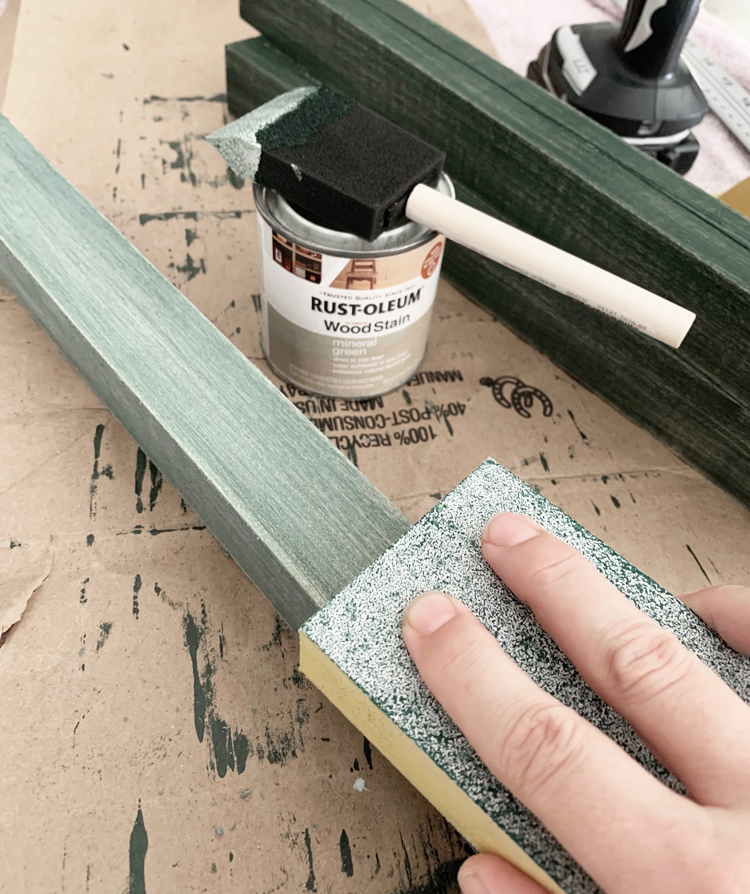
So I went with Plan B. I set aside the green stain for a future dresser project and recoated my wood with some leftover Rust-Oleum stain in mineral green. I immediately sanded it and let it mellow and it transformed into an unexpected beachy blue green color which was a really nice surprise. When it was dry I sanded it a little bit more to expose more of the natural wood tone.
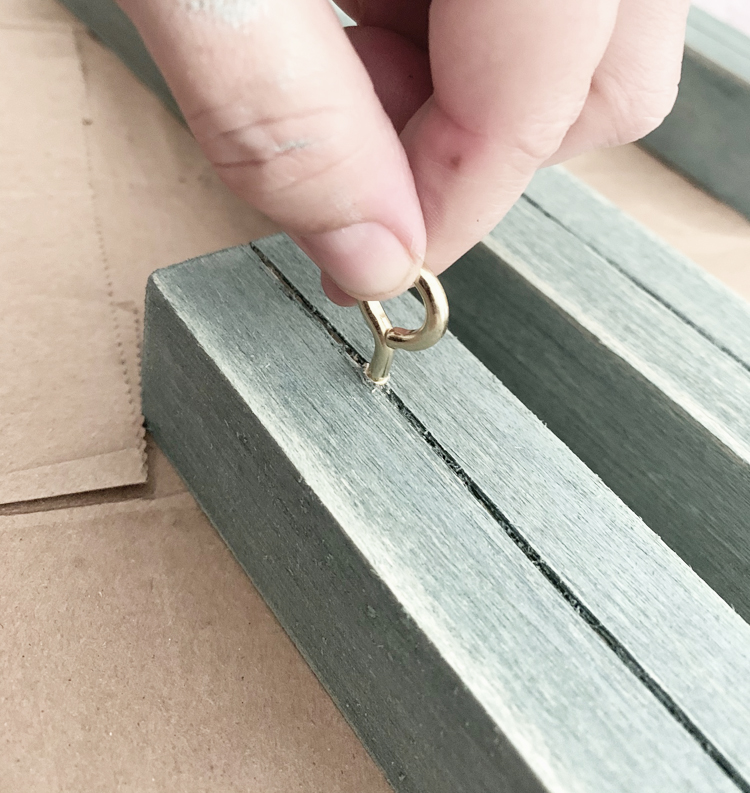
Drill pilot holes for the screw eye hooks. Be sure to map out their placement first.
![]()
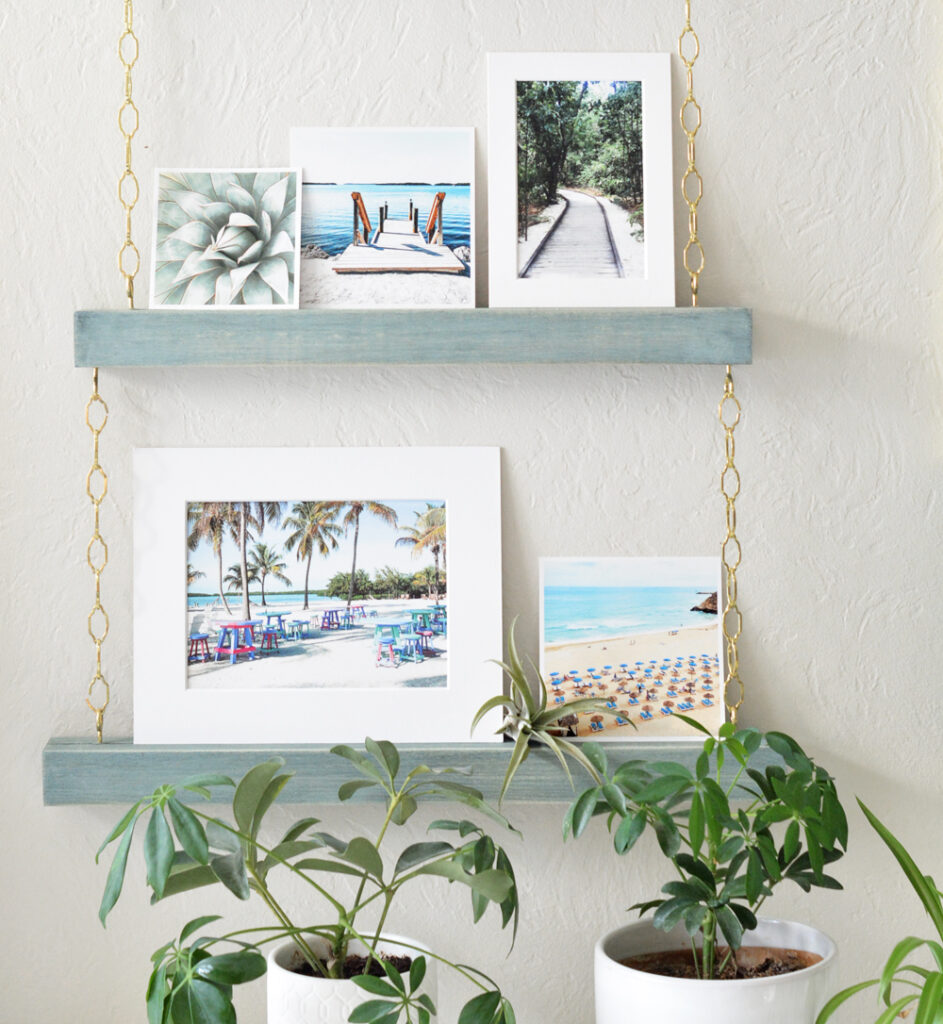
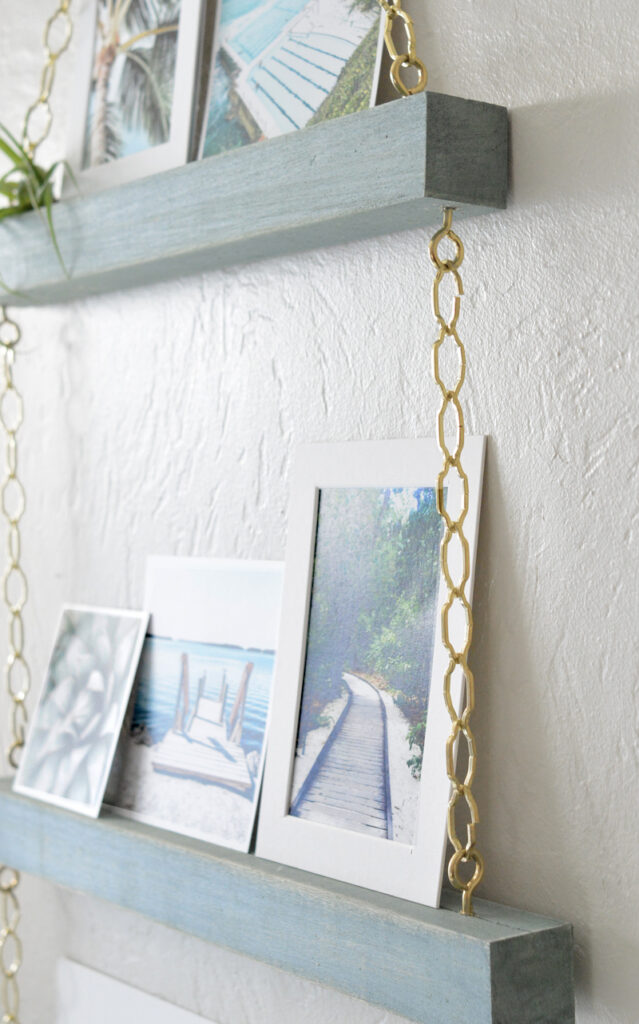
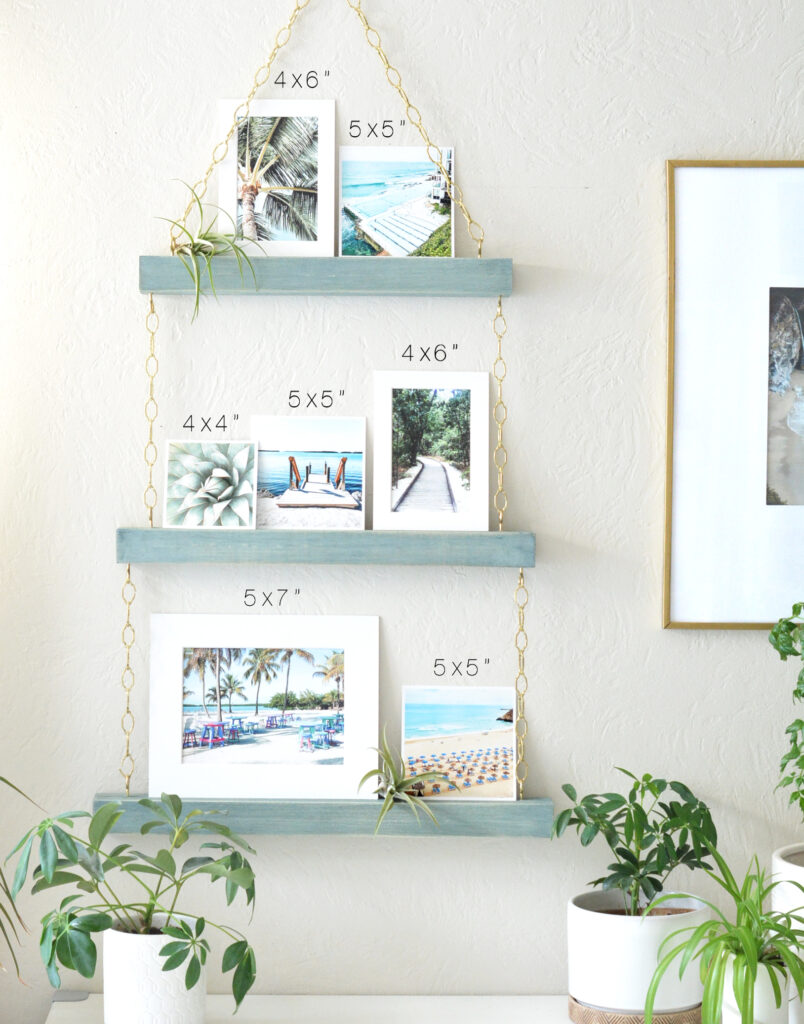
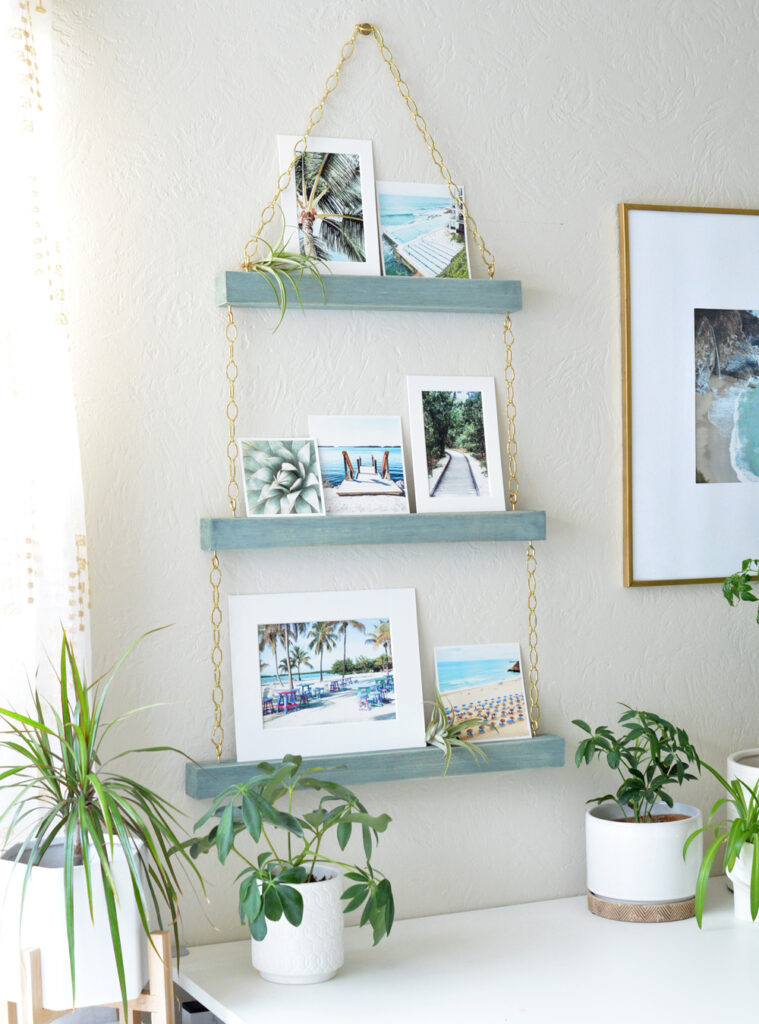
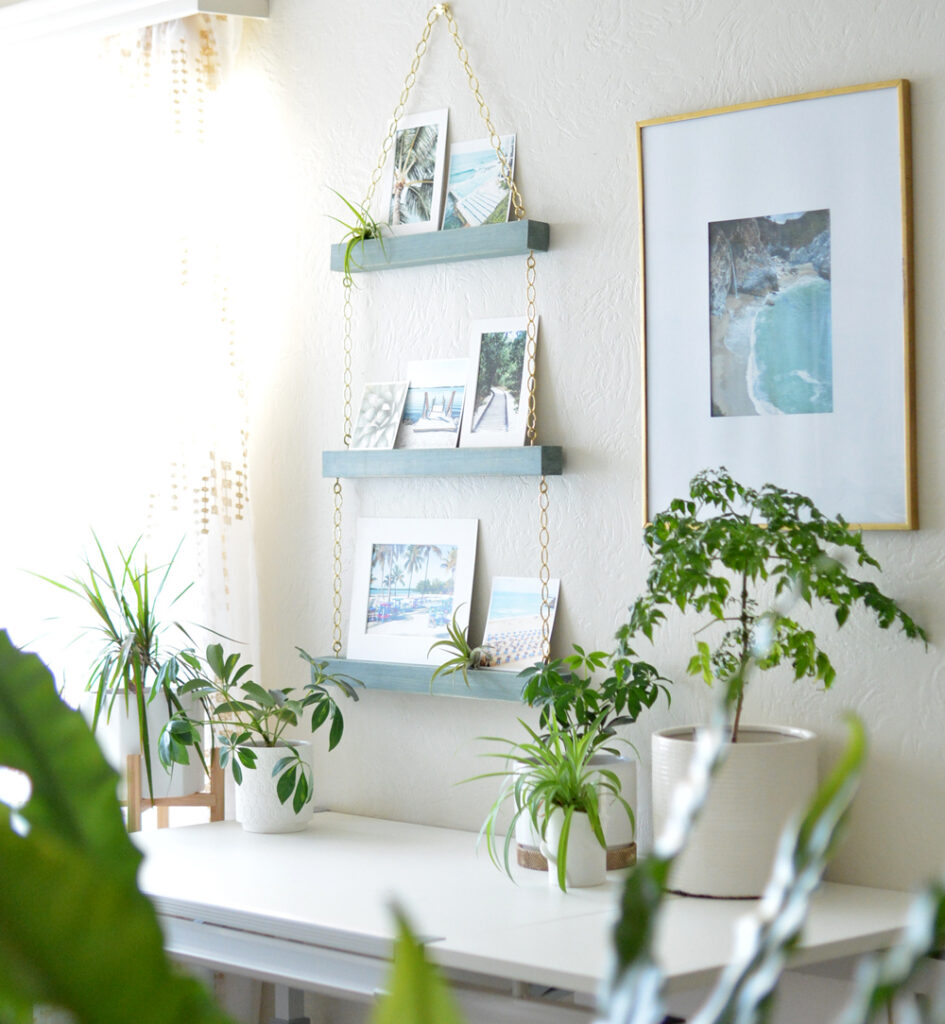
Using pliers (it’s handy to have two), separate the links where you need them. I used 9 links between the bottom two ledges, it created the perfect amount of space for displaying small prints. Use whatever amount of chain that’s left to create the top hanging element.
Nine links between ledges seemed just right for the sizes of art prints I’m displaying. I’ve identified the sizes of my art prints shown below, they vary from 5×7” to 4×6” and include 5×5” and 4×4” sizes. Some prints have simple mats around them too. I added two little air plants to the display for an organic touch.
![]()
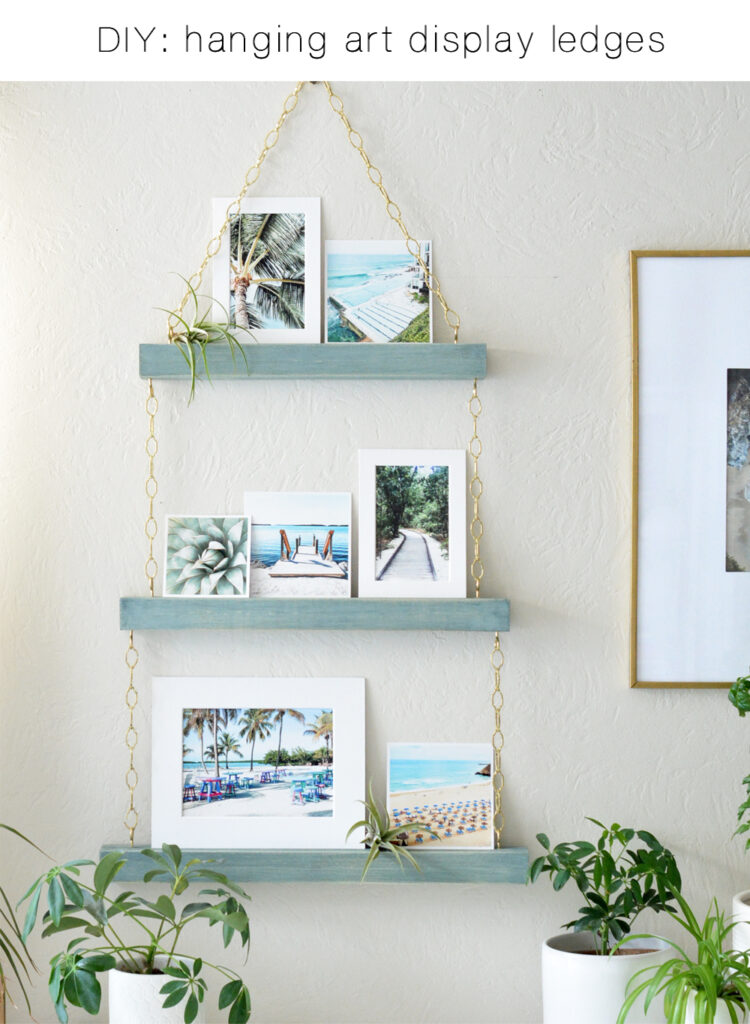
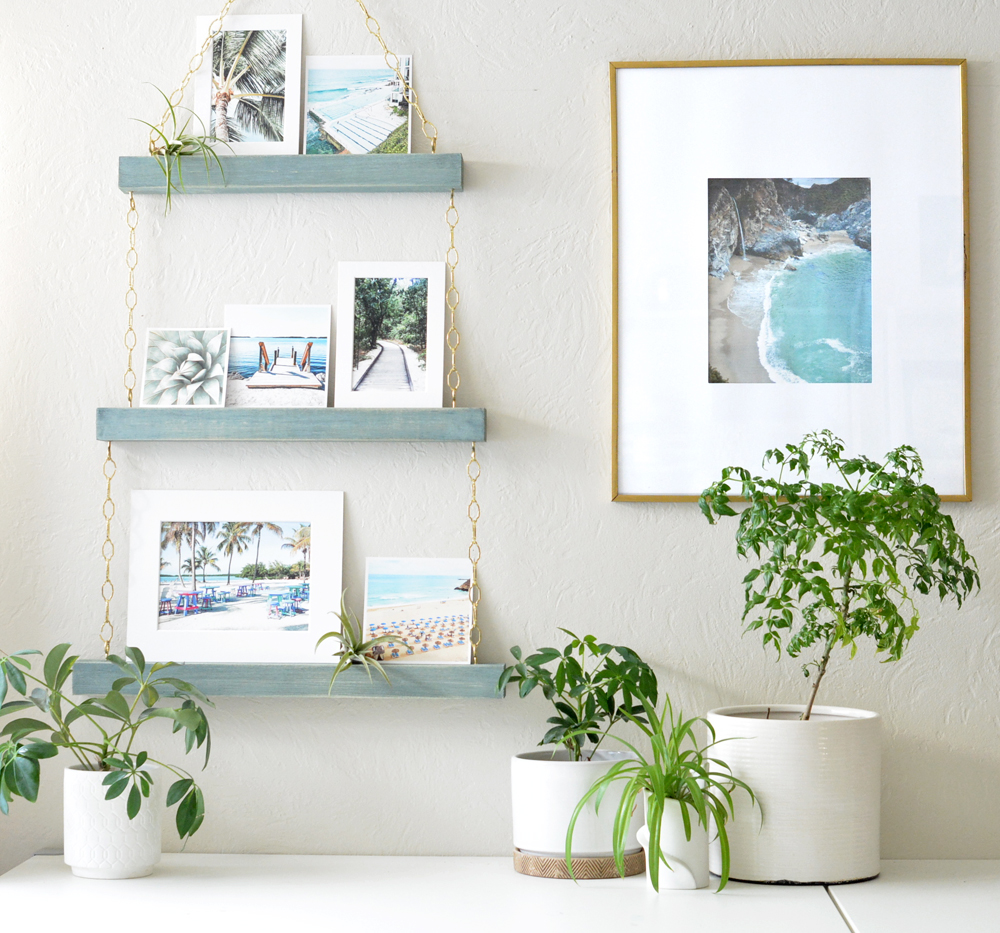
You can recreate this to display photographs of family and friends too! And as I wrote before, using rope and wood beads instead of chain would be a really cool alternative as well!
.


Love it!!! You are one handy dandy chick! Also hoping I can go to Italy in 2021, as well as Caribbean, and domestic travel! Hopefully this will be a bad memory soon. 🤞🏻
Yes, hoping 2021 invites more good experiences!
Oh, gosh! I wish I were crafty. These shelves are just great.
Thanks so much.
xo
That is so awesome and clever! I love it. I may be making one of my own. Thanks for the great ideas. You always have so many!
Thanks Tracey! I’d love to see it in black stain and wood beads, that would look cool. :)
That really would look cool! Do you know where to get beads that would work for hanging the shelf?
Perfect idea for while we’re renting! There are some picture hooks in the walls, but this will extend what we can do with them.