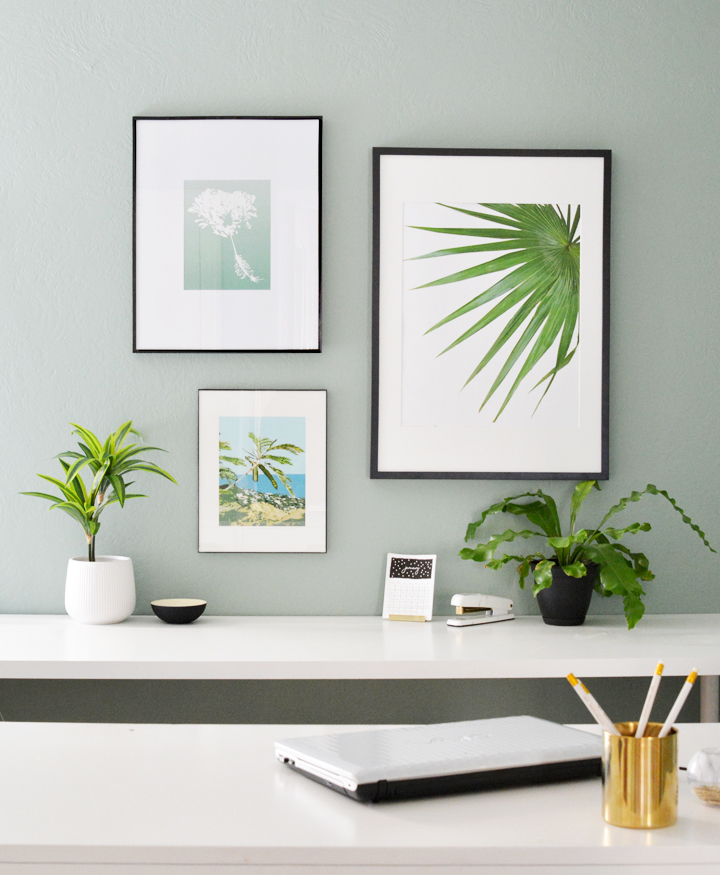
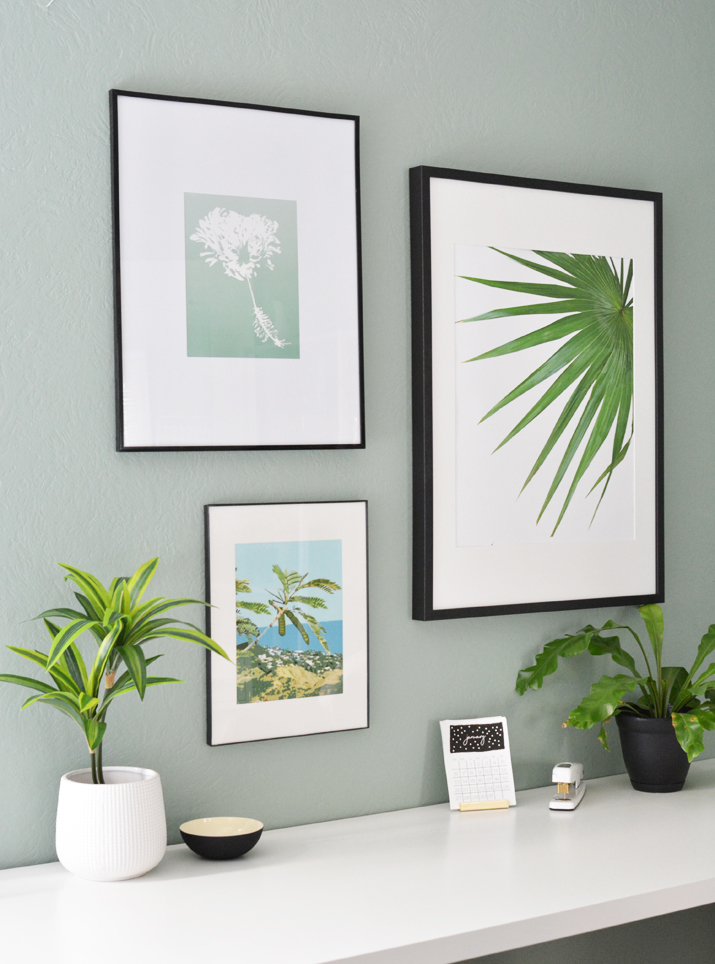
I’m just putting the finishing touches on my new office, and I wanted some original art on the walls. As you know I looooove to travel and I always take a lot of pictures when I’m someplace new!
Last year I visited Oahu for a week and also had weekend getaway in Maya Riviera, Mexico. I love exotic botanicals so much so I took several pictures on my trips. To remind myself of these beautiful places, I turned them into original artwork for my office using Photoshop Elements.
If you’re unfamiliar with (or maybe a little intimidated by) Photoshop Elements, don’t be! Photoshop Elements is a more basic version of Photoshop CC. You can download a free trial on the Adobe website and play with the filters and tools on your own to create something original from your photographs too.
Maybe you have a nice picture of your flowers blooming in summer or a nice view from a place you visited? Tweak the orignial photo and turn it into a unique piece of art!
When in Mexico for a weekend, I took this picture of these giant palms (anyone know the species?), I just loved their fan like leaves.

In Photoshop Elements, I isolated the palm branch with the Polygonal Lasso Tool and erased everything outside of the leaves (making the bacground white) with the Eraser Tool.
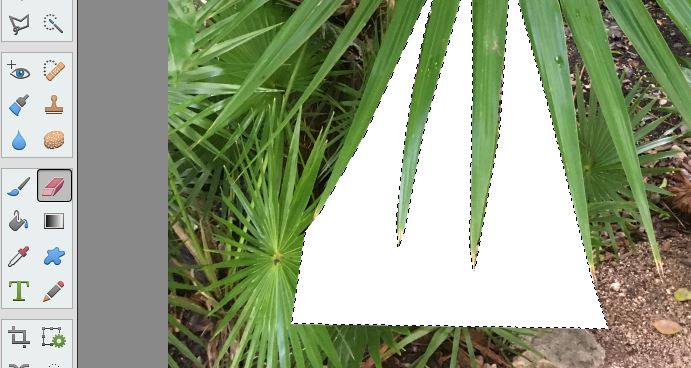
I also patched some of the leaves with the Brush and Clone Stamp tools. I copied and pasted the isolated palm branch into a new file and made it offset with a lot of white space. Then I had the new image enlarged to 16 x 20” at my local FedEx/Kinkos.
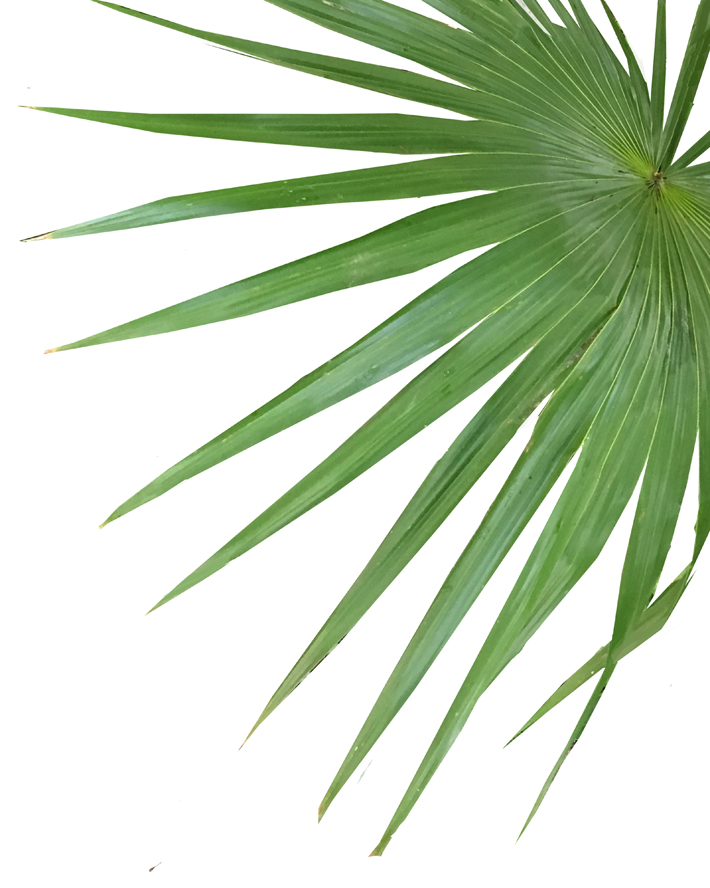
Easy large scale botanical art!
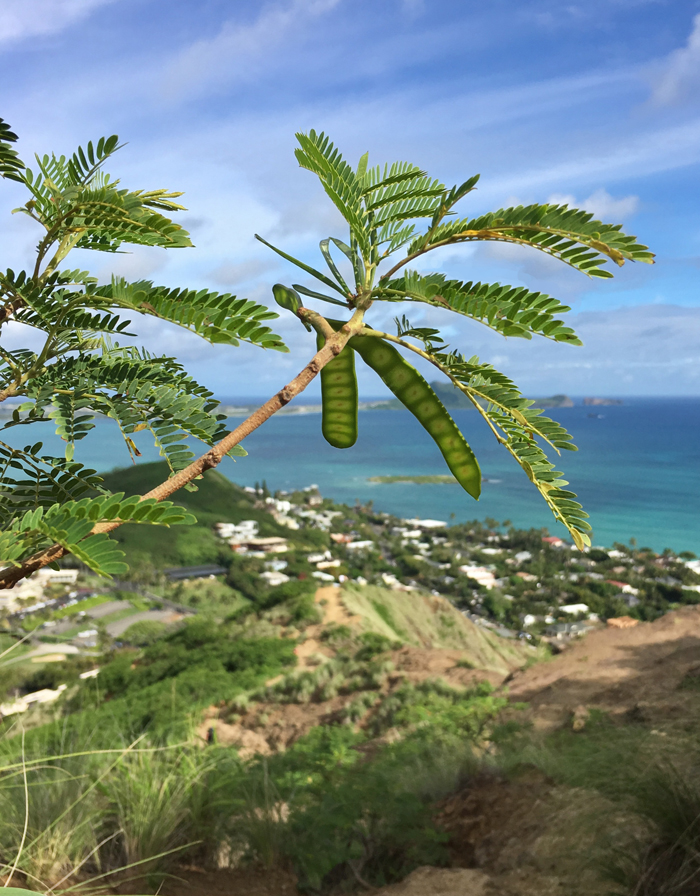
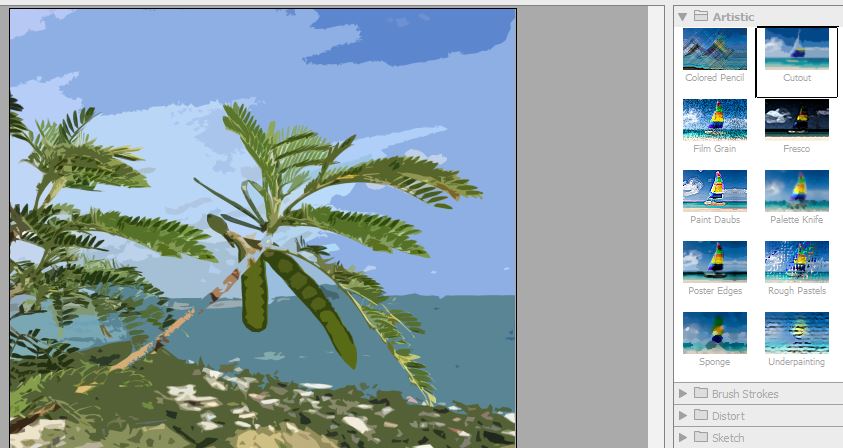
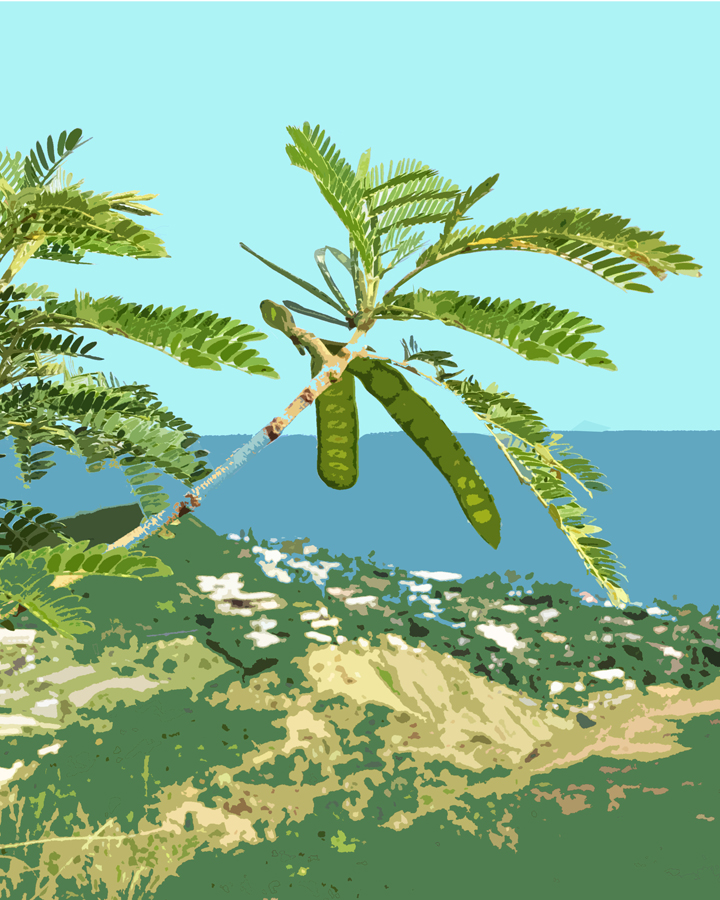
I took this next photo in Oahu when I was hiking up the Pillbox trail. (Don’t miss my article on cheap ways to travel in Oahu!). I loved the perspective of the botanical in the foreground and the view of the town of Kailua and the ocean below.
I used several tools to make this new painterly version: the Cutout Filter (Filter>Artistic>Cutout) to give the photograph a painterly effect.
I also used the Brush tool to eliminate the clouds and the little islands in the bay. I liked the idea of sky and ocean being one solid color, and leaving just the impressionist effect of the colors in the town and hills below. I also changed the hue of the color of the sky and the water with the Brush Tool and Color Picker tool.

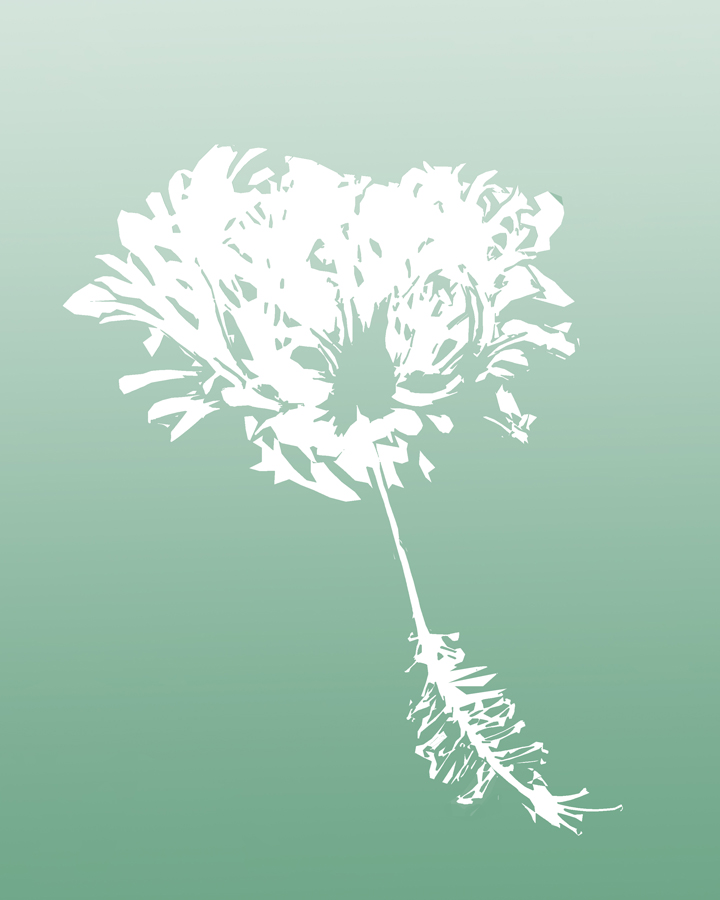
This exotic flower I spied while walking around Oahu, I wish I knew what kind of flower it was (anyone know?).
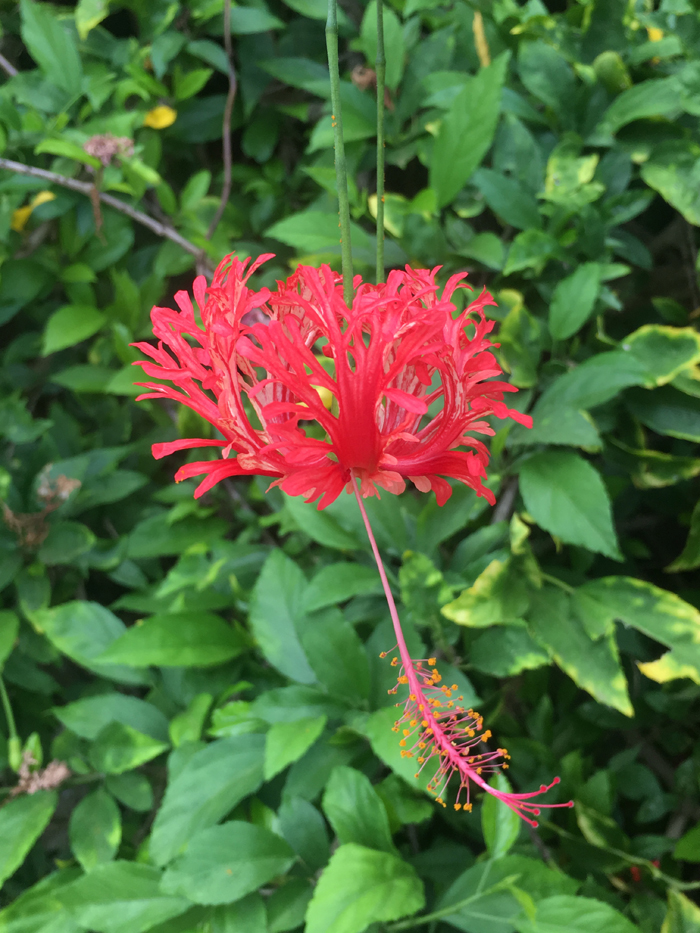
I love it a vivid pink but then started playing with the Note Paper Filter which totally changed it and gave it a more abstract look.
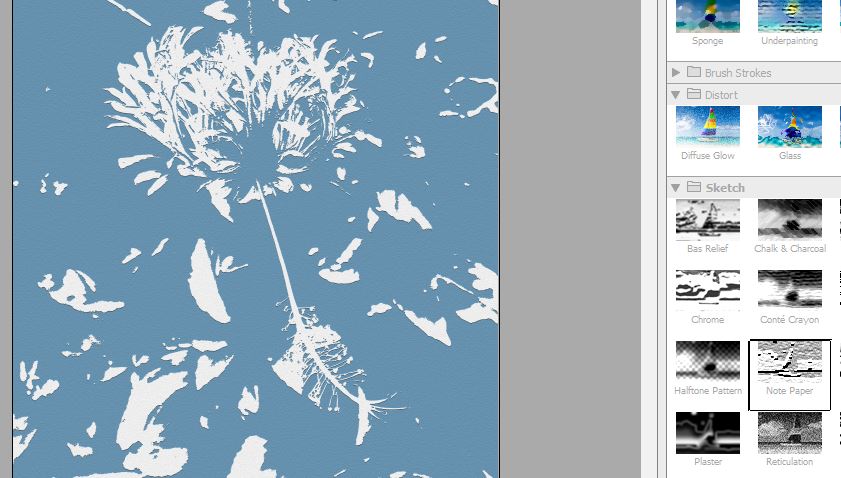
After that, I used the Brush Tool to eliminate all the distraction in the background, changed the background it to a soft green with the Color Picker tool, and used the Gradient Tool to give the background an ombre effect.
Now every time I enter my office the first view is artwork I’ve created from places I’ve been. I love that so much!
If you download a free trial of Photoshop Elements, open your image in the Photoshop Elements Editor Workspace, also make sure you’re working in Expert Mode to have access to all the tools.
Just a word of encouragement if you’re inexperienced with Photoshop Elements, I’m totally self taught! I’ve learned everything about these filters and tools just by playing with them over time. There are many different ways to take ordinary photographs and turn them into original art with this program, so give it a try!
Those of you who use PE, what are your favorite tools? Do you have any tips to share?
.


Great photos, Kate! These are beautiful. I love the palm leaves especially.
I do use Photoshop Elements often but my favorite filter is done with the Waterlogue app. I took a picture of the beach on a vacation last year to Tahiti, and turned it into a watercolor picture with Waterlogue. I have that enlarged and hanging up at work, and people often ask me if I painted it. :-) I often like to use PE first to make any fixes in the light, saturation, straighten it out if necessary, etc. and then use another program for the final filter.
That’s a great one Susan! Do you have any issue with resolution? I remember using it years ago and I couldn’t get it to make my photo a high enough resolution for a larger print. Any tips you can share?
The flower looks like a variety of hibiscus (Hibiscus schizopetalus). Hibiscus also makes beautiful red tea.
Hi Kate, your office looks great! The palm is called a palmetto. The flower is Hibiscus schizopetalus.
Thank you Kerry, I thought it might be a Palmetto and the flower a species of hibiscus because of the stamen. :)
I LOVE this. We travel often, and I have many lovely photos that just “aren’t quite right.” I’ve been scared to try photoshop (why???), but you may have convinced me. I truly love your creativity.
Thank you Sharon, give it a try!
The flower is Schizopetalus — An East African species that defies description!
Known also as CHINESE LANTERN, JAPANESE LANTERN, Skeleton Flower.
Love this article!
Thank you so much Jennifer!!
OMG.. Love this idea! I definitely will be trying this out with some photos. Brilliant little tip that you have shared. Also thanks for the great tutorial. It Is nice to have something to following along while trying to implement. Kudo’s on your blog. Great design and style.
Thanks so much Donna!
I would love to know what size frames you used. The grouping looks great. Thank you!
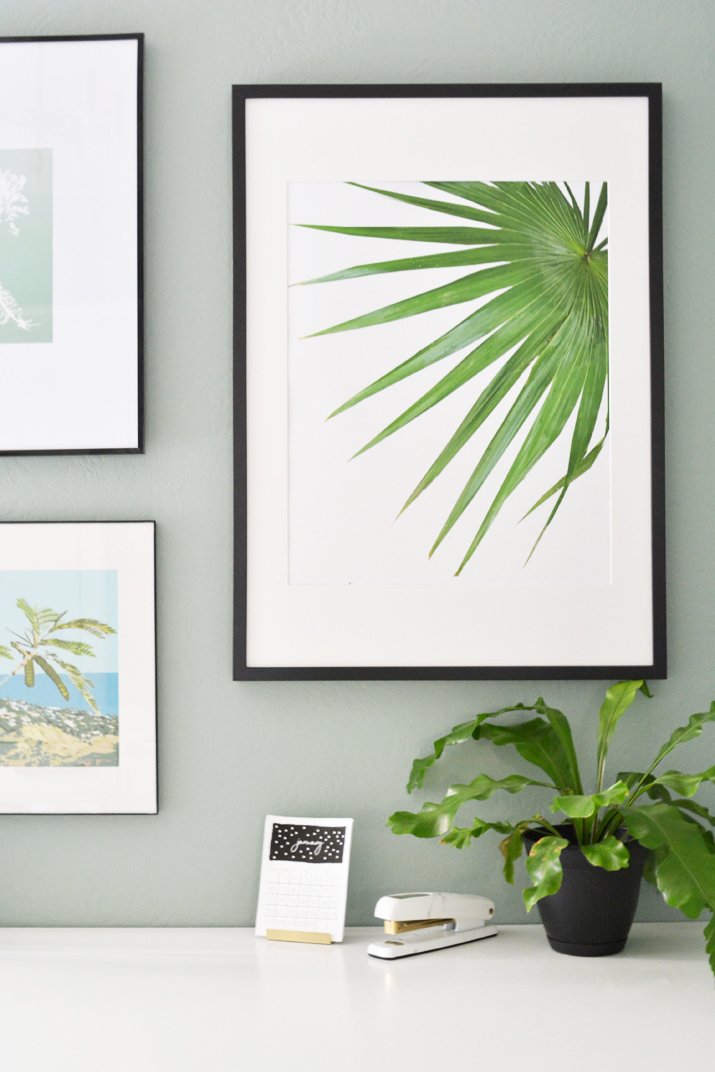
Hi Laura, I used one large frame from IKEA, I think it’s the Ribba, and the smaller two are from Michaels, they both have pencil thin frames but different size mats, I found them in their frame section. :) I like to vary the size of the frames and artwork and mats but keep the frame color consistent. :)
Hi – I love your work! Any chance you will post your PDF’s?
I hadn’t thought of that! Great idea, I’ll update the post with a link to the images :)