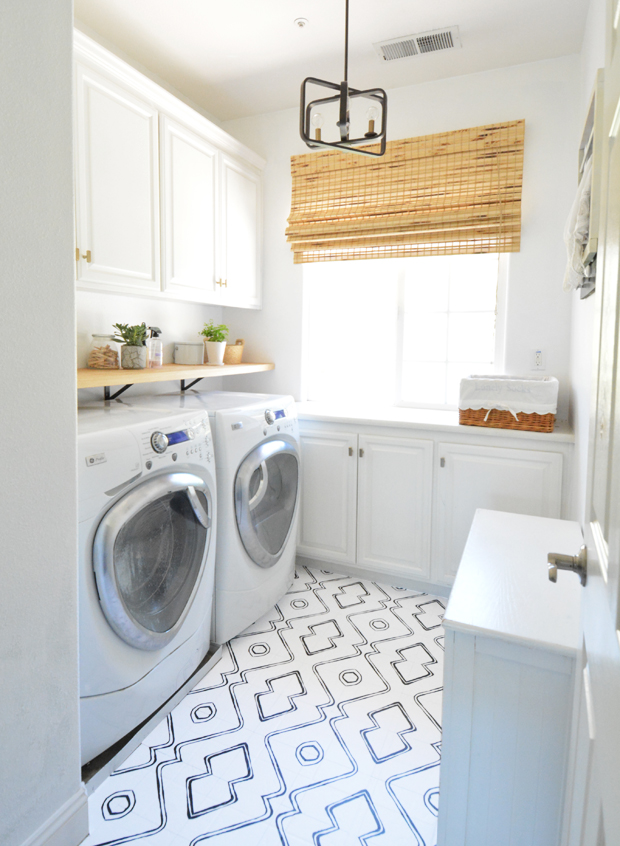
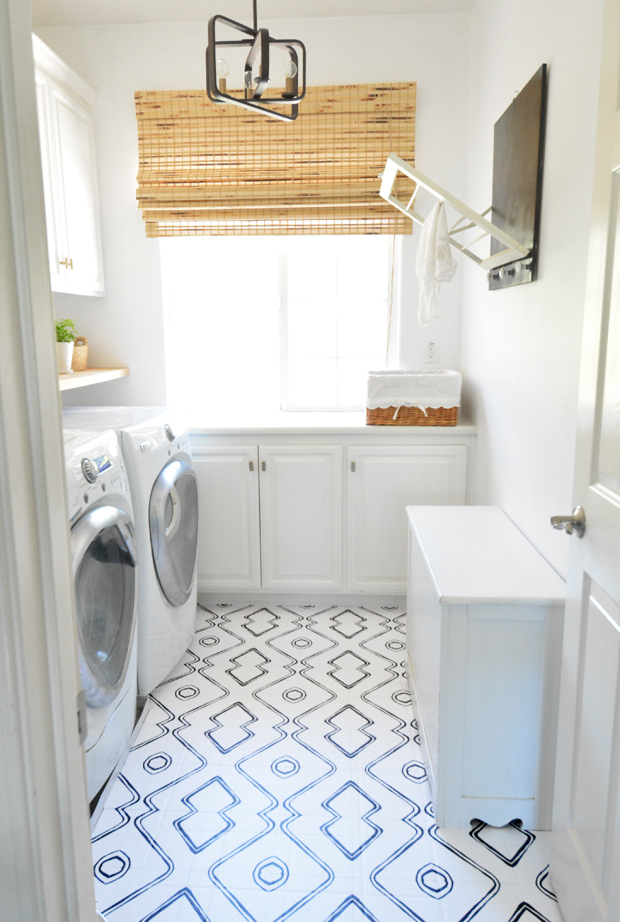
For ages I’ve hated the ugly linoleum floor in my laundry room. I covered it up with a rug for a long time but that solution was slippery so I was living with an ugly floor I hated.
Call me cheap and lazy, but I didn’t want to go through the effort of replacing the flooring in this space since I’d have to move the washing machine and dryer out. Someday I’d like to redo the flooring but for now, I just hid my ugly floor with peel and stick vinyl tiles.
I rounded up a bunch of good looking peel & stick flooring a few months ago and I thought it time I give it a go with a trial project myself. My laundry room was the perfect candidate.

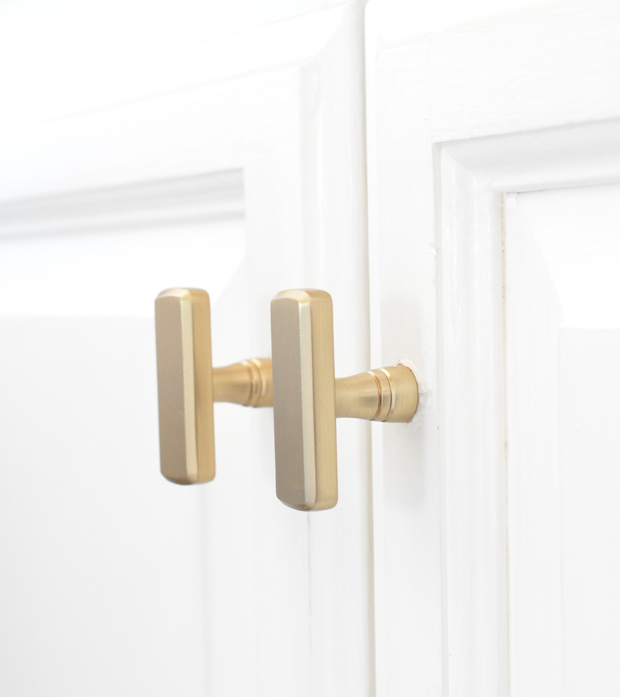
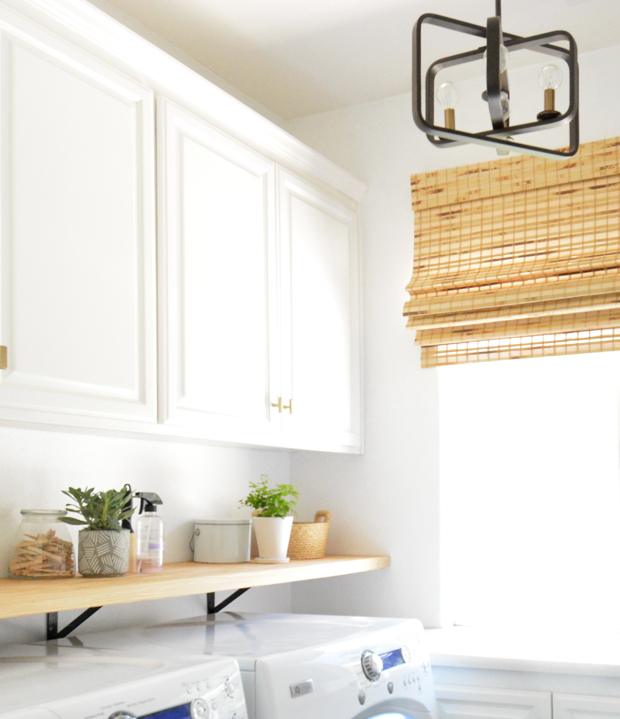
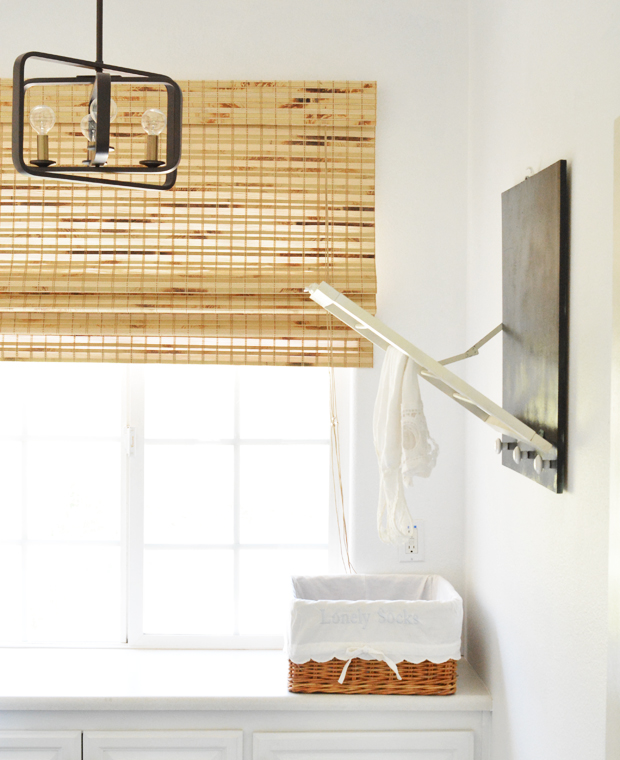
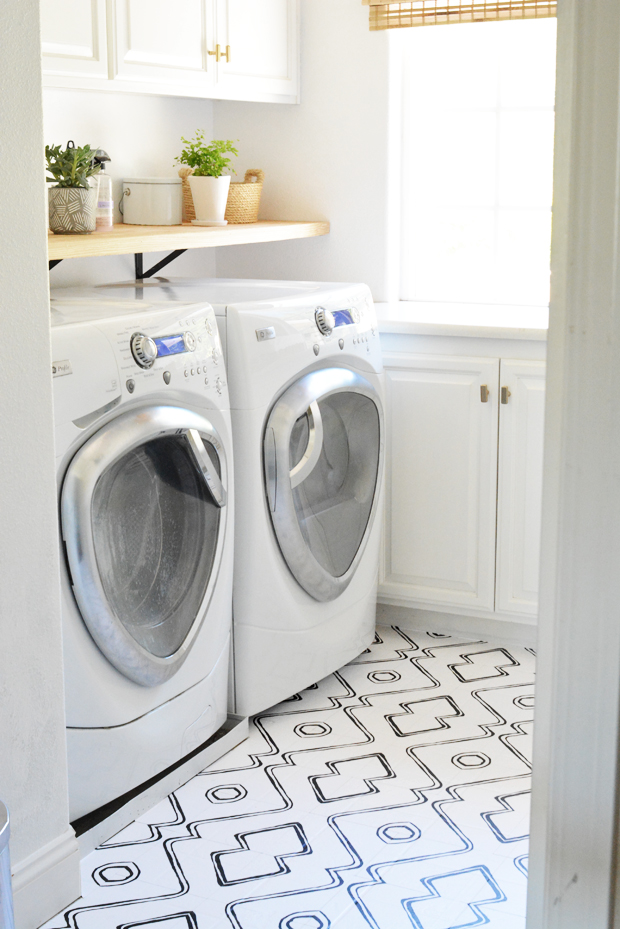
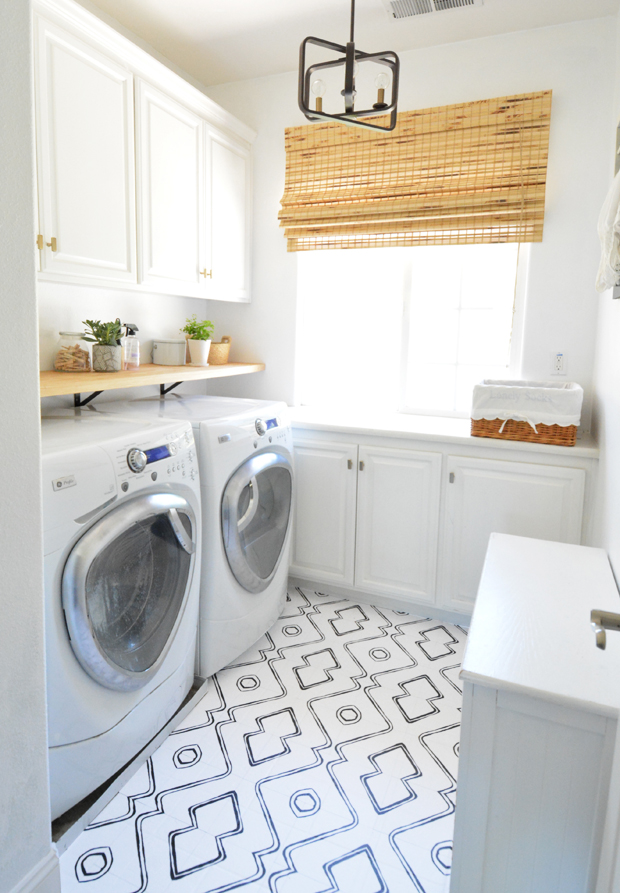
I’ll show you how easy it was to install, but first a quick tour of the laundry room refresh. Eight years ago I painted the cabinets white, and the paint job has held up perfectly so no need to make any changes there. I did update the old nickel knobs with the honey bronze Kingsbridge pulls I used in this kitchen renovation.
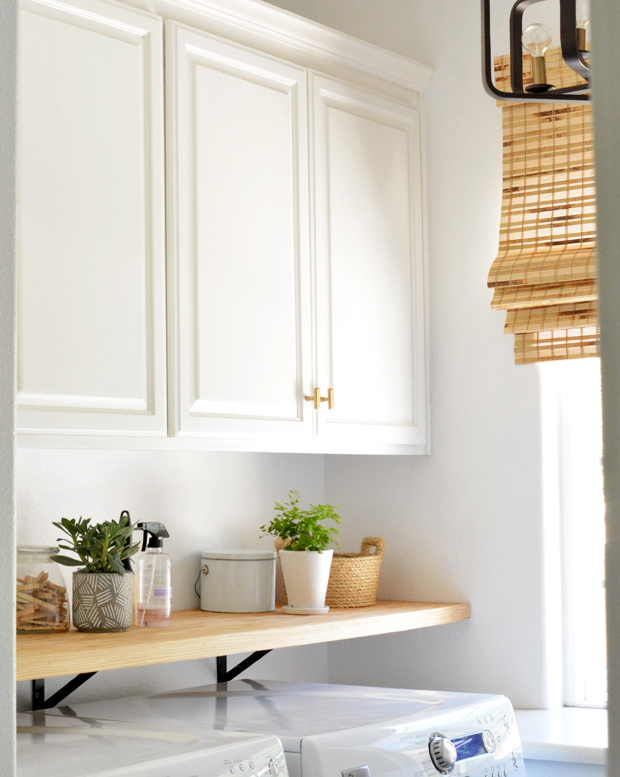
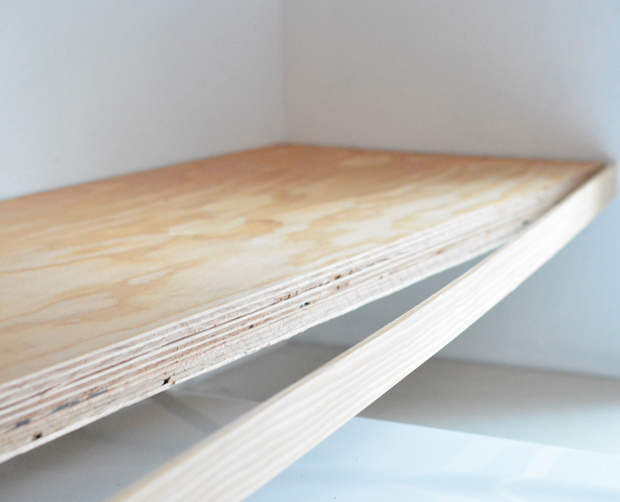
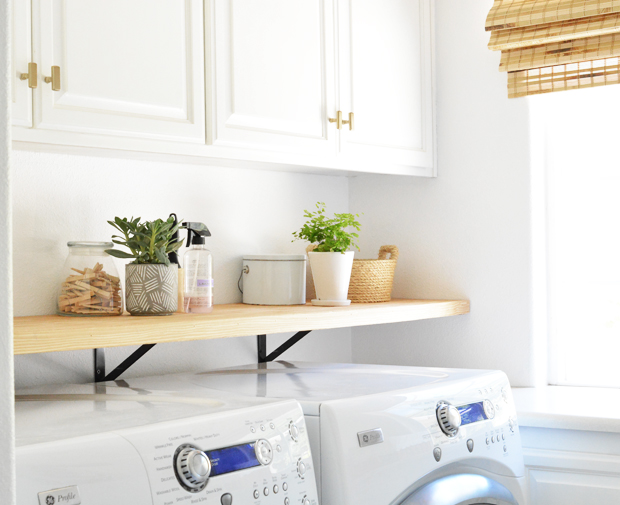
I also replaced the old painted (and much less sturdy) shelf that used to live in here with a thicker wood one and supported it with really strong yet inexpensive black L brackets I found online.
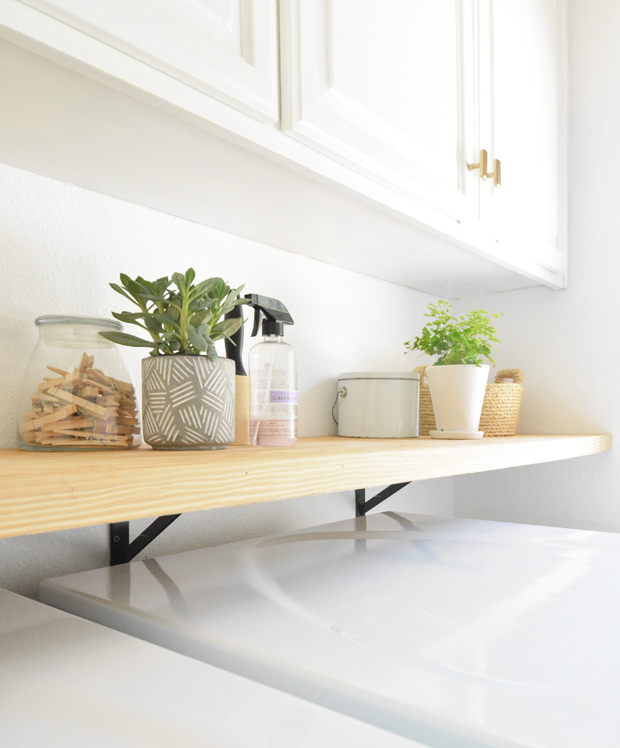
To make the shelf I bought a ½” sheet of plywood (the more expensive kind with a smooth finish) and had it cut at Lowe’s to the length and width of the wall. I coated the top with clear Polyurethane and covered the edge with a piece of lattice trim, also from Lowe’s.
Instead of staining it, I kept the shelf’s finish a natural hue to play off paler tones in the the bamboo window shade.
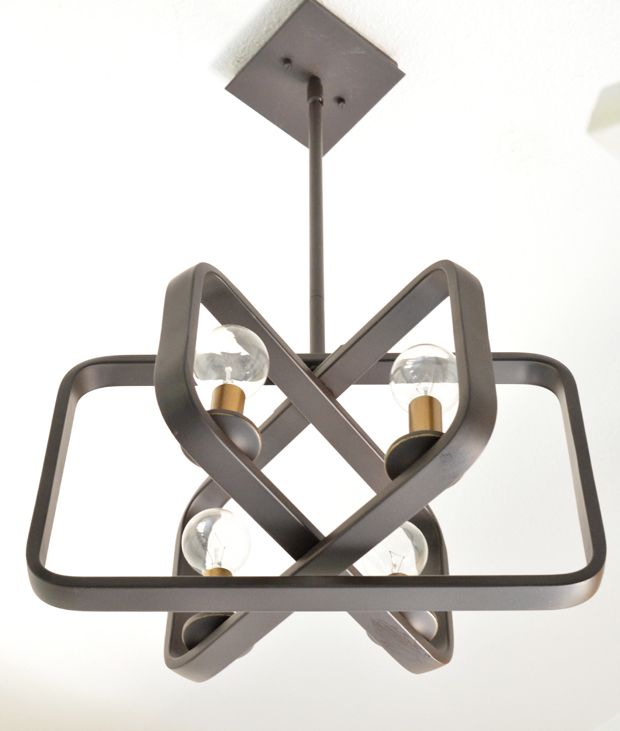
I love the new light fixture’s unique shape and its brass and black finish. I linked to this fixture and other similar black pendant lighting earlier this year.
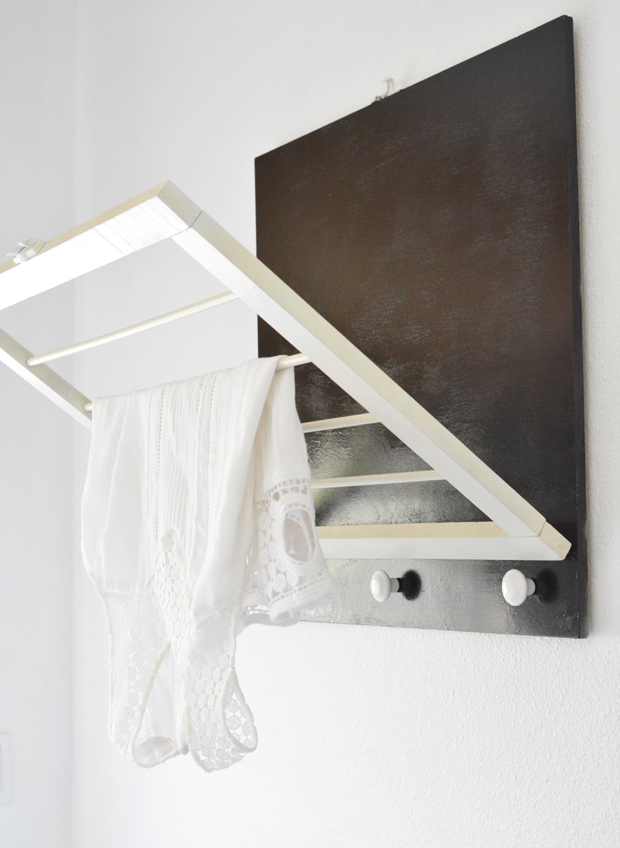
My DIY drying rack that I built nine years ago is so functional and such a great asset to this space. I changed the old sea green base with black spray paint to coordinate with the new black & white palette. That drying rack is still one of my favorite DIY projects. :)
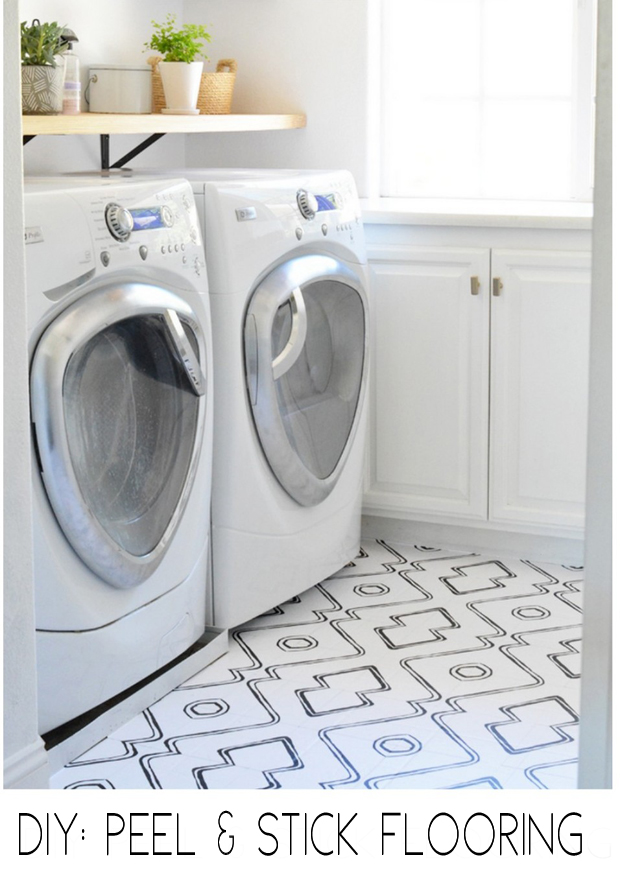
The space looks and feels a lot fresher, much of it due to the new peel & stick flooring.
Installing it was incredibly easy, all you need is an even and super clean floor. The peel & stick tiles are thin, like a decal, so they will show any debris underneath. Be sure to start with clean floors!
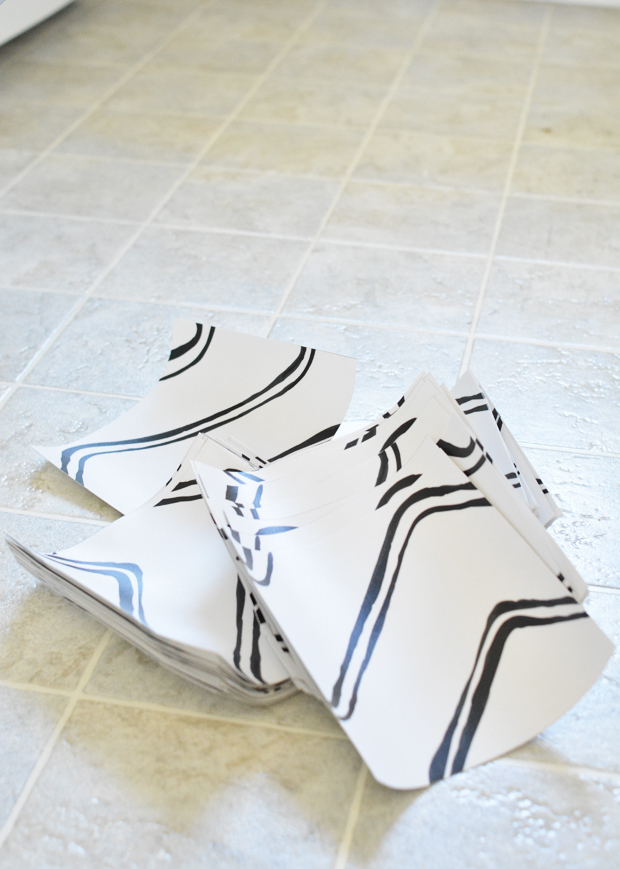
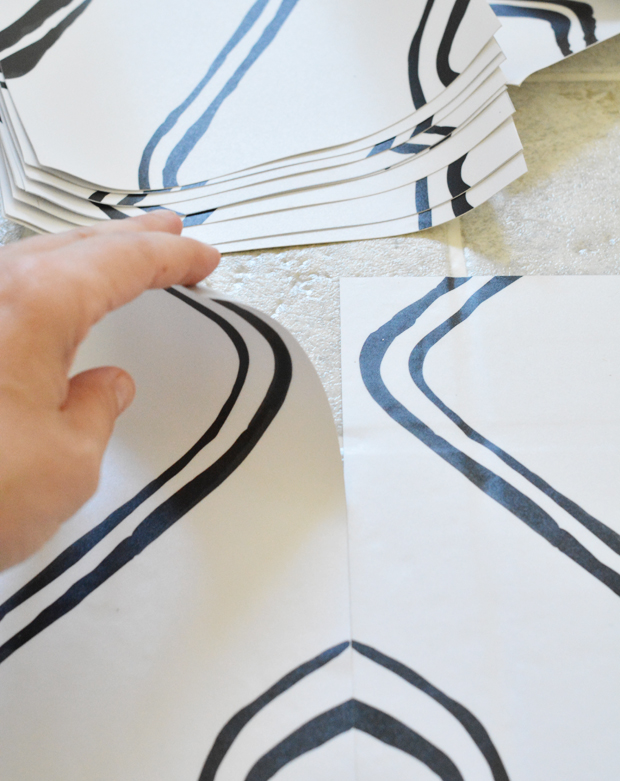
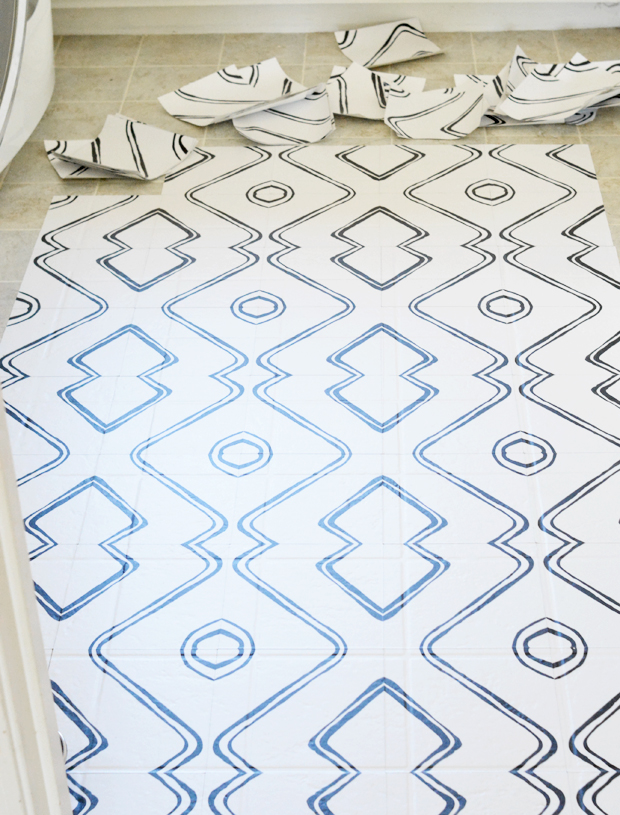
Next gather your tiles, figure out the pattern, and decide where you’ll begin. I figured out how I wanted the pattern to look then started at the doorway, working row by row.
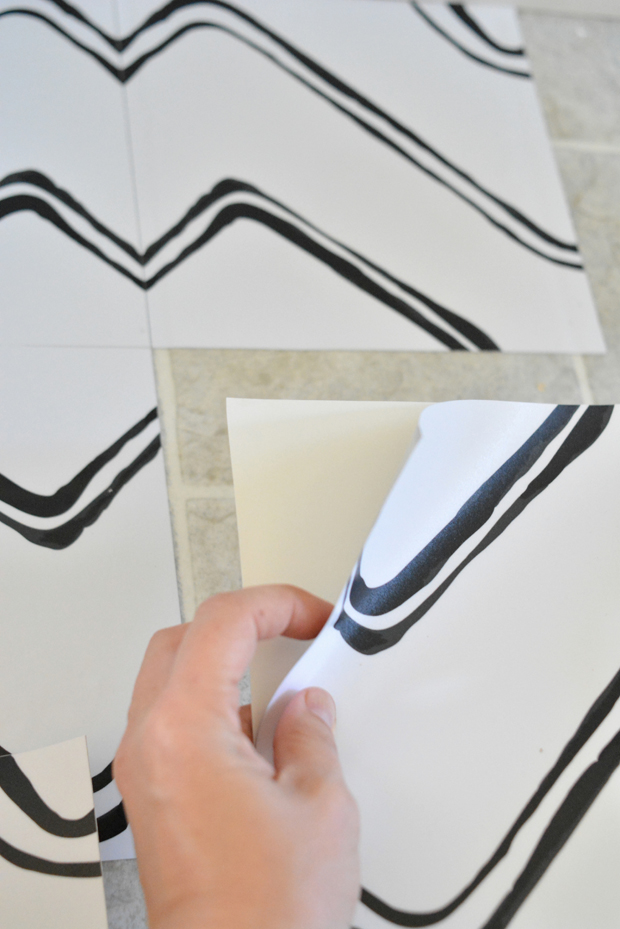
What I really like about this solution is how forgiving the adhesive is. You can pick up each tile are reapply it a few times to make sure the pattern is straight and it will still retain a good stick when you get it right.
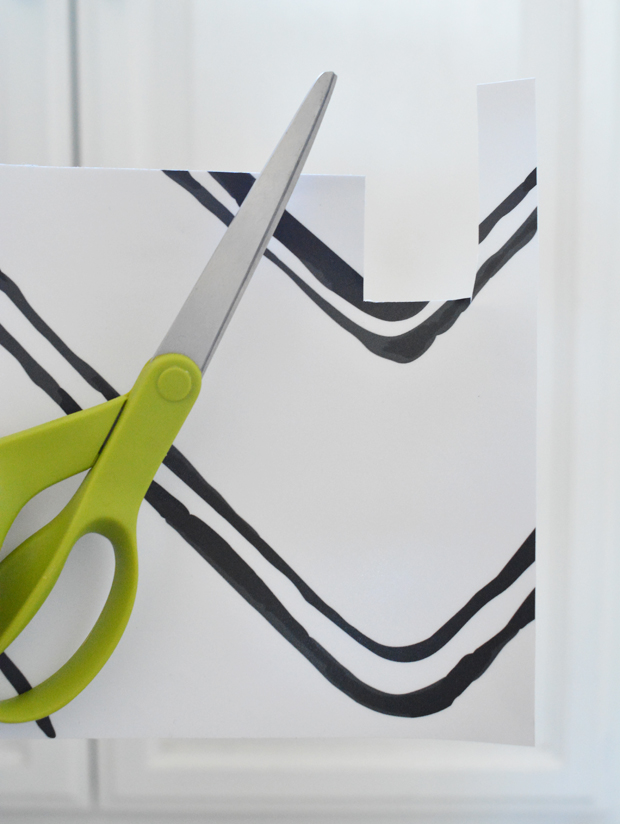
Cut the tiles or notch them wherever necessary with simple household scissors.
It’s hard to believe but this larger floor pattern is made of just two different printed tiles rotated 180 degrees as you install them. I thought at first it was four different prints but it’s only two!
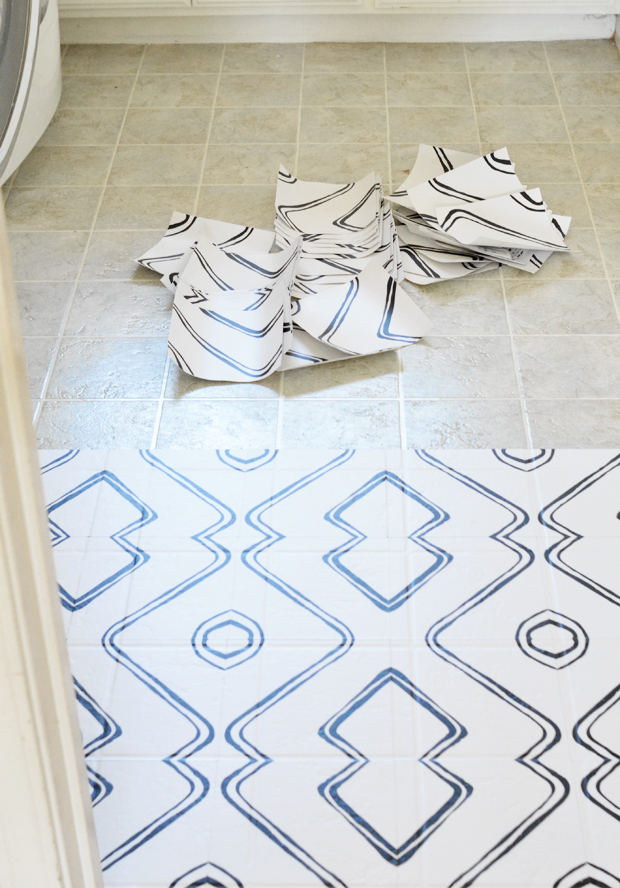
The whole project took about two hours, not bad!
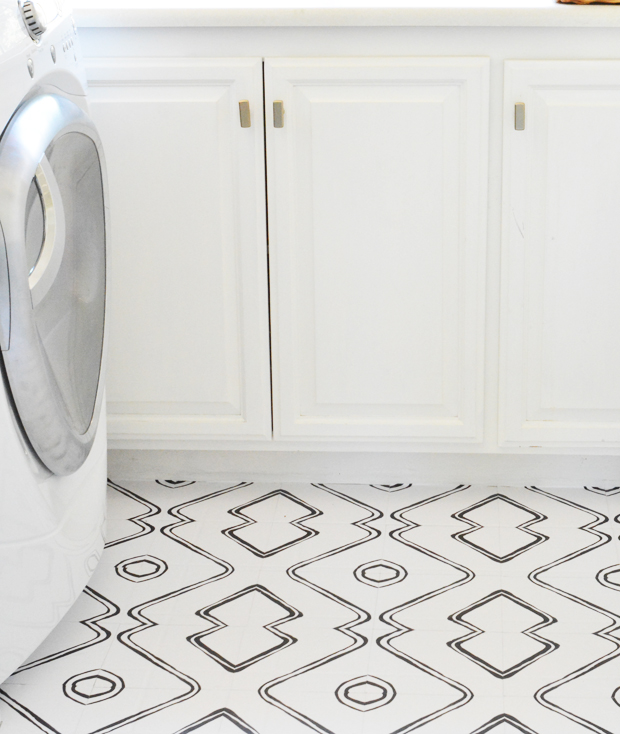
Can you see the seams between the vinyl tiles? Yes up close you can, but not so much in these pictures. They don’t bother me though since it’s a huge improvement on what lies beneath.
How do they feel? Like you’re walking one great big thick vinyl sticker (because you are).
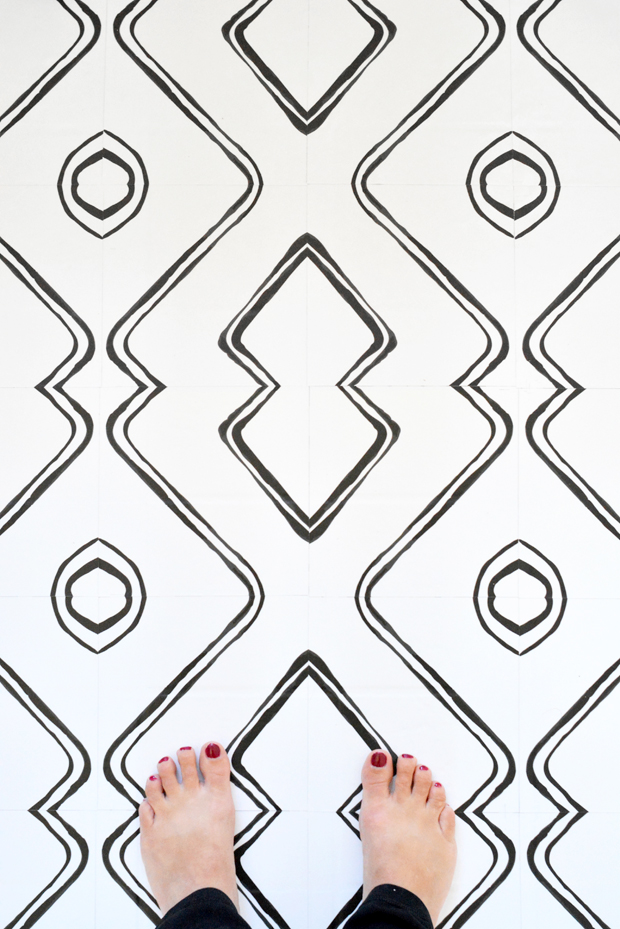
It’s not a permanent solution, just one I hope lasts a year or two. I love the black and white geometric pattern, don’t you? This Linear Pattern is from Bleucoin on Etsy, I chose the 8×8″ size in the matte finish. Find dozens more patterns in their shop!
I have no idea how well it will hold up over time, but I’ll report back in a few months with an update on how the floor is doing! **** SEE UPDATE BELOW
JUNE 2019 UPDATE: It’s been a year since I installed this flooring and it’s still looking good! I’ve had to replace only three of the tiles when the corners peeled back and they lost their stickiness in those spots Other than that, I’m very pleased with this project one year later!! I recommend purchasing a few extra tiles to keep around when the project is done, just in case you experience the same and need to replace a few down the road. :)
For more peel & stick vinyl patterns, be sure to check out this post on other patterns available for peel & stick flooring projects.
.


What a pretty update!
I painted our ugly vinyl bathroom floor with porch paint a few years ago. The wide stripes of gray and white camouflage the seams in the old floor. I can scrub it all I want. Someday I’ll update it permanently, but this works for now, and it feels fine underfoot.
Dear Kate,
It looks very nice what you managed to do in your bathroom. It’s an idea at hand and I hope it will last with time. You chose a very interesting model, black and white.
I love you warmly and I wish you a beautiful summer, Mia
That looks great! I have looked into using those to cover my laundry room floor but was concerned about the seams on the previous floor showing through the decal. I can see that it shows in your floor? Is it really pronounced in person? Does it bother you? Thanks.
You can definitely see it when the light shines on it, but it doesn’t bother me. :)
This is a great DIY update! Your laundry room looks so fresh and bright now. Thanks for the tip on plywood/lattice shelving, too – I had been thinking of something like that for built in book cases but hadn’t been sure exactly how to execute it.
Love your laundry room. I have been thinking of using butcher block but I love the look of your shelf. Where did you get your bamboo blinds?
The woven bamboo shades are Levolor from Lowes, they cut them to fit for your window, inside or outside mount.:)
I’m so obsessed with the floor! I can’t even contain my excitement ;)
You are so creative. The shelf, the floor…all of it. Looks great!
So strange, I know I left a comment yesterday, but it didn’t show up! Anyway, I love that tile and have looked into quite a few of the stick on tiles, but I’ve always been concerned about the existing grout lines showing through. I notice that it does that on your floor. Is it very noticable in person? If so, does it bother you? Just wanting more clarification before I do that project. Thanks.
What is under your washer (or is that your dryer)? I am wondering if it helps absorb noise or movement when your washer is in the spin cycle!
I’m sure it’s a tray to catch water in the event of a leak.
Brilliant! I wonder if these would work in my bathroom with people dripping water everywhere? My bathroom is about the size of your laundry. I’m going to see. I love the black and white.
Clever idea to change the look and style of a laundry. People often believe they need to go to extremes to perform an expensive renovation to change the appearance and feel of a room like this. But you have proven otherwise.