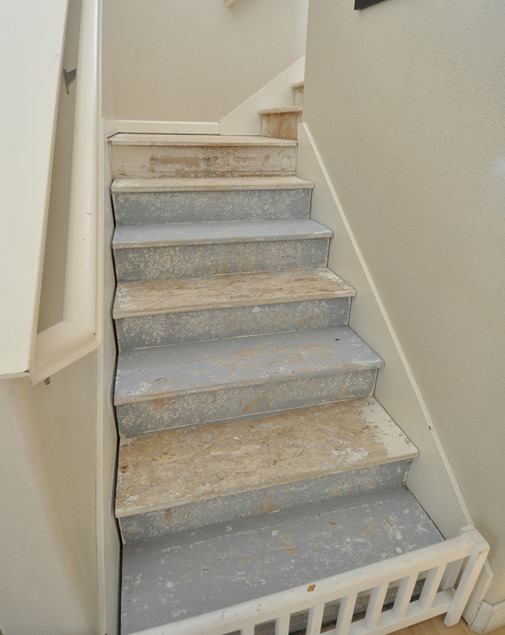
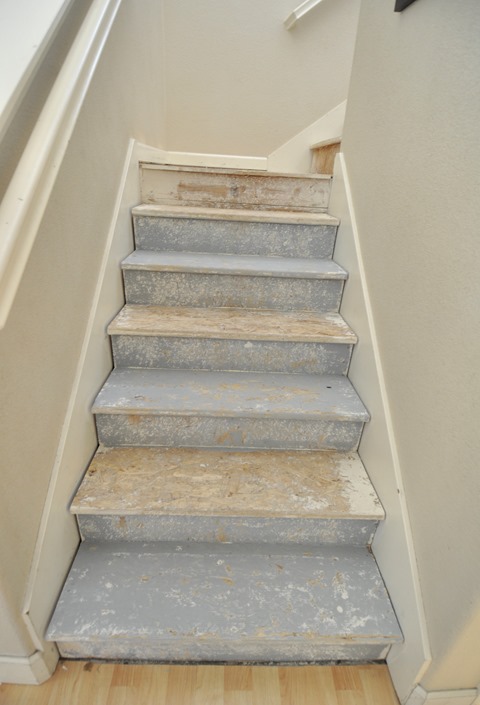
I have a friend named Kara with a beautiful family. Several months ago Kara had a very dingy carpeted staircase so she decided to rip that carpet off the stairs because she felt it was better to live with unfinished particle board risers and treads than to stare at that dirty carpet for one more day. I know just how she felt, I’ve been there too.
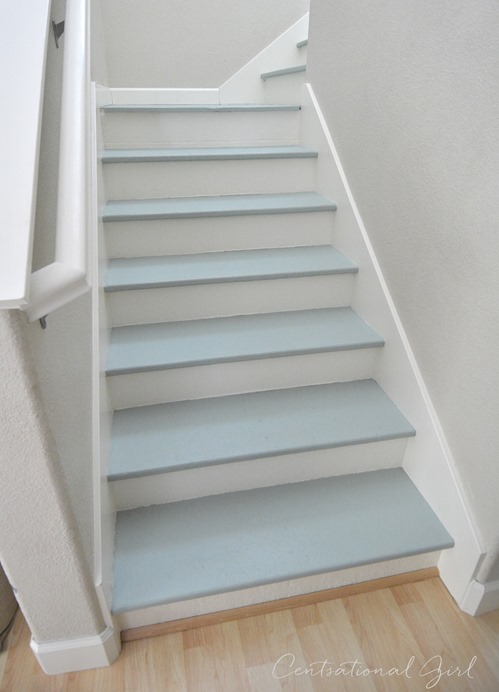
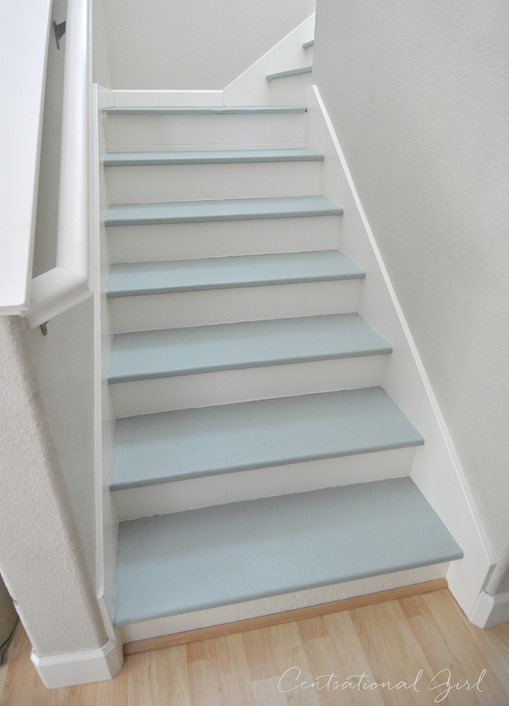
Instead of replacing the treads with stained wood, Kara decided to tackle this staircase in a more colorful and economical way. She took a ‘work with what ya got’ approach and painted the risers white and the treads a pretty shade of blue/green (Glidden’s ‘Seaside Village’) and filled the gaps where the carpet once wrapped around with a very clever idea (details below).
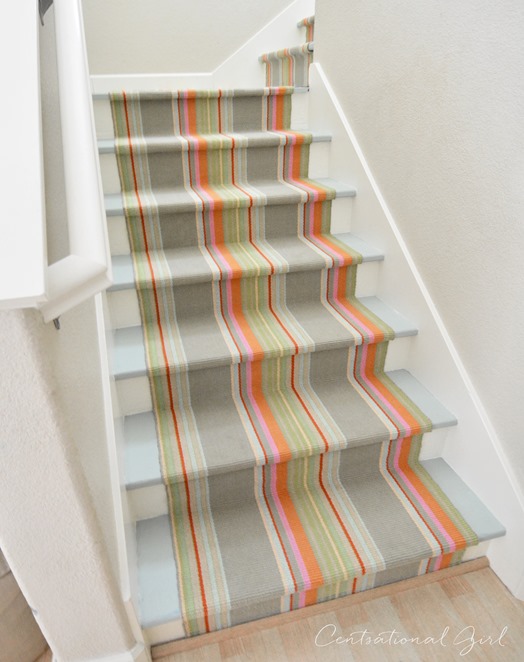
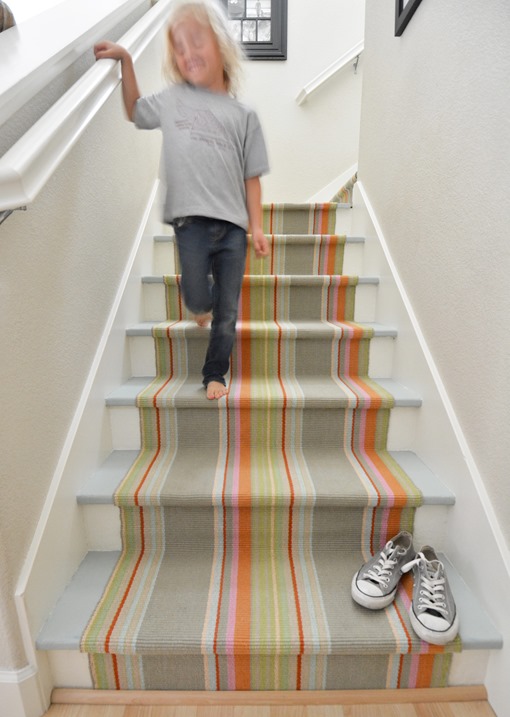
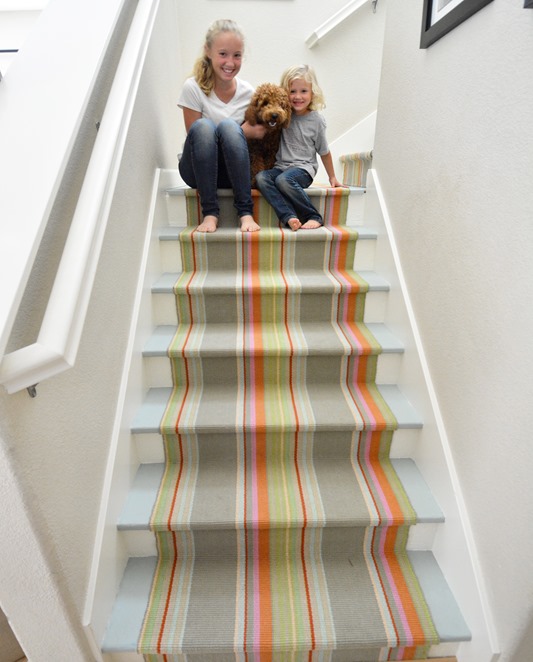
The paint medley is lovely don’t you agree? Kara decided to make her staircase softer underfoot and give it more personality by adding striped Dash & Albert runners. I do declare this is the happiest staircase ever!
I documented the process along the way, here’s the step by step on how Kara transformed her staircase from blah to beautiful.
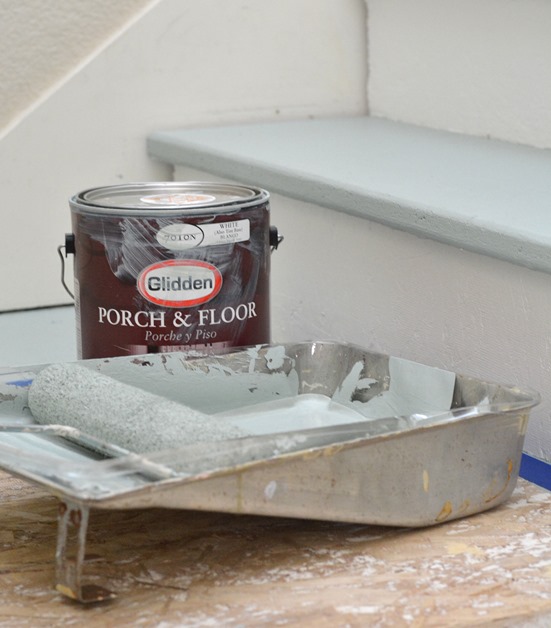
First, she was smart to use the right product, she painted the risers and treads with Glidden’s durable Porch and Floor formula, it has a built in primer.
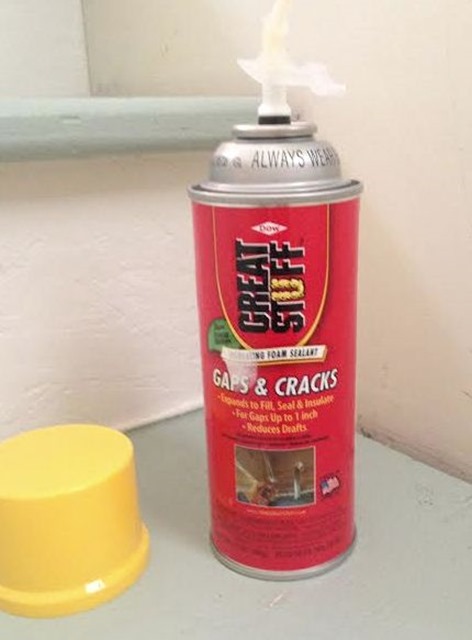
The stairs still had a gap on both sides of the risers and treads where the carpet used to be so I suggested trimming the sides with molding to cover the gaps but it was problematic given the somewhat rounded edge of the treads. Then Kara had a brilliant idea. She suggested trying foam gap filler, the kind used to insulate openings up to 1” from drafts. So smart !! It worked !!
Kara filled in the gaps up and down the sides of the staircase with the foam product, wiped it down to just below the top since it dries solid. Kara then filled in the top of the foam sealant (after it was dry) with sandable paintable spackle.
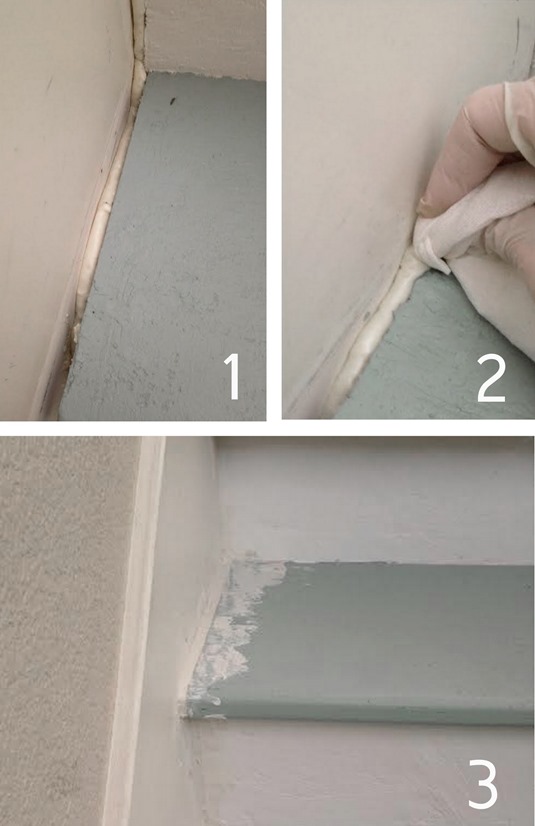
Once that was dry she touched up the paint and it looked like this with all the gaps filled in, nice! Far away it looks really great just painted but up close you can tell from the texture that it’s particle board, not smooth wood so the decision to add a runner dressed up the stairs with color and covered the imperfections.
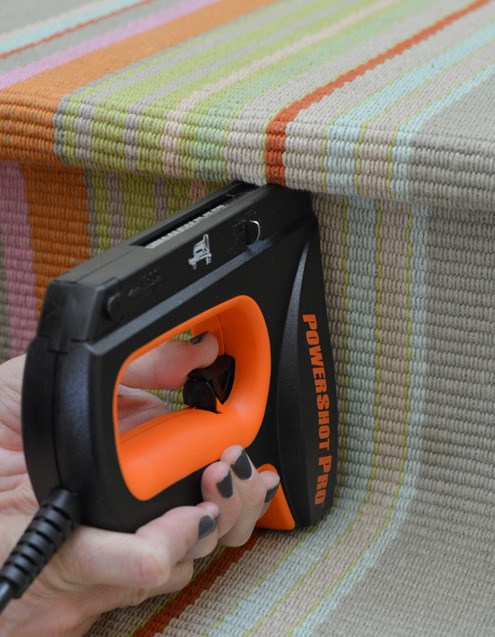
I helped Kara install the runner last week and we followed Annie’s very helpful tutorial for the wrap around technique. We used my Powershot Pro stapler to attach it to the risers and treads, a few times the tool didn’t get the staples in all the way so in that circumstance we pulled the staple out with a flat head screwdriver and tried again and it worked just fine to secure the runner in place.
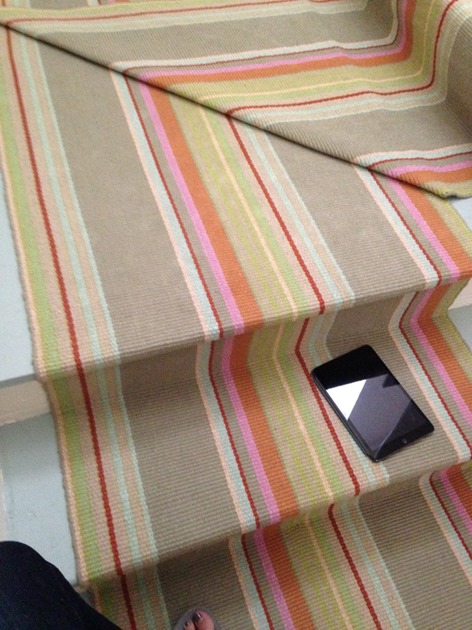
This staircase turns twice on its way up and there are different ways to install a runner around the corners on a staircase, this image below is one of them.
We didn’t have enough material even with the three 12’ runners we had and were concerned about bulk with overlap so opted for a ‘straight up’ solution taking the runner up to the top of the landing similar to this one and ending it there.
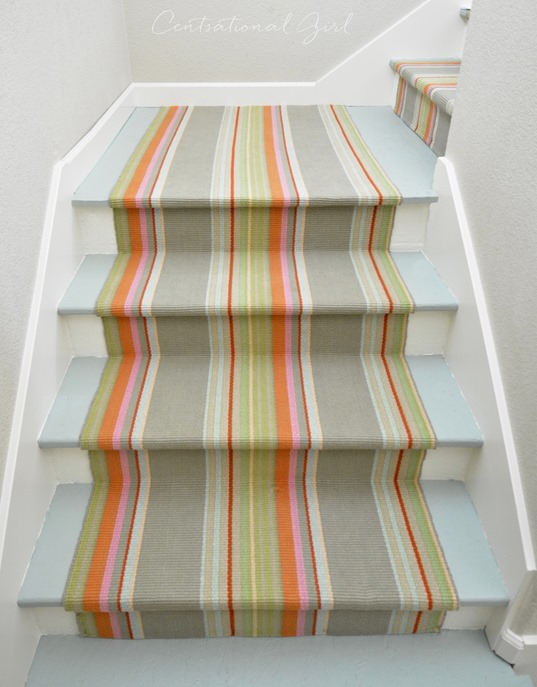
Cove molding covers the edge of the runner at the bottom of the stairs; at the top, the runner meets the upstairs carpet at the top of the riser (not shown, forgot to take a pic!).
A reminder of the stairs before the DIY magic …
Now it is one colorful happy staircase in the home of a family of four sweet kids and one adorable golden doodle named Scarlett.
Fantastic job Kara!
Find more inspiring staircases on my Pinterest board dedicated to the topic! .
…

Wow! The happiest staircase ever is right! I love it!
Wow, what a transformation! Love the painted stairs combined with the Dash and Albert runner. I hope to install a D&A runner on my stairs soon, thanks for the link to the tutorial!
That’s an amazing DIY! Love the paint color and the runner.
http://jax-and-jewels.blogspot.com
That is so pretty! It looks be beachy and bright. I see a project like this in my future.
It’s perfect!! Love how economical it is too!!
That looks great! I’ve been wanting to try something similar and now that I’ve seen this I’m going for it!
Kate, I recently did this same project for under $75 using Ikea rugs. You can check out the results here, http://providenthomedesign.com/2014/09/09/stair-runner-reaveal-tutorial/. I love how much it has brightened up our staircase. I love the soft blue paint Kara used, it looks fabulous! Great team work! :-)
Great colors! I love the beachy feel of that runner!
xo Rachel
What a transformation! I wish I had this inspiration when I was re-doing my stairs. I’m assuming that the paint has gone on thick enough to hide any indication that the steps are particle board….
Looks fabulous! LOVE the runner!!
M
looks amazing !
What is the color of the blue? It’s beautiful.
This is flipping amazing!!! I will probably wind up doing this in my home. Thanks so much!!
I absolutely love this! I’ve been fantasizing (yes, these are the kinds of things I fantasize about, haha) about doing something like this to my staircase and this is such a happy pretty solution! I too have wondered about what to do with that gap, when I lift the carpet on our stairs, we have that too. I’m so glad you shared Kara’s project, great job!
Amazing and beautiful! Glad you did the straight end on the landing, a fold looked like a terrible trip hazard….
Great job.
Only question. What happens when the rugs get dirty?
Nancy
You can spot clean a cotton rug like this, or remove it and flip it over since it’s reversible. We had this discussion too Nancy and figured out it’s not that hard since the staples pop out with a flat head screwdriver. It might take an hour to remove it but it can be done. Also consider indoor/outdoor runners that can be hosed off!
Perfect timing!! I was just talking to my husband this weekend about taking this on as my next project. I was going to pull all of my OSB treads up, but might rethink it if they are in good semi smooth condition. Thanks for the great tutorial.
What a great project!
I LOVE, LOVE that runner! It sure is bright and colorful, perfect for little ones! I might just try this at home.
I wouldn’t recommend wiping that Great Stuff unless it’s specifically stated that you can or you’re doing it on a surface that can easily be sanded. It gets everywhere and can make a HUGE mess (especially if it’s getting all over your newly installed windows that you can’t sand to remove the goop). It dries into a foam-like consistency that you can cut – a better way to go.
Thanks Jenoside, I haven’t used that stuff myself so if that’s the nature of how it works, I appreciate you sharing… I’ll confirm with Kara!
Was there a reason the gap-filling wasn’t done before painting?
Nope Marianne, you can certainly do it first!
Happy indeed! Beautiful work!
What a great idea and much prettier than plain carpet!
Your projects get better and better! enjoy your posts. Thanks
So cute! I was considering a Dash and Albert rug for me stairs as well. My question as always been how do you start at the top? Do you have any photos of the top?
So pretty!
Wow I love it so much! I adore Dash & Albert! Fabulous and inspiring post as usual Kate! x Maria
Hi Kate,
Was there a reason you didn’t use any padding underneath? All the tutorials I’ve been reading used it and I wondered if it was required. Thanks!
Hi Erica, it’s optional IMO – it adds to the comfort level for sure but sometimes (as a friend explained to me) it can bunch up or be seen under if it’s not perfectly cut or gets dislodged. Owner’s preference!
What an amazing transformation! I love the way it brightens things up. I have one question. In the first picture, is that a small sort of baby gate at the bottom of the stairs? It’s adorable, & so much nicer looking than a regualr gate. I’d LOVE to know where she got it, or see a tutorial on how to make my own!
That’s a pet gate Amber they used to use it to keep Scarlett from going upstairs but I’m not sure that’s the case anymore!
We just updated our stairs by removing the carpet and putting on a Dash and Albert striped runner as well! The challenge for us was that our stairs had a “divet” on the edge of the steps for the indent for the runner and that indent was wider than the size of the Dash and Albert runner width. To solve this issue, we bought 5 rugs in the 3 x5 ‘ rectangular shape and had them altered down to be the size of a wider runner. Where to have that done was my challenge… We found a car upholstery repair shop that altered each rug for $30! Where there is a will there is a way! It looks so amazing now and I wish I could show you the before and after!
Amazing solution Jennifer, I’d love to see pictures!!
Shear genius and so unique. Love your posts, Kate.
Rita
wow what a transformation that made! the cloth material looks like it would be nice on bare feet too.
My sister did something similar to her stairs. She had dark wood floors and stained the wood to match then ordered a runner from Home Depot. It totally worked.
Wow! What a great idea. I think they look great. And the fabric played the part very well. Thanks for sharing from 3girls1apple.com
A tip when using great stuff:
1. cover the space you are going to fill with masking tape.
2. fit the nozzle through a little slit you make in the tape, then slowly fill it up.
3. once it’s dries, take off the tape
This is great because it controls where it expands!
{ This obviously wouldn’t have worked here, but I’d thought I share. I use it a lot too:) }
Thanks for the tip Melody!
Well done, great color and wonderful accomplishment.
I am so doing this!! I just started installing a runner over our horrible carpet, and thought about ripping it out first, but was too scared. This has totally given me the courage to do it!! Thank you so much Kate, and Kara, you rock!
Thank you so much for sharing, I love how it turned out! My stairs have been looking dingy for years now & I think I may have to give this a try! No carpet on my stairs, just beat up paint and some old plastic runners. This would do wonders to make our stairs look updated!!! Thank You :)
Thanks for the tutorial. Did you have to cut the runner at all? I’d like to do something similar, but I’ve been afraid that if I cut a woven runner, the whole thing will unravel. Any tips you can give me would be most appreciated!
Yes you do need to cut it Urban Cholita, it will unravel until the next line of weave but then it stops. See the Annie Selke tutorial for more details on cutting and wrapping/turning the cut piece under.
Thanks for sharing how you turned the corners. We’re about to move into our first home, which is a two-story, with carpeted stairs. I’m a little nervous because I don’t know what’s under the carpet. But I would love to do something like that, and this actually kept me up last night, trying to figure out how you turned the corners of the stairs (I had seen this post yesterday and am revisiting it to see if you answered the corner question!). Sorry for the novel.
<3
bethany
I can’t believe that foam stuff worked…that is pure genius! It looks wonderful. I have a train wreck of a staircase in my basement. I may be trying this trick. Thanks!
Great DIY! Indeed, it became a happy staircase. :) Carpets usually look nice but it comes with ‘responsibilities’. I must say that you really did a great job. With the right tools and great ideas, the best transformation can really be made possible. Thanks for sharing!
What a creative mind you must have. That looks so bright and colourful and an inspirational idea to use foam to fill the gaps.
I absolutely love the look of this runner, but am wondering how difficult it would be to clean.
Lovely Color blue….do you happen to know the color? Great project. Can’t wait to tackle it in my own home.
Dash & Albert stair runner. I have been looking into doing dash and albert stair runners on my stairs –I picked ou pattern….but 3 people, 2 carpet guys and one handyman would not install for me, saying they were concerned rug would stretch, and installation would be tricky. Have you heard of anyone who HAS installed being disappointed after use? Do you know of anyone willing to take on project on Long Island, NY? It is out of my realm to attempt.
LOVE the look!
Thx