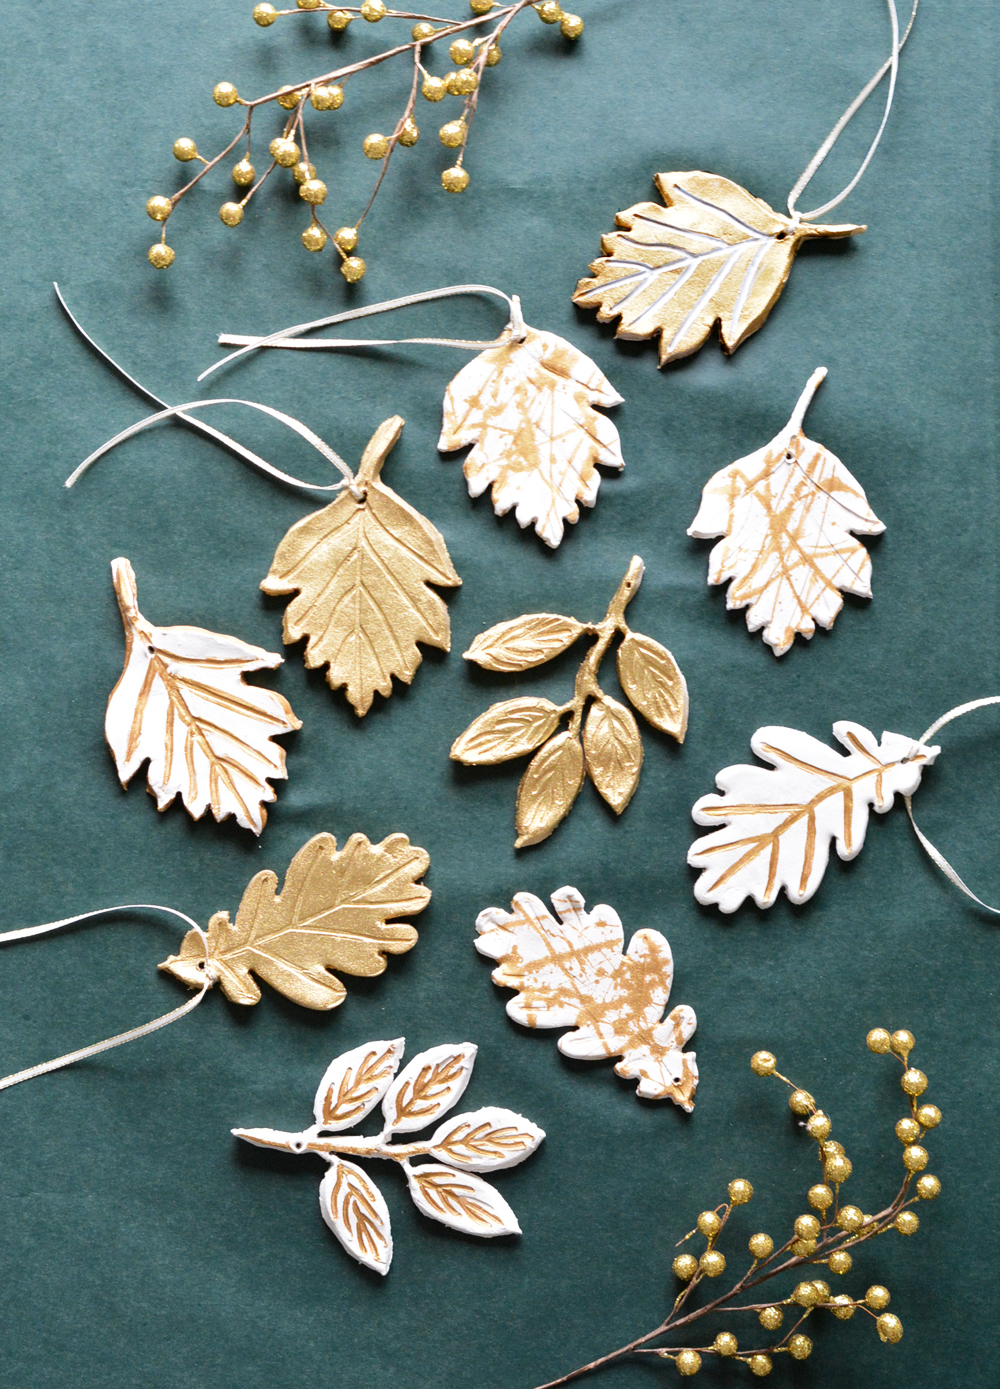
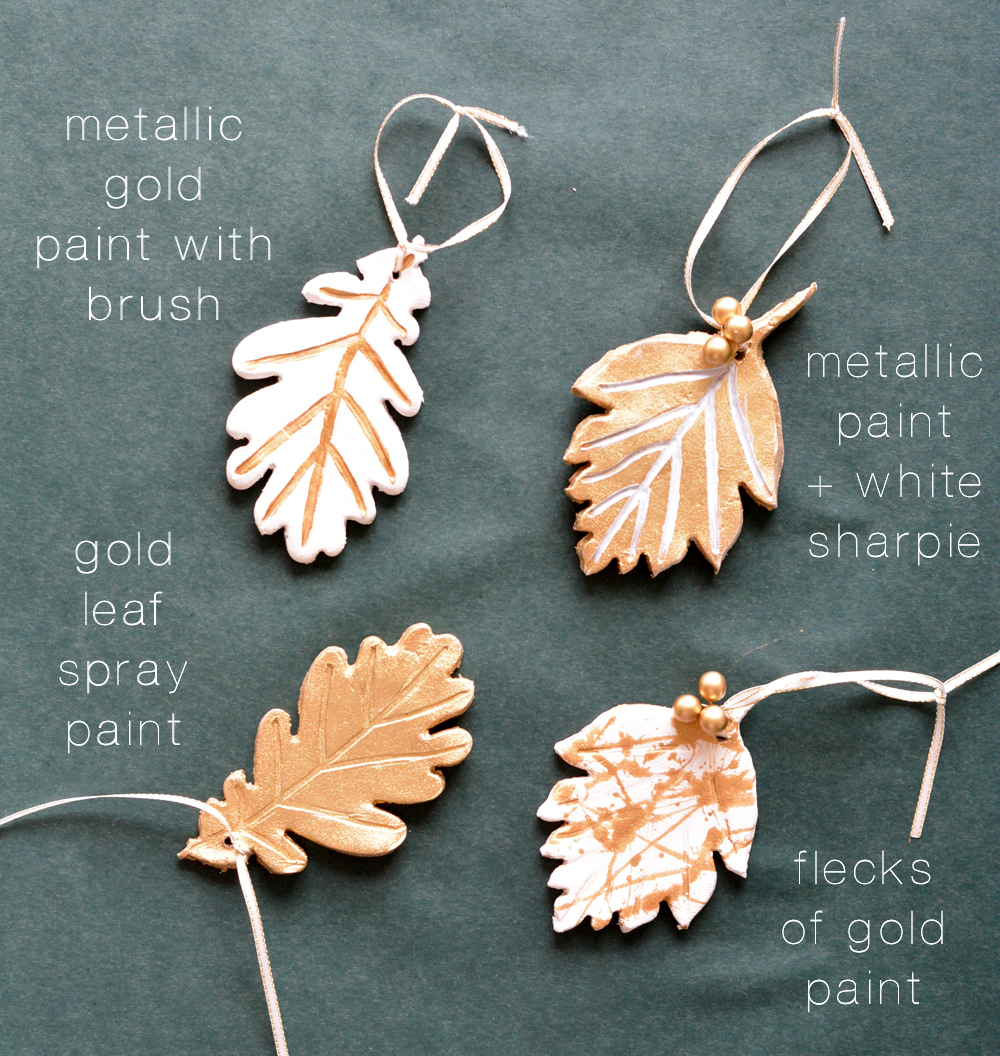
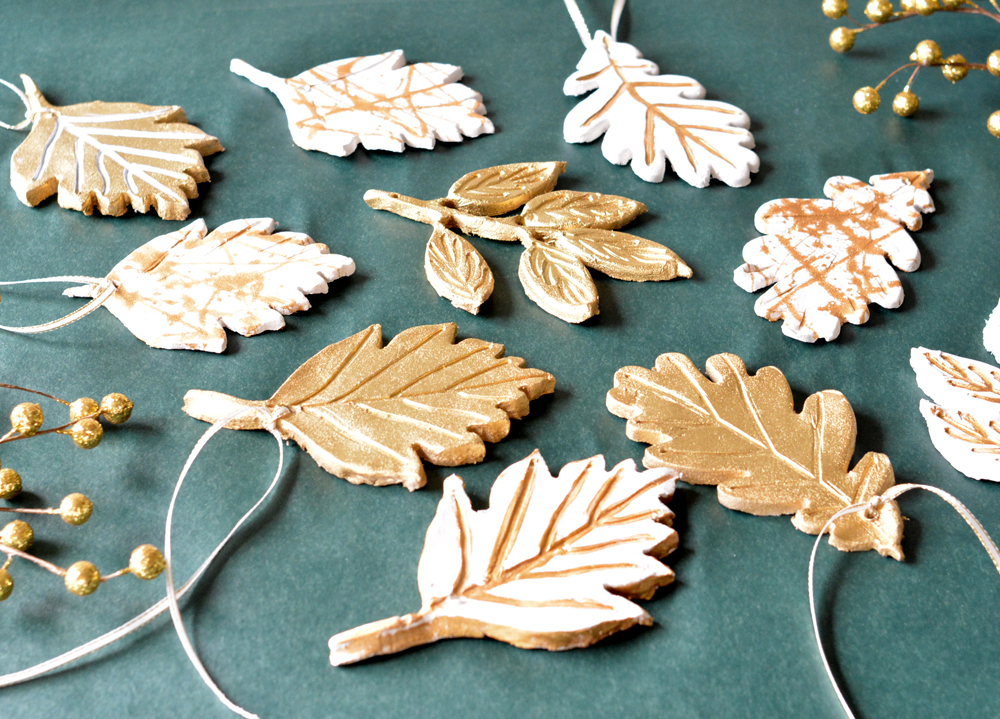
I finished my last creative holiday craft project! I like to play with different materials and tools and this time it was air dry clay. I made these clay leaf ornaments and gift tags and finished them in different styles of paint. I love how they turned out!
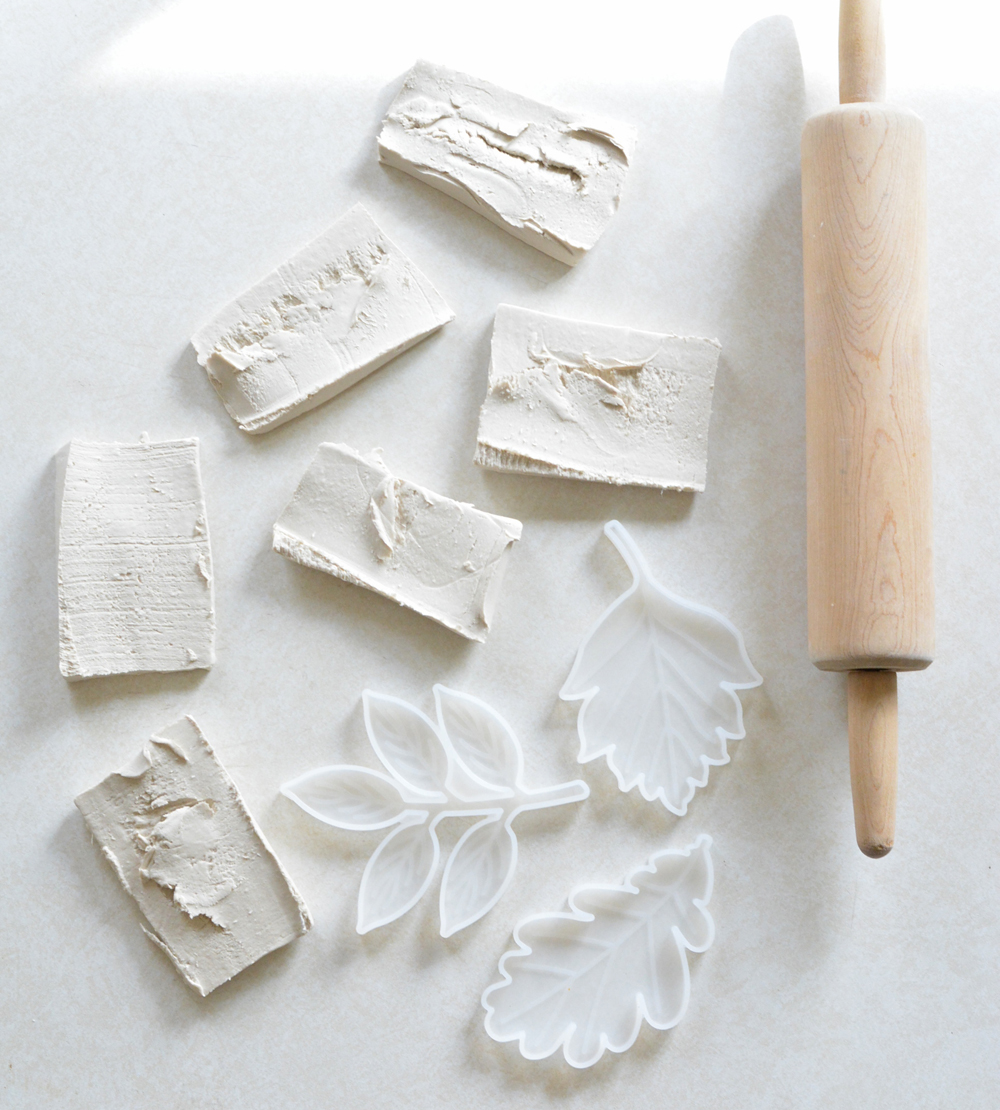
I made them with clay I found at Michaels and silicone leaf molds I bought on Amazon.

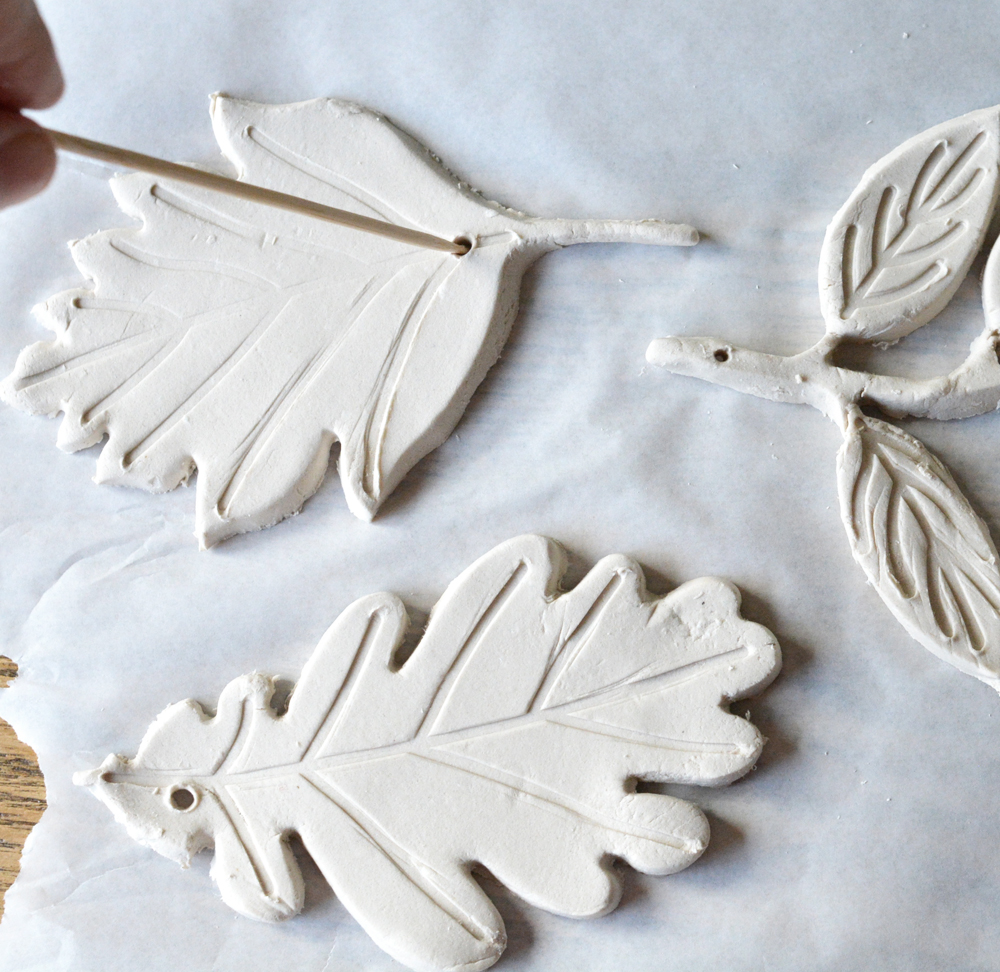
Slice the clay into wedges then roll out the clay with a rolling pin to a size slightly larger than a leaf mold. Press the mold into the clay then flip it over.
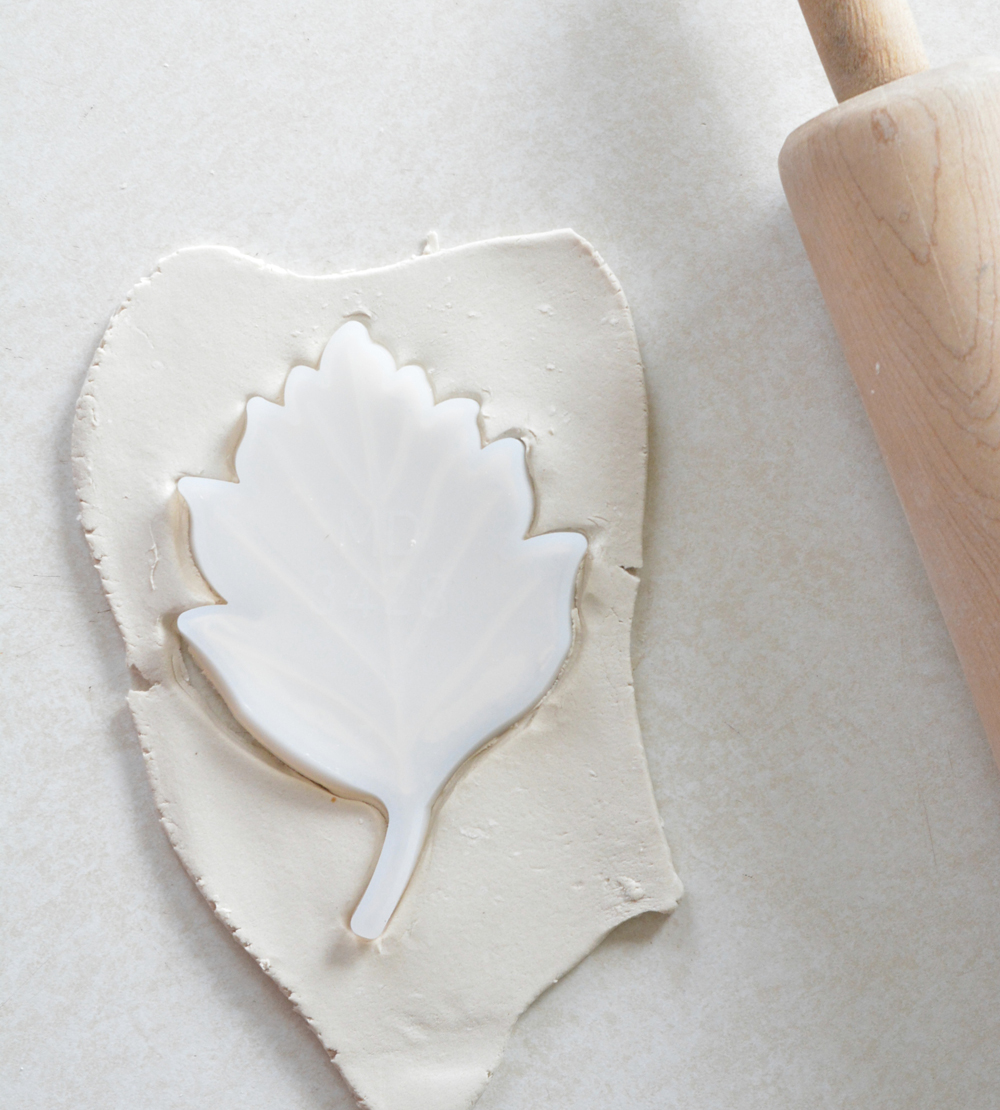
Press the clay into the mold with your fingers working the clay into the grooves of the mold.
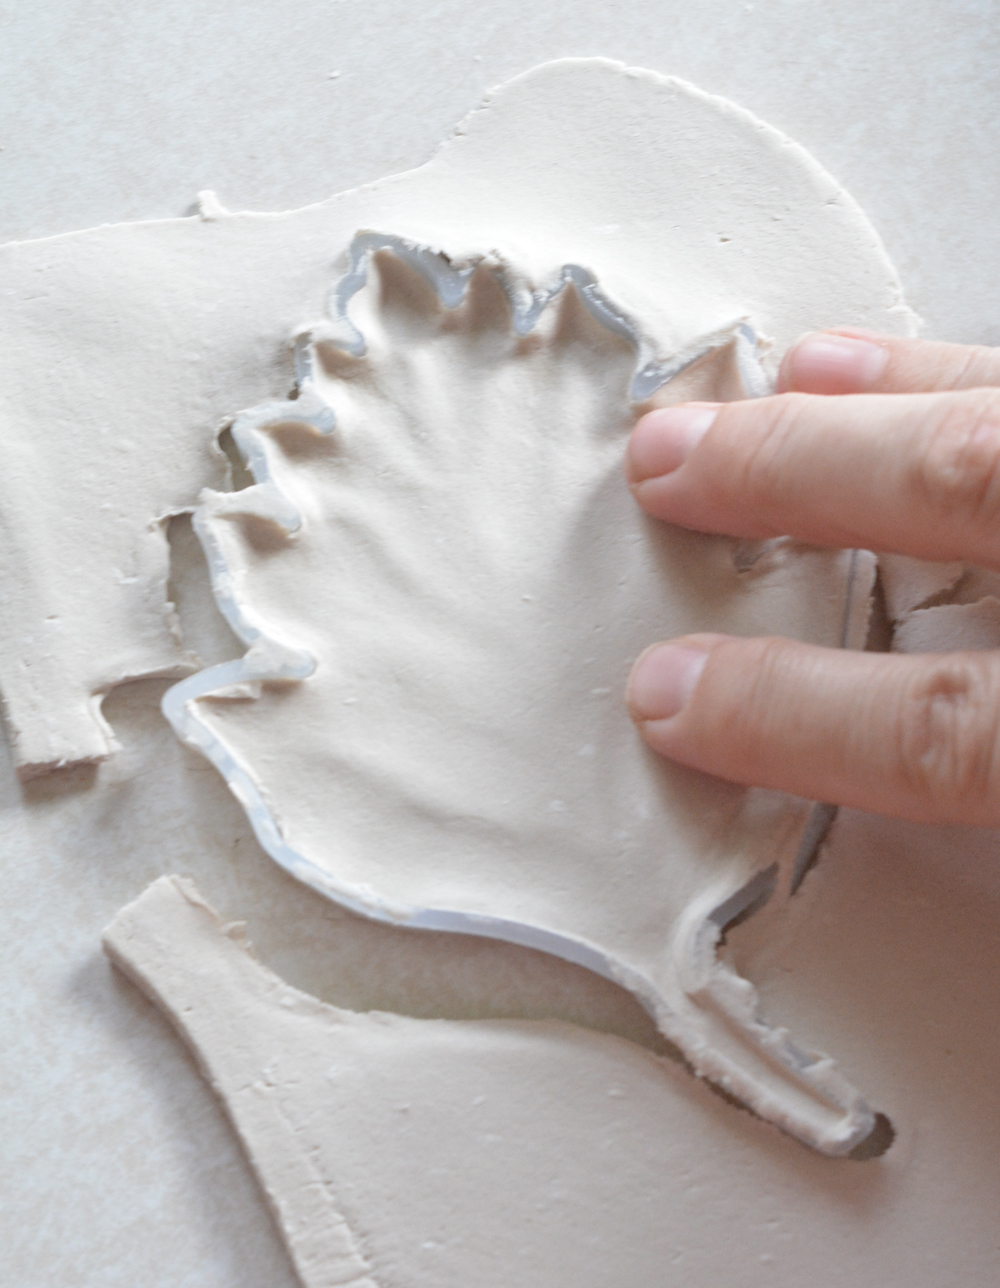
Carefully peel back the silicone mold and remove the clay, then use a skewer or toothpick to create a hole for hanging.
I was able to make 12 clay leaf ornaments with the amount of clay I bought. Allow them to dry on parchment paper in a warm dry place.
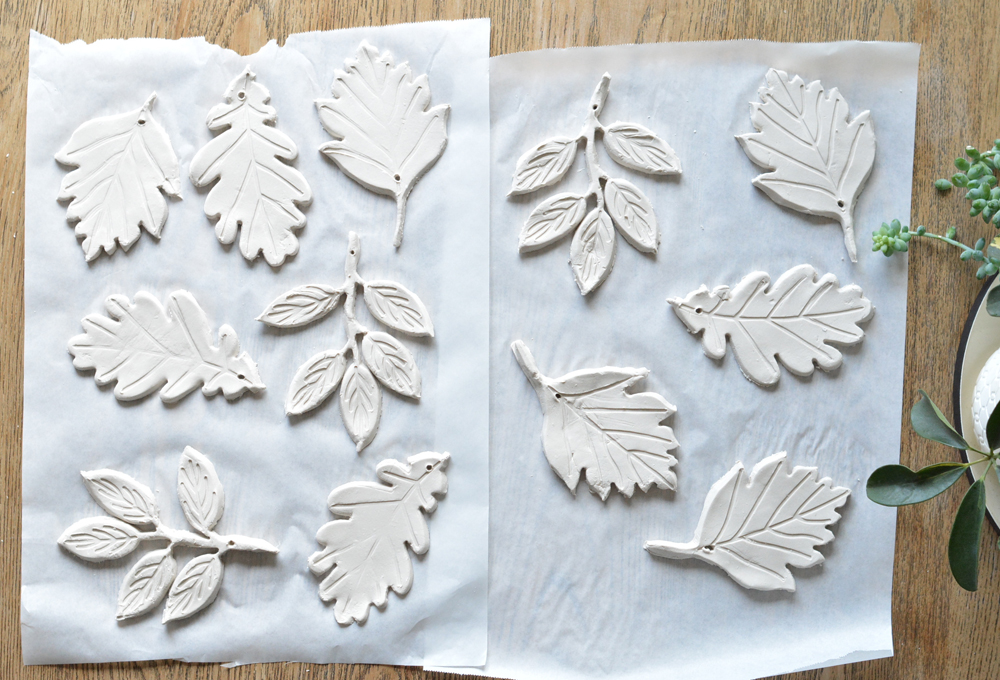
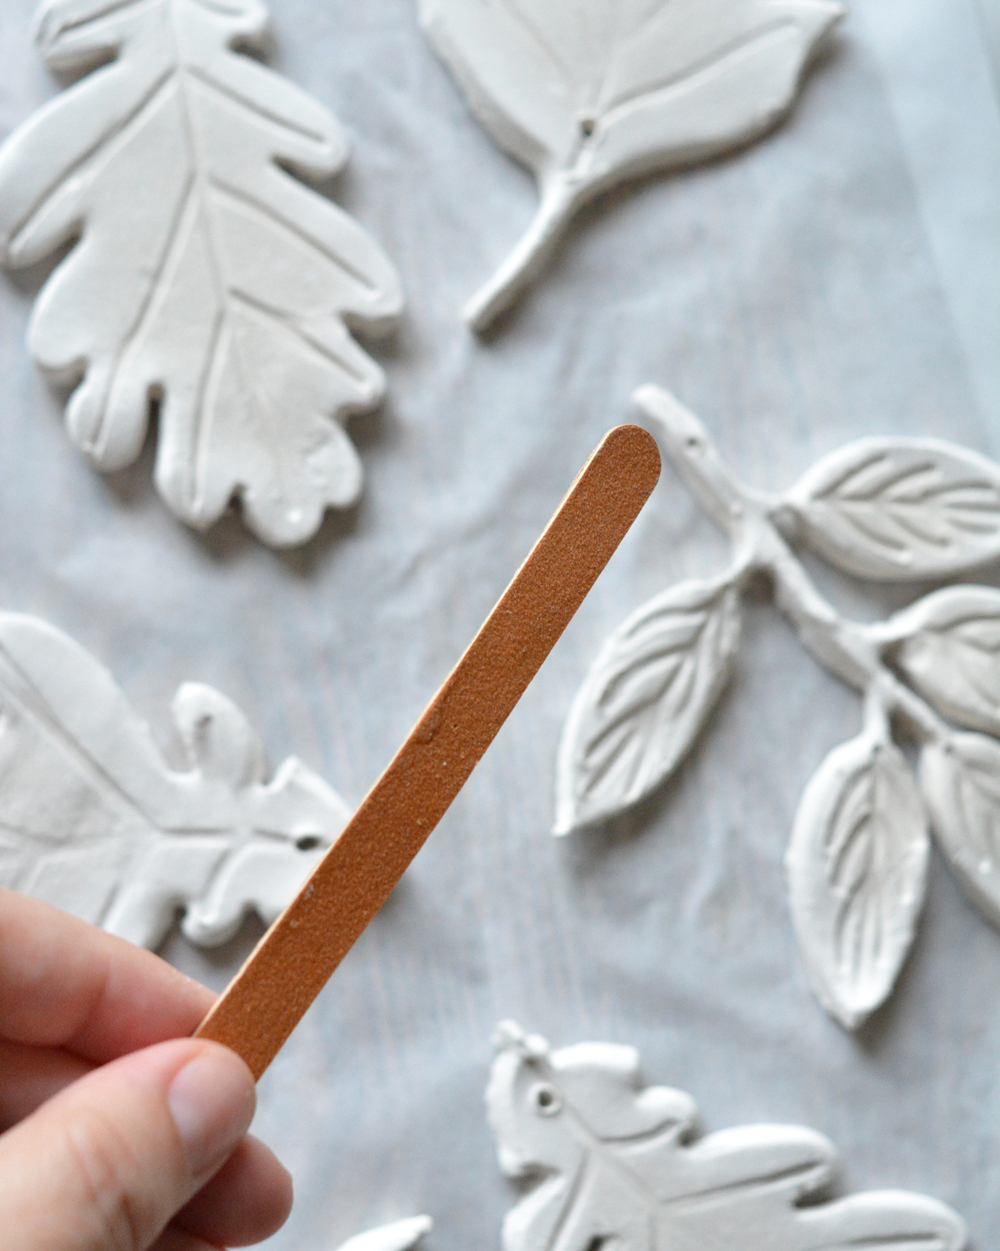
For the clay leaves to fully dry, it takes two days, so be patient! Once dry, a simple nail file will smooth any rough edges.
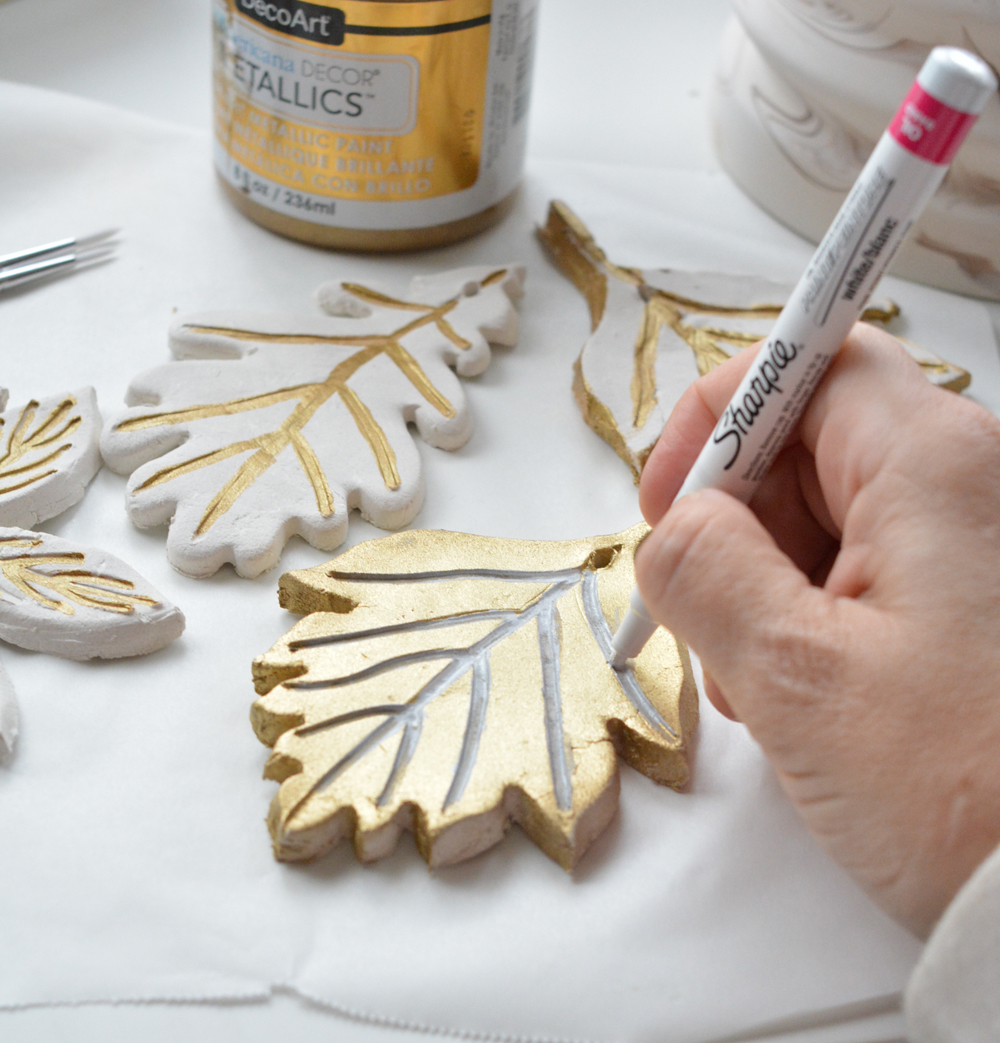
Once dry, paint or decorate any way you choose. I opted for a classic gold + white palette, using metallic paint, gold leaf spray paint, and a white sharpie to create different looks.
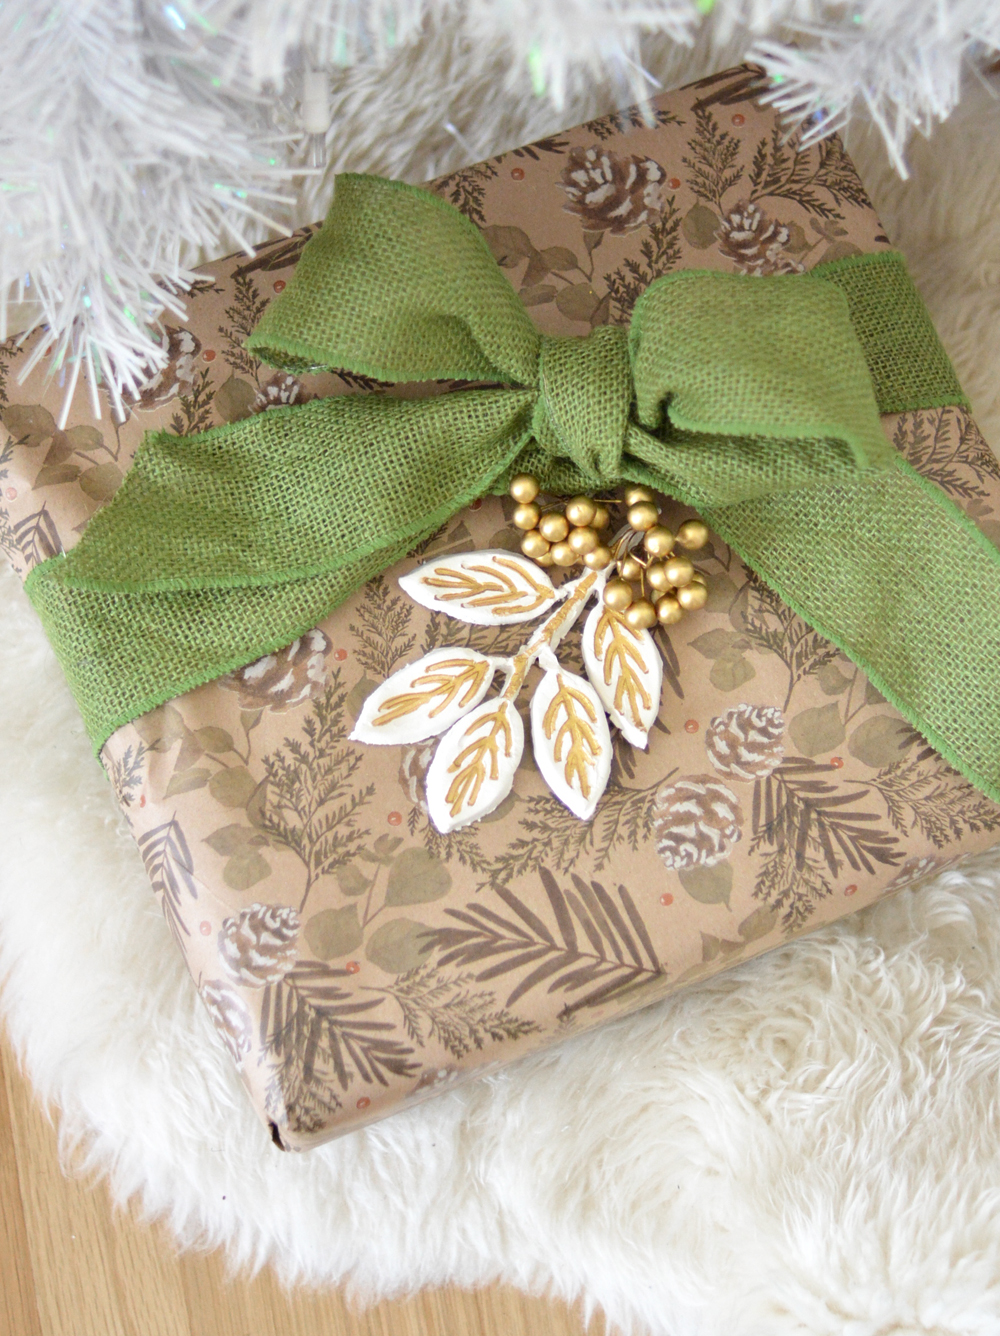
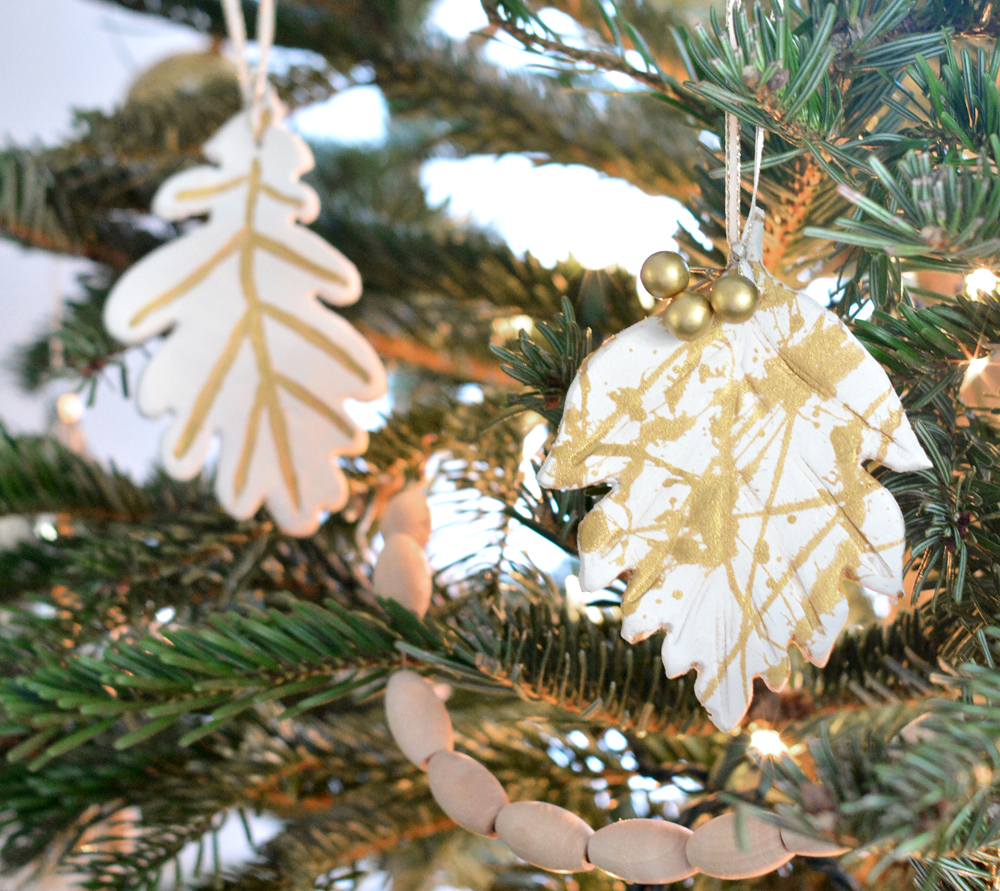
Use them as ornaments or gift toppers!


Wow, those are gorgeous! You always have the best ideas. They look glam and fun. If I can get the molds in time, I may try this myself. Merry Christmas!
There are so many kinds of molds to get creative with clay!
Let me know if you recreate your own!
xo
This is such a great idea! looks beautiful!
I really miss seeing Christmas home tours.