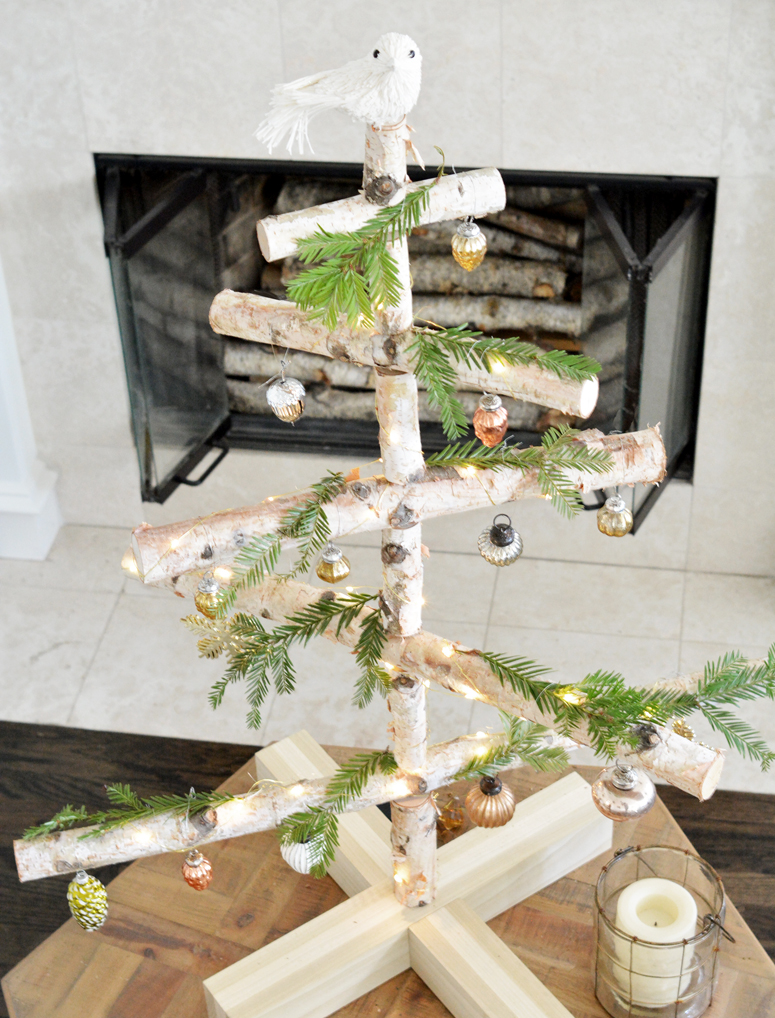
For the holiday season, I envisioned making a rustic tree out of real birch branches, so over the weekend I pieced this one together then embellished it with a few decorations.
I enjoy doing a few DIY projects around the holidays and this one is my latest creation. I love the papery white bark of birch, it’s textured and appealing, and the spaced out branches of this DIY tree allow just enough room to hang a few ornaments.

I know there are plenty of places around the country (and world) where birch trees grow, but that variety is more scarce here in Northern California. Since I have no birch tree in my backyard, I purchased three 4’ long branches from CB2 for $6.99 each. I cut the branches to form five stems and used the remainder pieces to form the trunk. The base is basic 3×3” lumber purchased from Lowe’s. To follow is the step by step on how I made it. I’m also sharing lots of video on Instagram later today so you can check my stories there to hear me talking about the process and how I pieced the tree together. :)
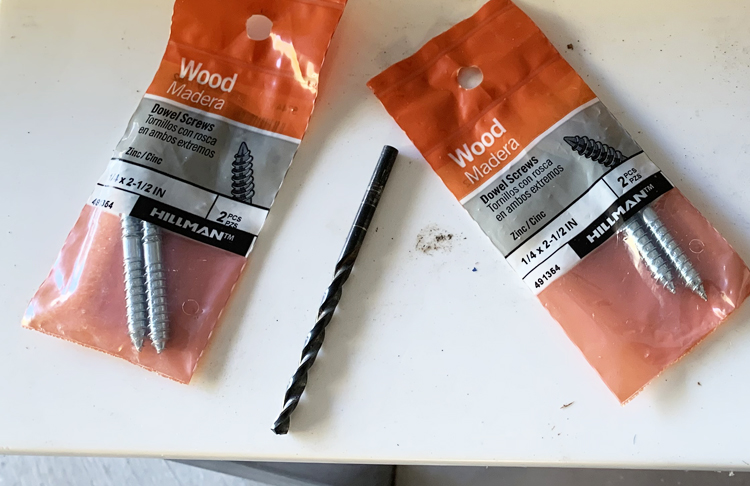
Supplies to recreate: three 4’ long birch branches, relatively straight, approximately 2 ½” to 3” in width; (I purchased mine here); thirteen ¼” x 2 ½” dowel screws, miter saw, power drill with drill bits, measuring tape, lights and ornaments of your choice.
Here’s my sketched-in-30-seconds drawing of the branches. You’ll need five branches at these lengths 1) 2 ½” feet, 2) 2 feet, 3) 1 ½ feet, 4) 1 foot, and 5) 6-7 inches.

Because they’re natural, the branches are not perfectly straight, but straight enough, and you can see one had that curvy part, so I mapped out the cuts to take advantage of the straightest parts. Here’s a diagram of where I made the cuts on the three branches:
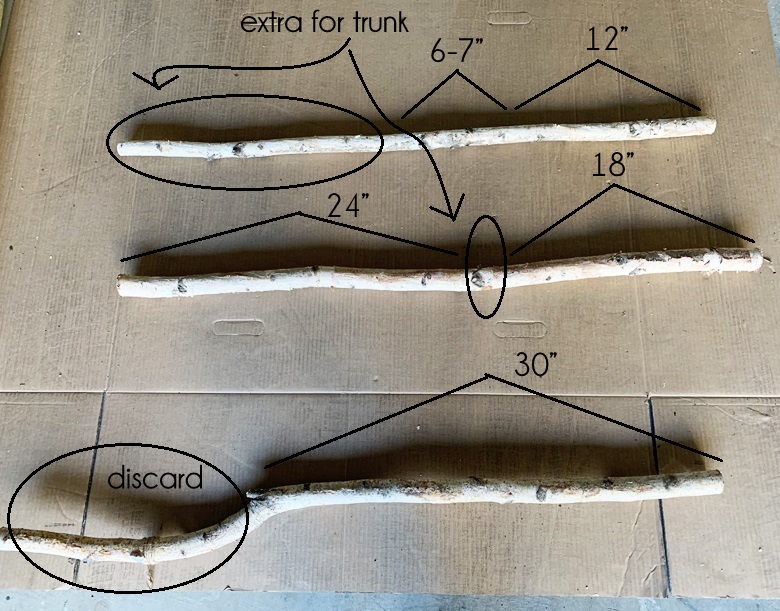
I used the leftover parts to cut the divider pieces for the trunk to separate the branches to allow room to hang ornaments.

You will need a miter saw for this project, although I suppose you could use just a really sharp saw! The miter saw does make it much faster and easier to make the cuts.
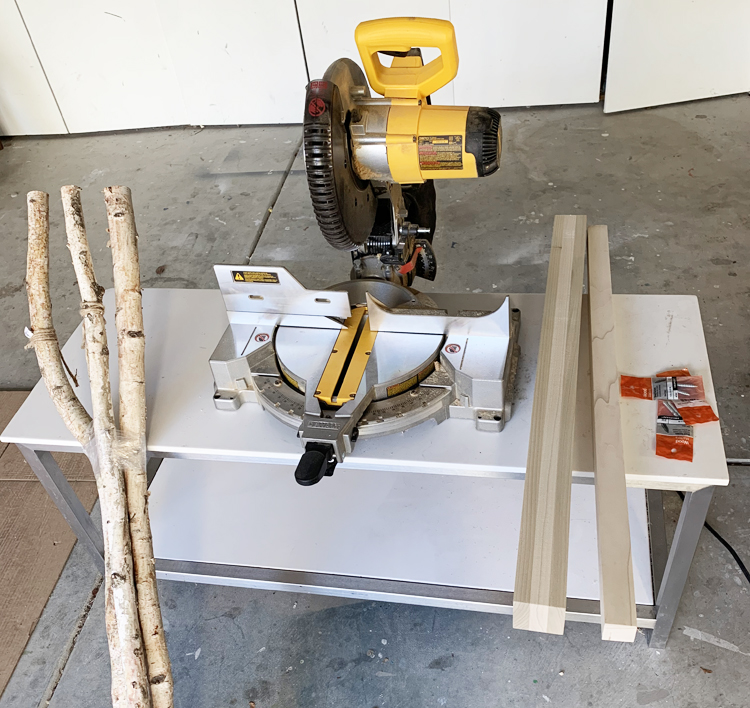
I forgot to take pictures of making the base but you can see the detail in the video on Instagram. Basically it’s this: I cut the 36 inch long 3×3” lumber into three pieces, one at 18” and two at 9”, then I drilled pilot holes in the centers and used the dowel screws to attach them together to form a strong base. You can see it up close in the next picture.
To secure the branch pieces to the trunk pieces, drill pilot holes in both spots where the dowel screws will attach them together. Make sure your drill bit is slightly smaller than the dowel screw and not the same size, this allows the thread of the screw to grip the wood so the tree is secure and stable.


Keep assembling screw by screw and piece by piece, then decorate as you please! I added little evergreen twigs for color, battery powered twinkle lights, mini mercury acorn ornaments, and a cute little bird is glued to the top.


I love all things birch and I love this tree! Awesome DIY idea, thank you!
thanks Melanie!
I so love this, Kate! I can easily get aspen here in CO so I hope to make this. You’ve got the best DIY ideas, I kid you not.
lucky you!
Love this! The addition of just a tiny bit of greenery makes it perfect!
agreed! and thanks!
Simply amazing, great utilization of resources.