I finished a fun little DIY project over the weekend. It’s been driving me crazy that I didn’t have a place to hang my backpack, hoodie, and hat each day, so I built a unique solution! Let me introduce you to a hat + coat rack I pieced together, painted, and hung behind the front door in my studio.

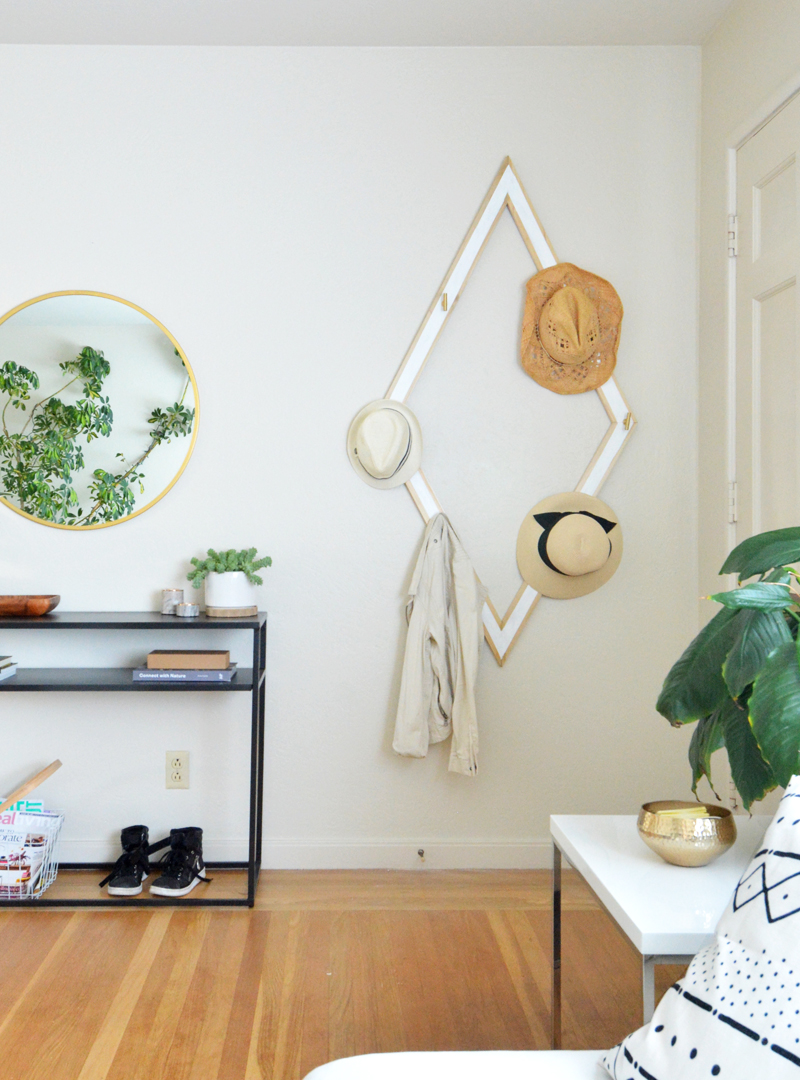
Mass produced coat and hat racks were just a little too boring for me, I wanted something more unique, less ubiquitous!
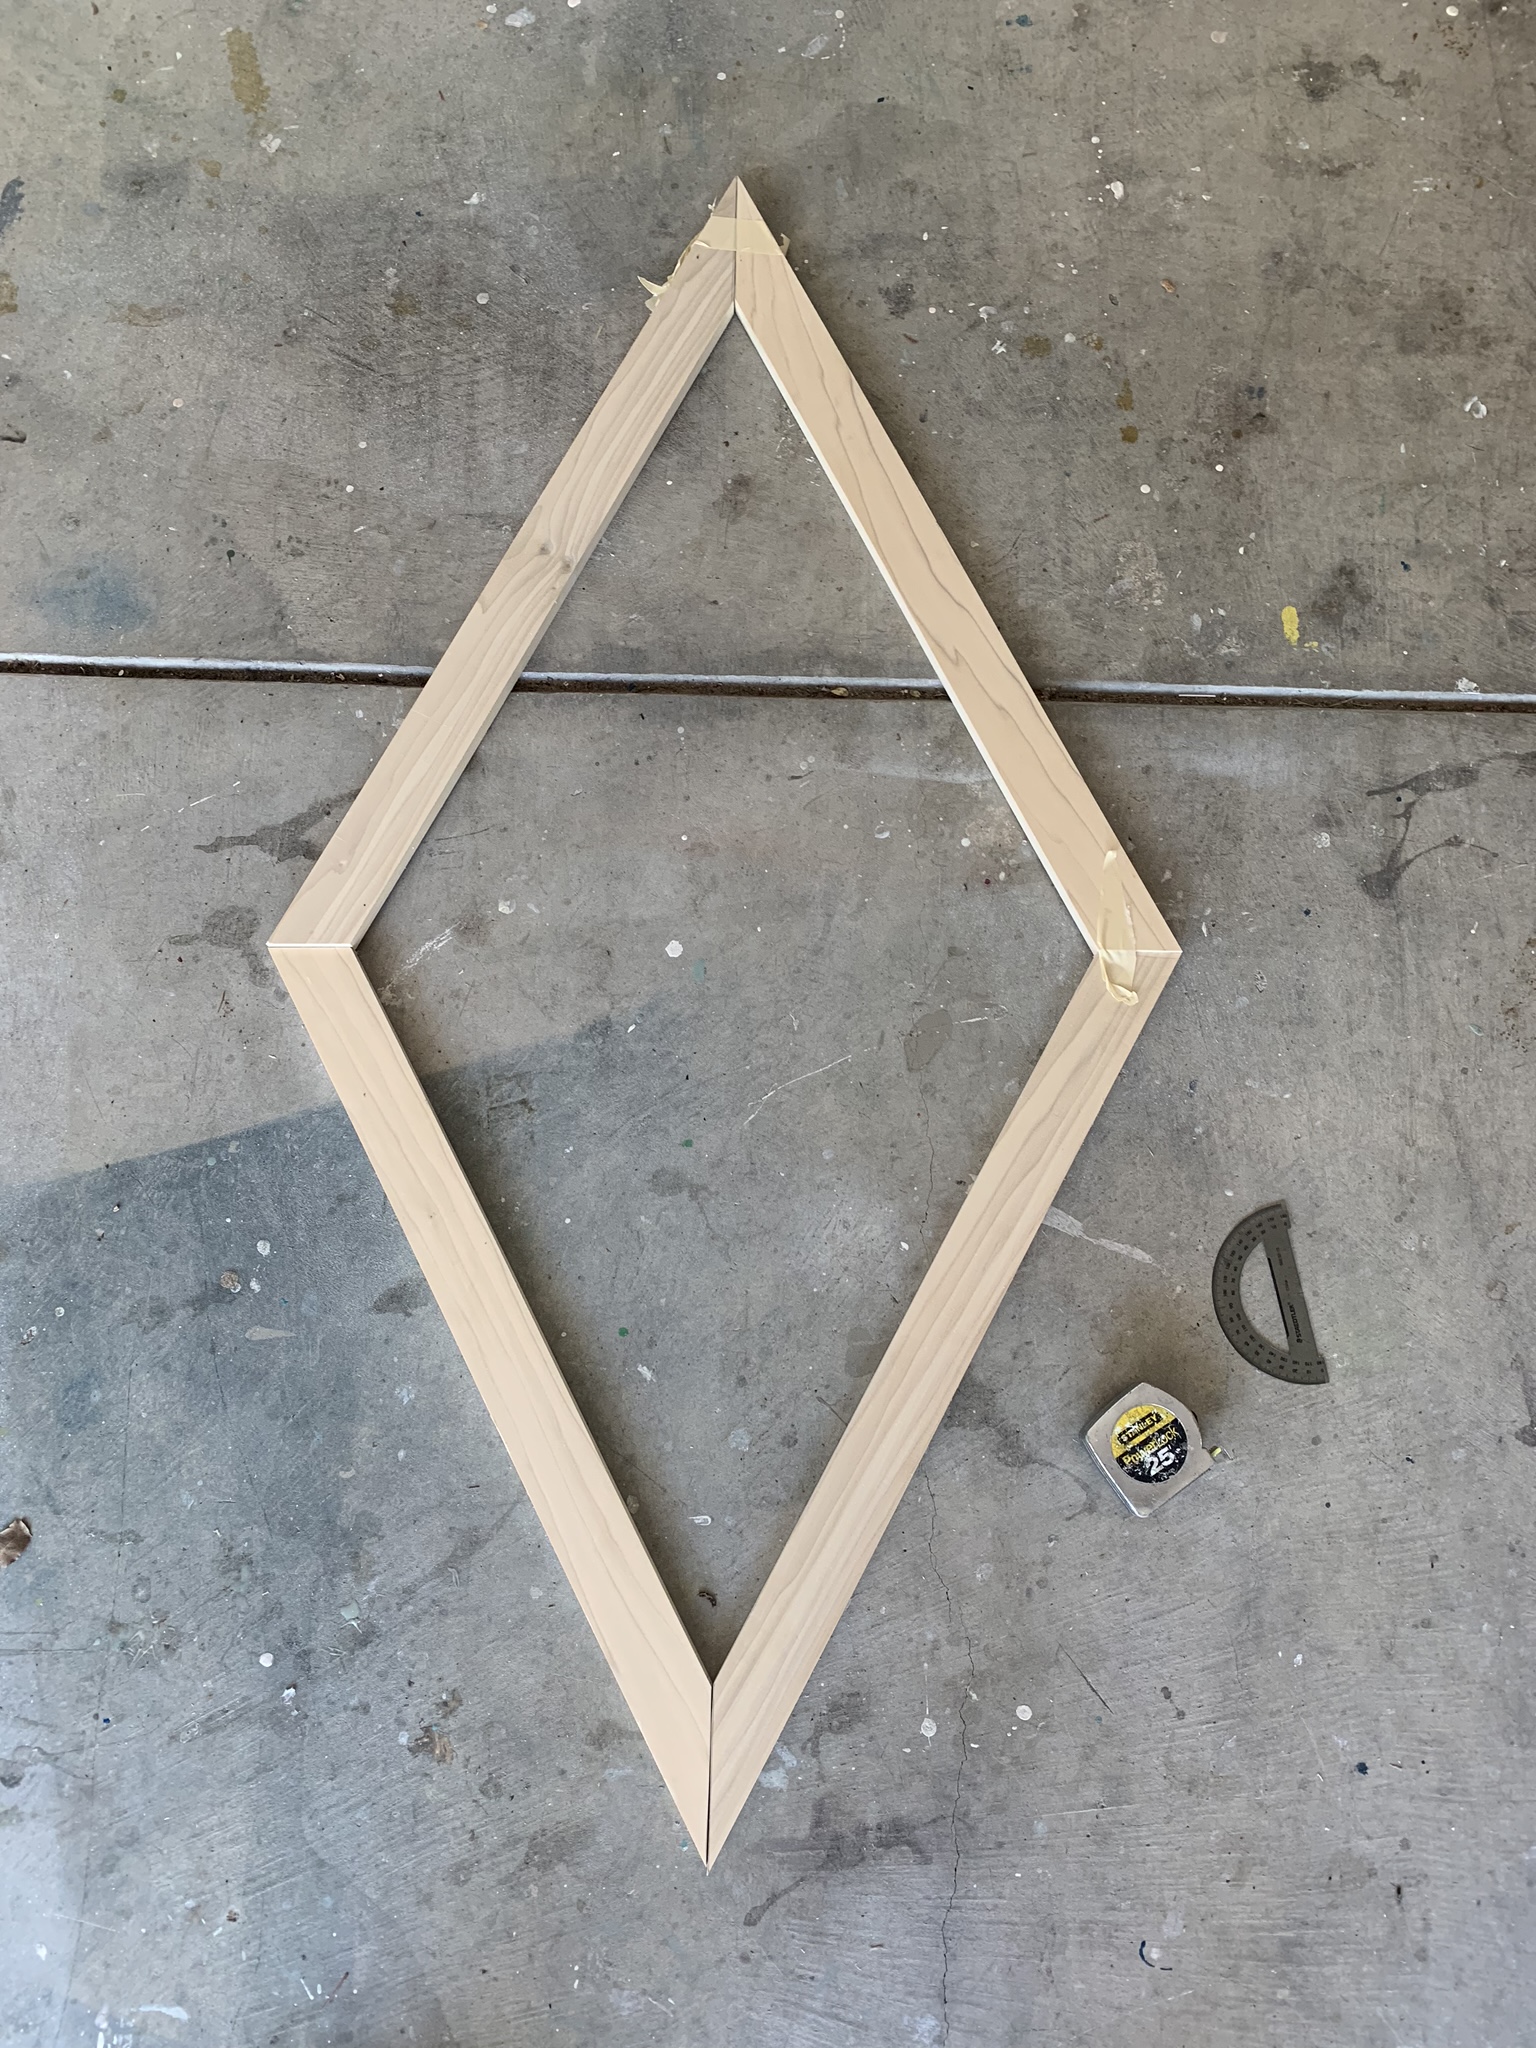
I measured out my wall space and conceptualized a simple diamond shape with knobs attached, then off I went to Lowe’s to buy the lumber and supplies. I purchased 2 eight foot long 3” x ½” birch boards.
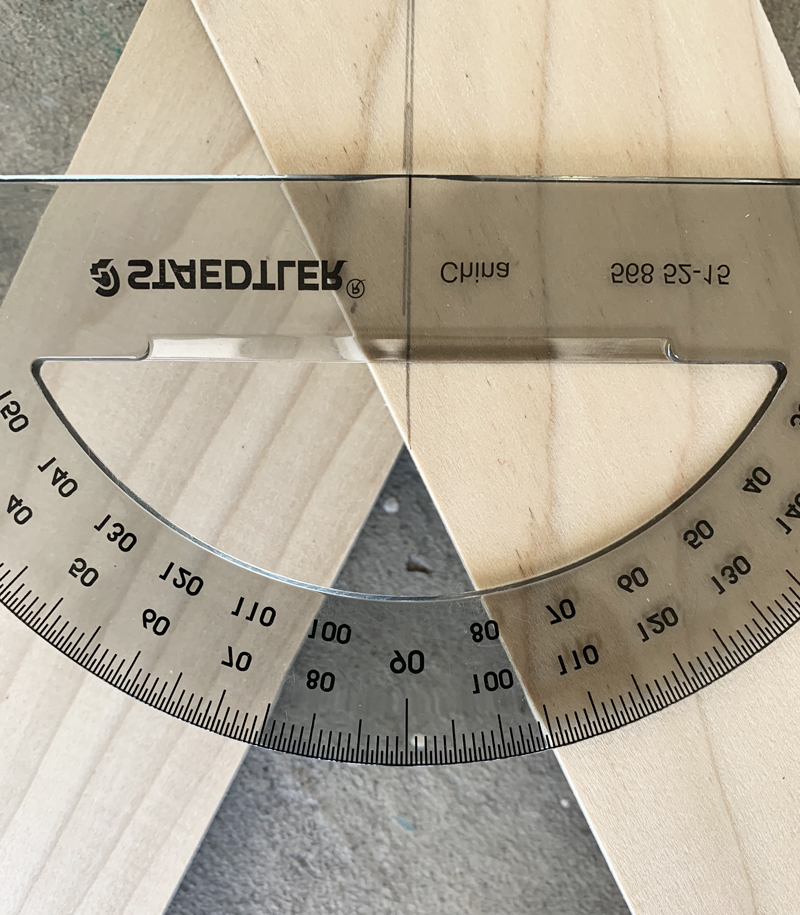
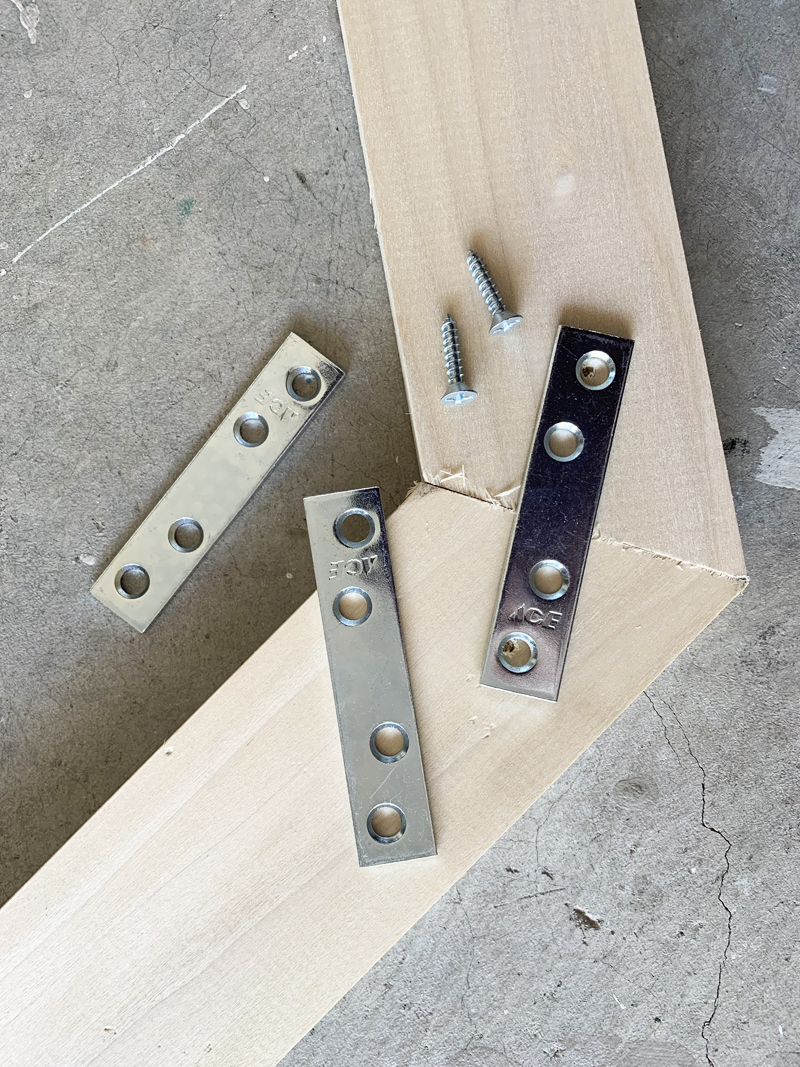
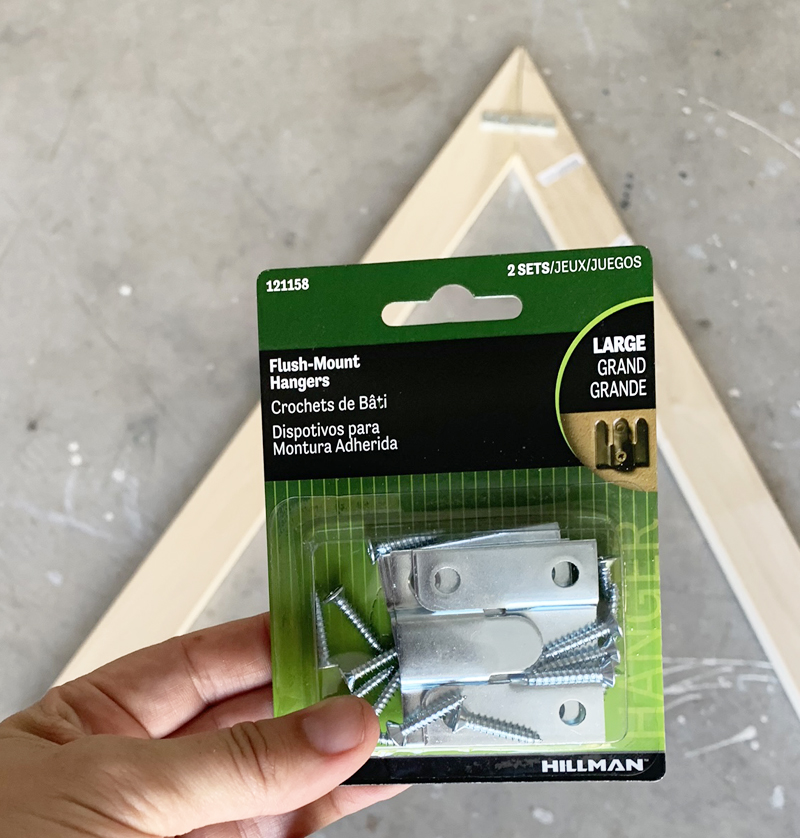
To recreate this you’ll also need flush mount hangers (seen below), four mending brackets (seen below), polycrylic protectant, white paint, wood filler, a protractor, measuring tape, painter’s tape, and miter saw.
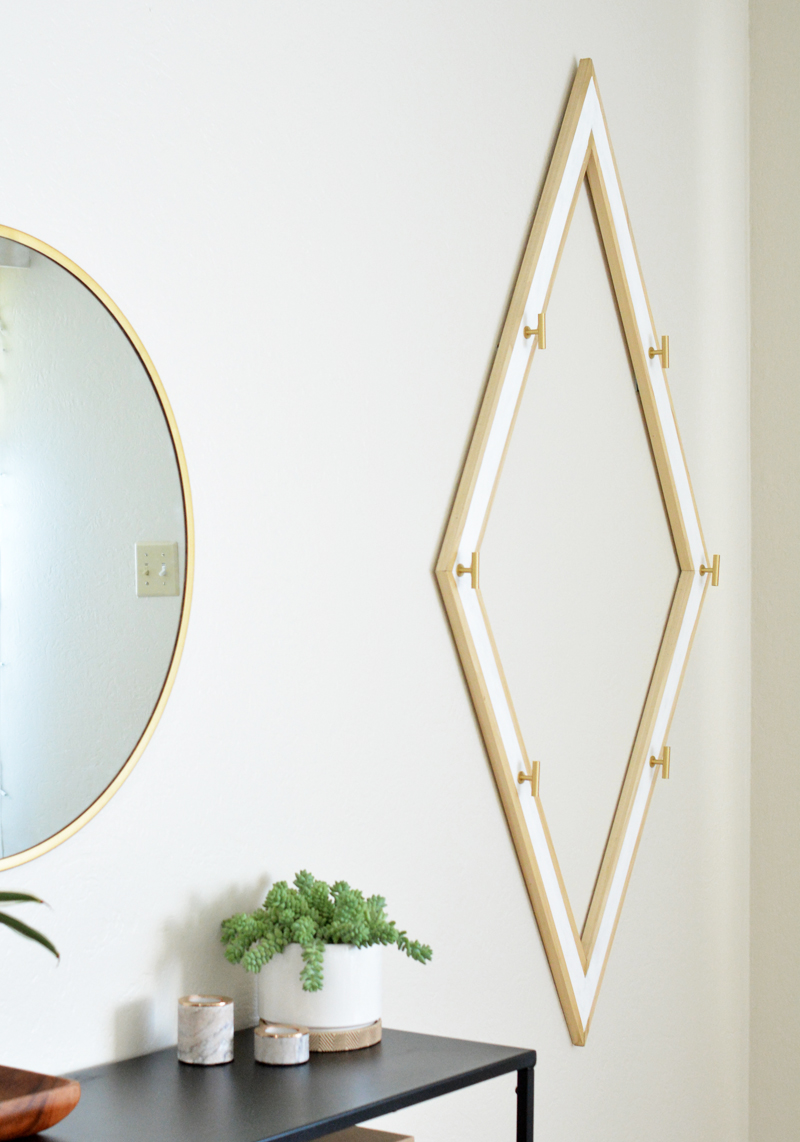
The entire rack measures 30” in width by 60” in height, it’s just 5 feet tall. To achieve this size I used a protractor to measure a 30 degree angle for the top and bottom cuts.
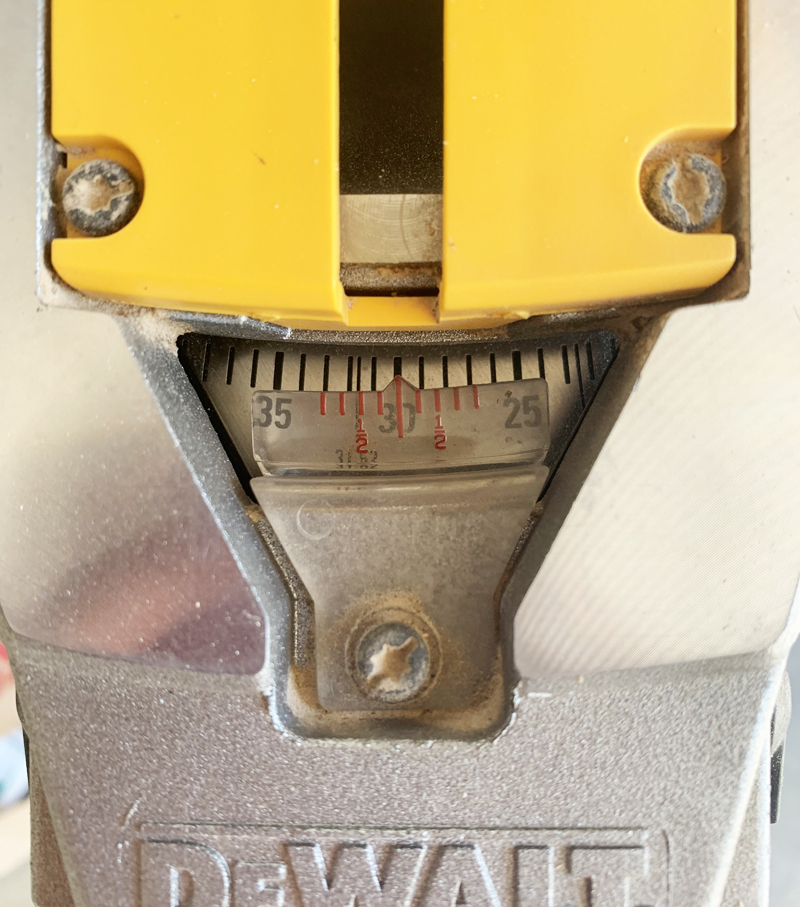
Set the miter saw at the same 30 degree angle (double check your pencil line on the board) and make the top and bottom angled cuts.
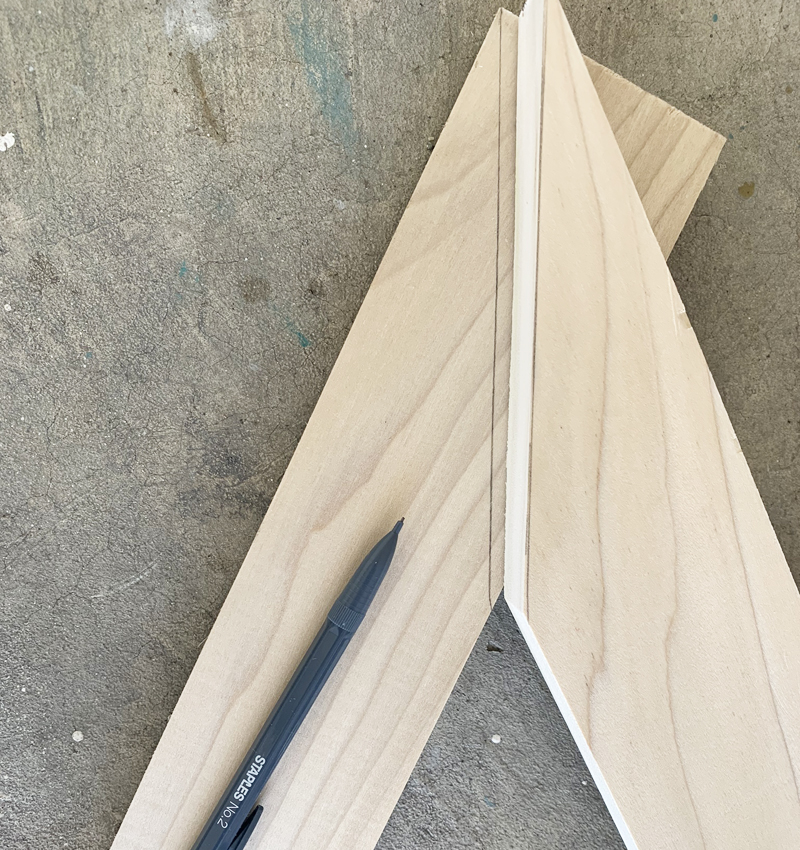
Once you’ve cut the four angles, set them together at the top and bottom joints then measure where they overlap, mark with pencil, and make secondary cuts that form the middle joints.
Originally I was going to use my Kreg Jig to secure the joints together but because this board is only ½” thick birch I opted instead for flat mending braces at the back and they work perfectly! Just be careful where you secure them to allow yourself to center the knob later.
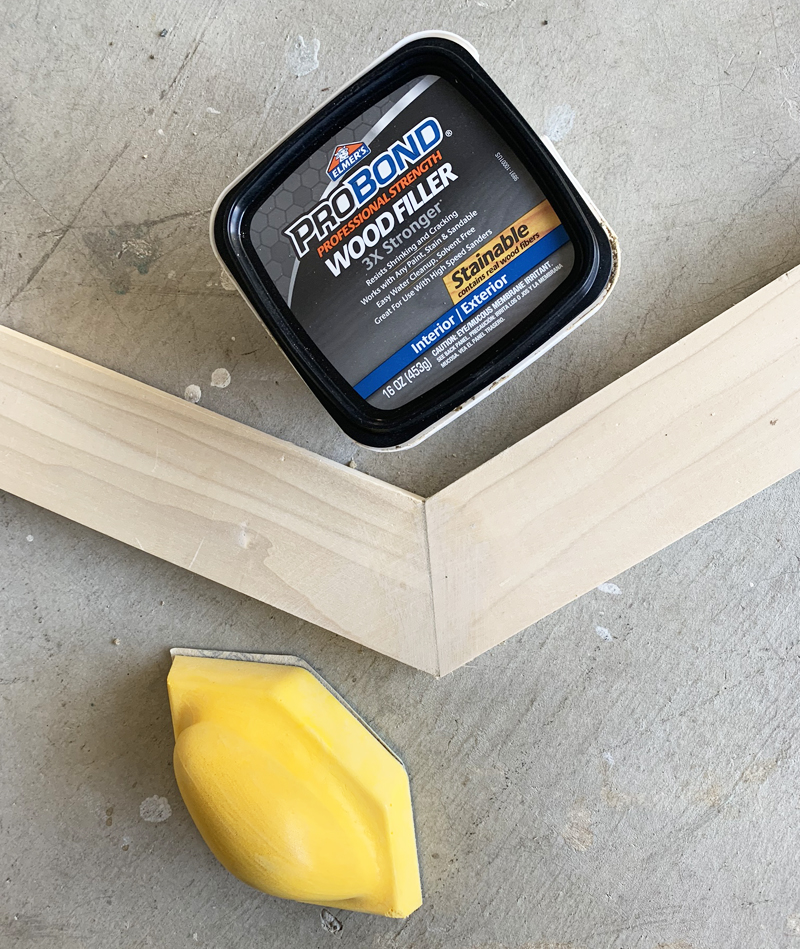
Any imperfections where the joints meet can be hidden with wood filler (sand it when dry before painting or applying protectant.)
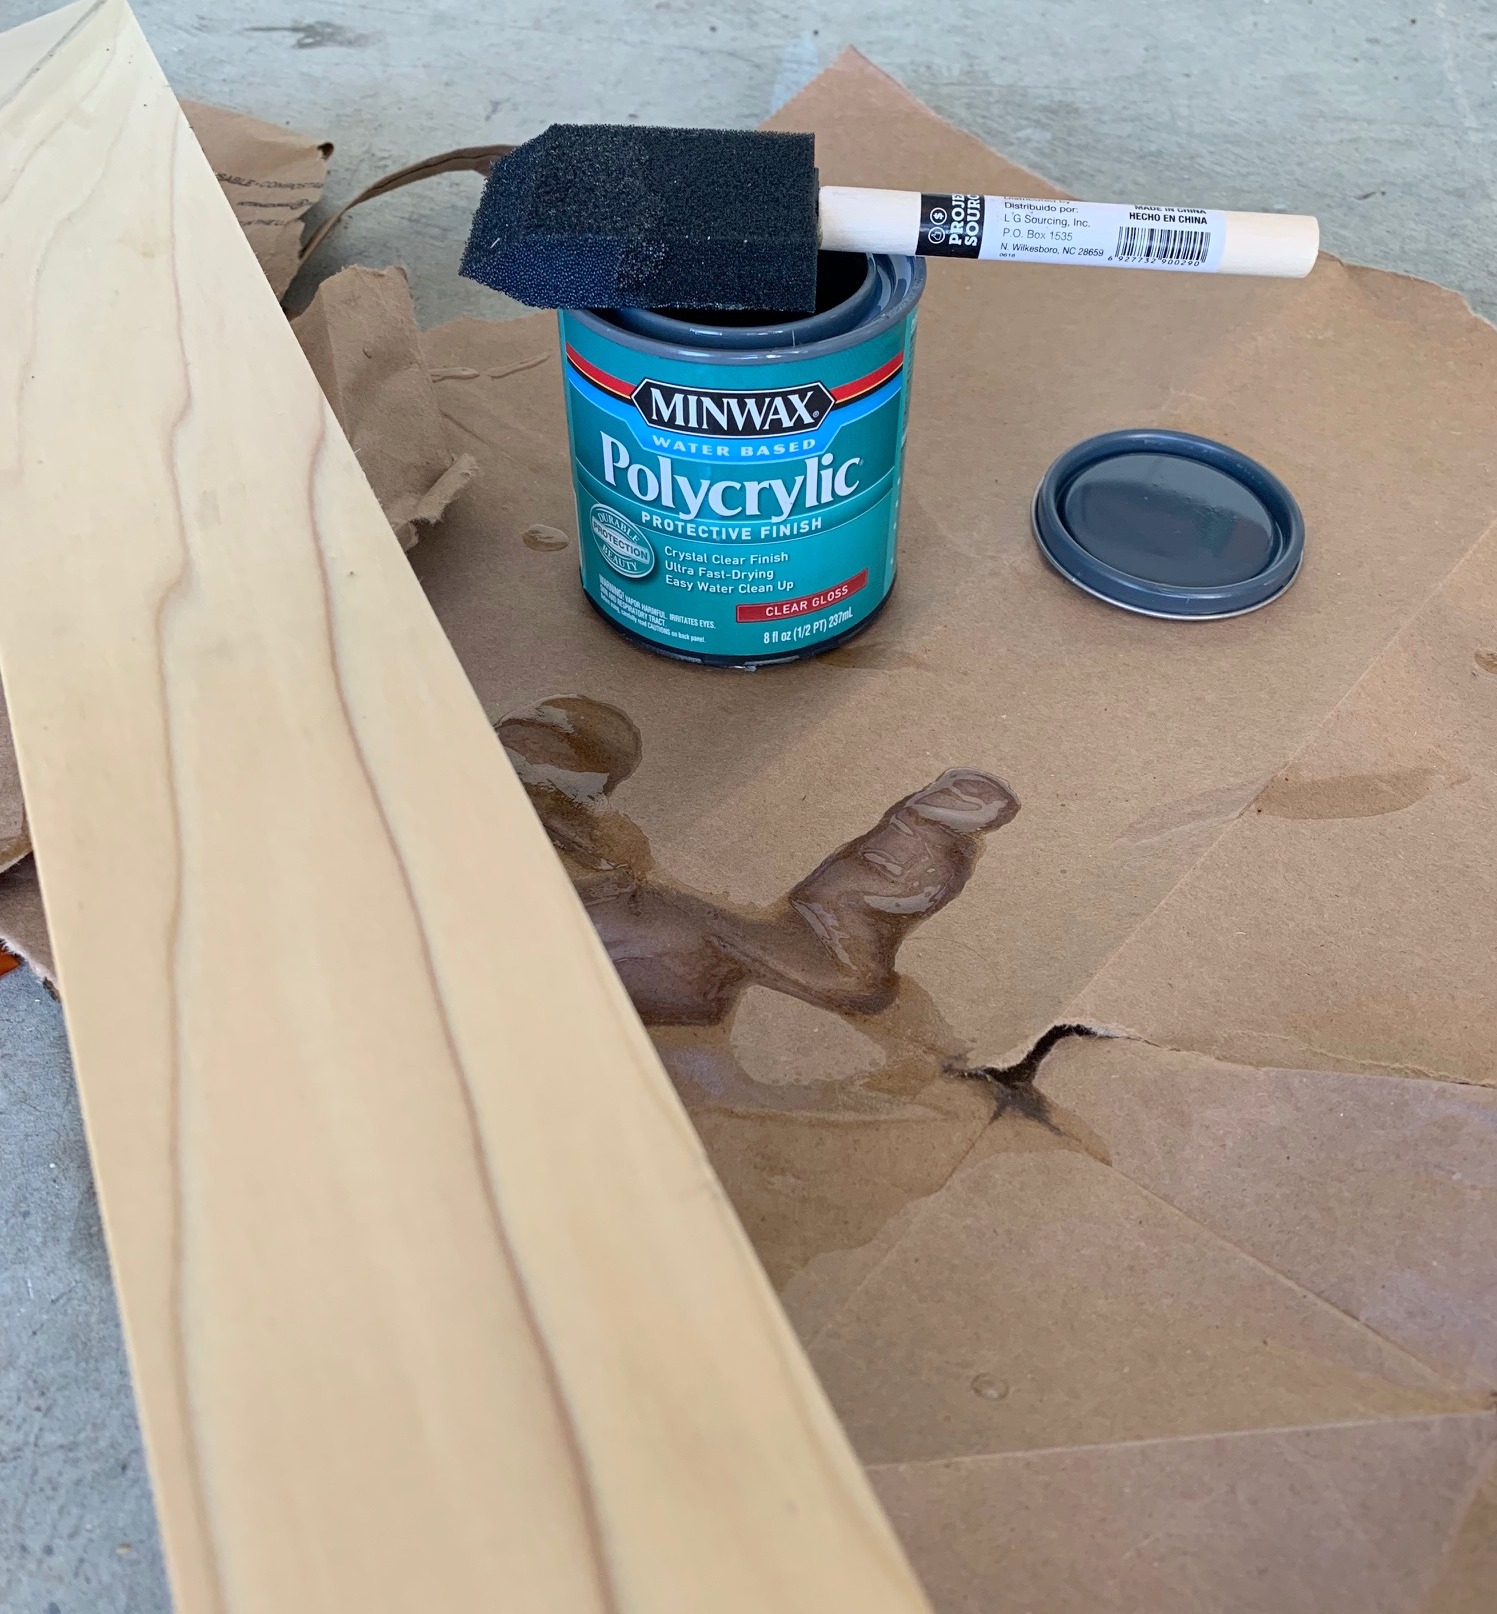
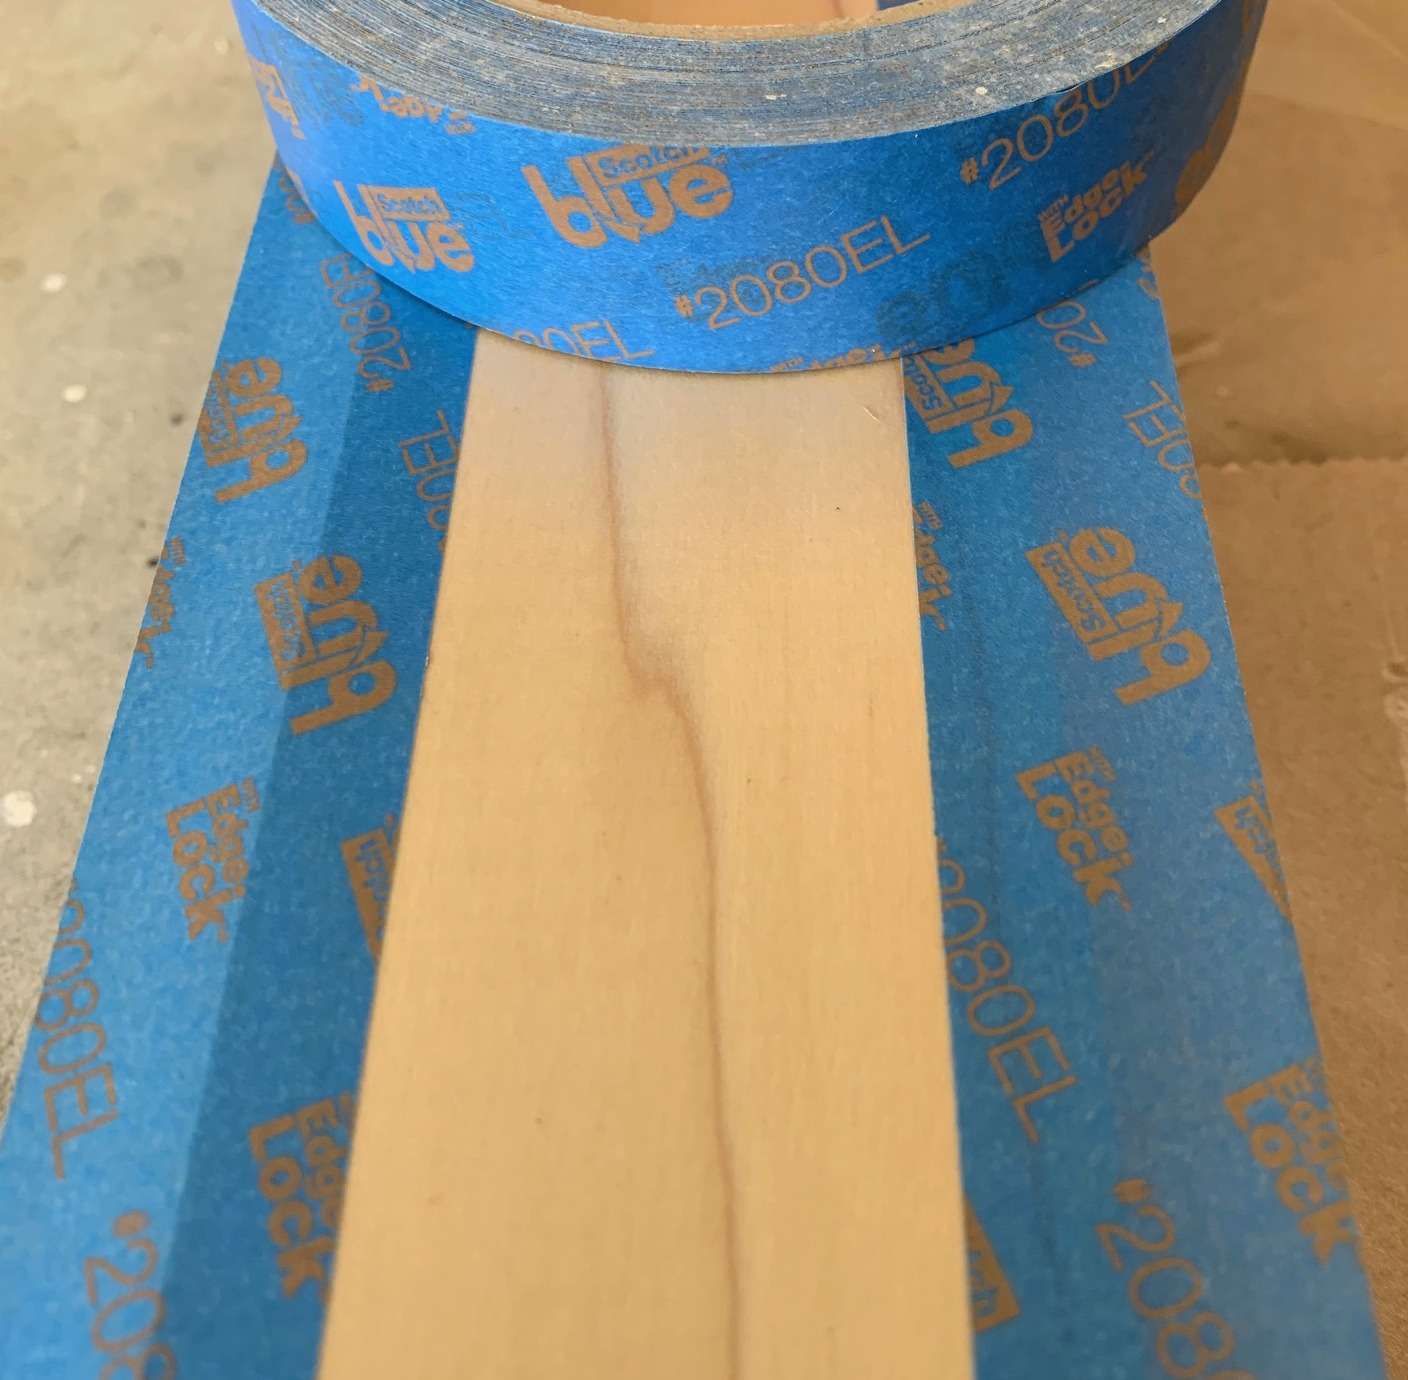
To achieve the two tone finish, I first added one coat of Polycrylic to seal the wood. It’s easier to correct paint mistakes on this gloss coat vs. a raw wood surface.
Next I used painter’s tape to create the white stripe. Note: you’ll get a cleaner line if you peel back the painter’s tape when the paint is wet. Allow the first stripe coat to dry, reapply the painter’s tape, and repeat the process by painting a second coat of white then peeling back the painter’s tape once more.
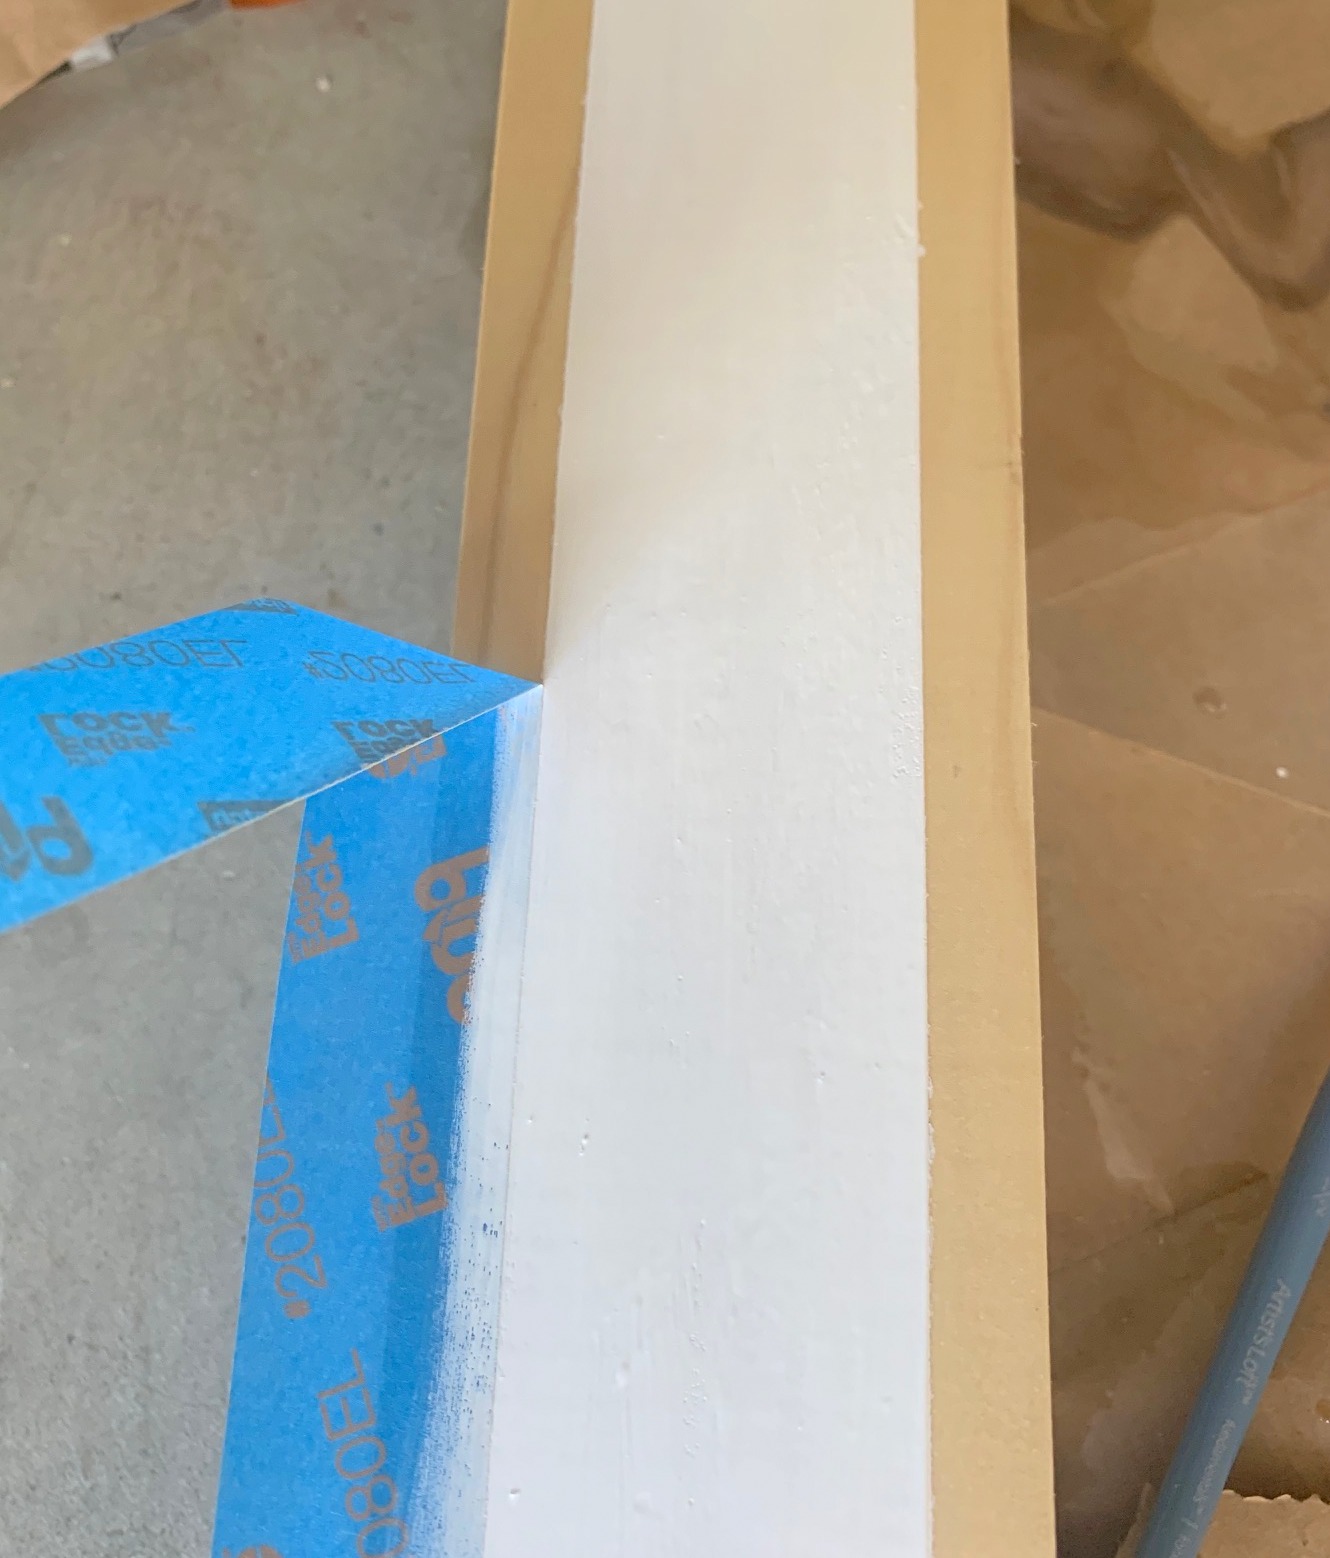
Allow paint to dry, correct any mini mistakes with a brush (or your fingernails) then add an additional coat of Polycrylic to give it a shine and protect the surface.
To hang it flush to the wall I used these hangers. I installed them 16” apart on the back of my hat rack so they’d match up with the wall studs. (Or consider using drywall anchors if you can’t hit the wall studs.)
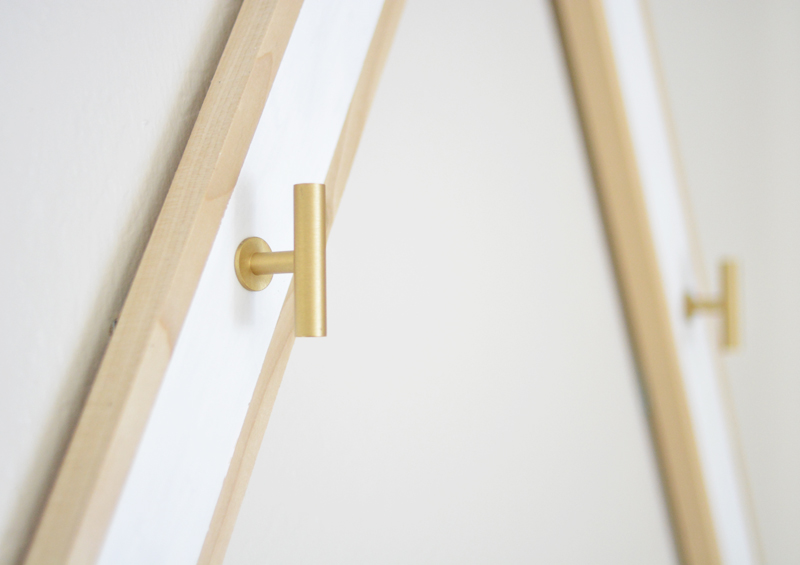
To finish it off, I added six gold knobs that I found online, they’re this Lew’s brushed brass knob.
All on its own when not in use, it’s a cool geometric installation, I love the medley of wood + white + gold! I already have a mirror in my entry, but I also thought this would look fab if you added a mirrored back to it!
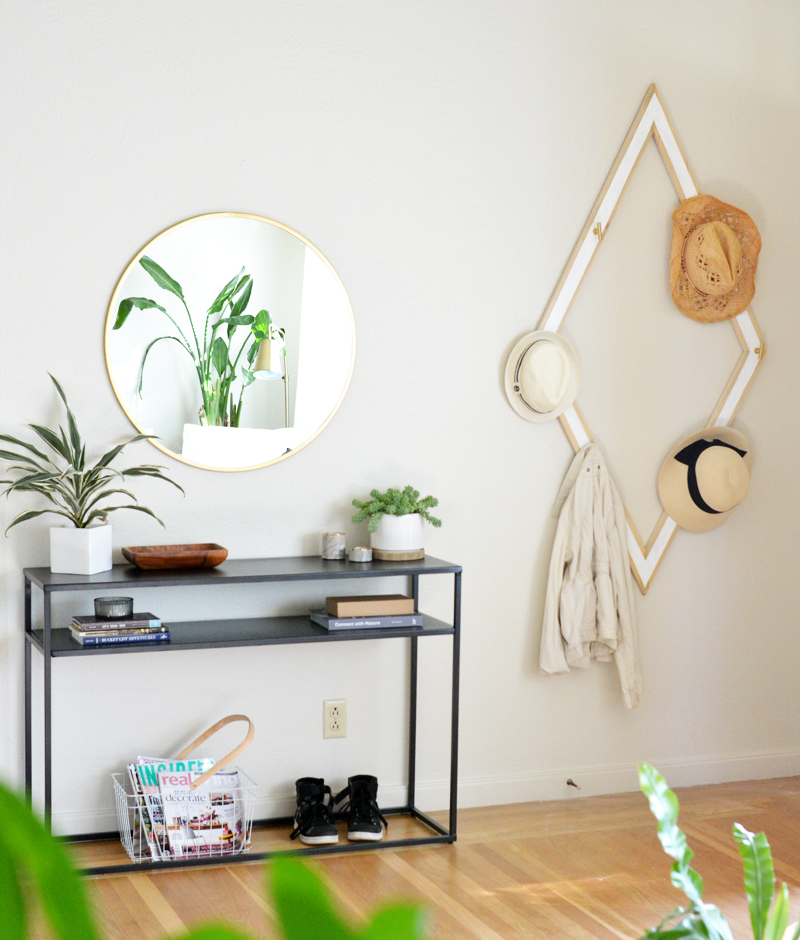
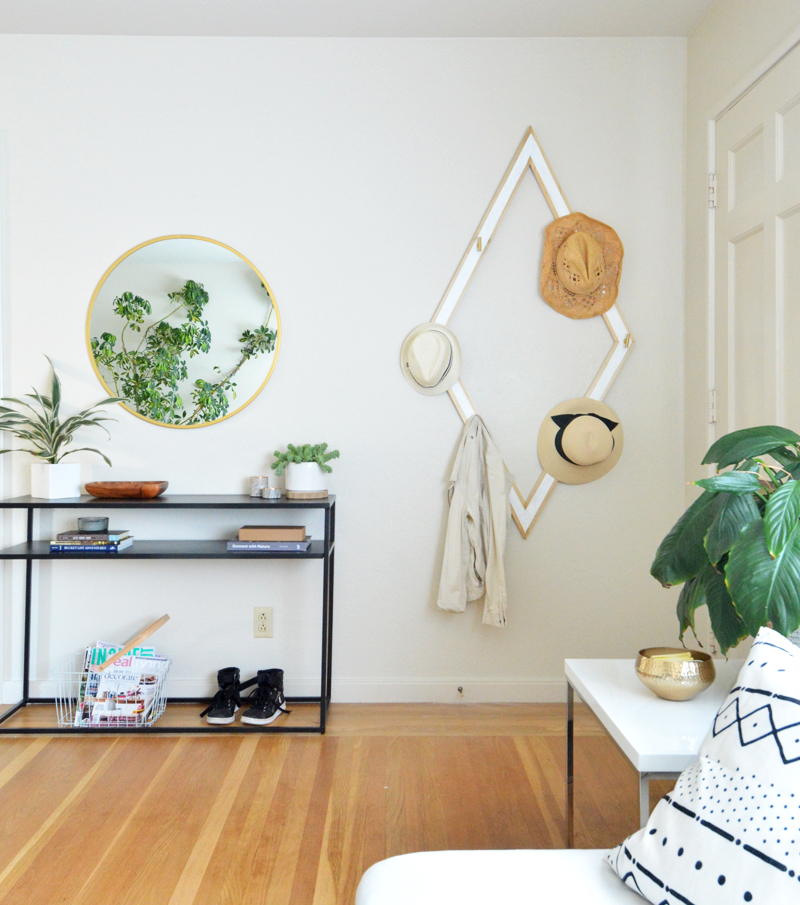
I styled it with a few hats from my collection…
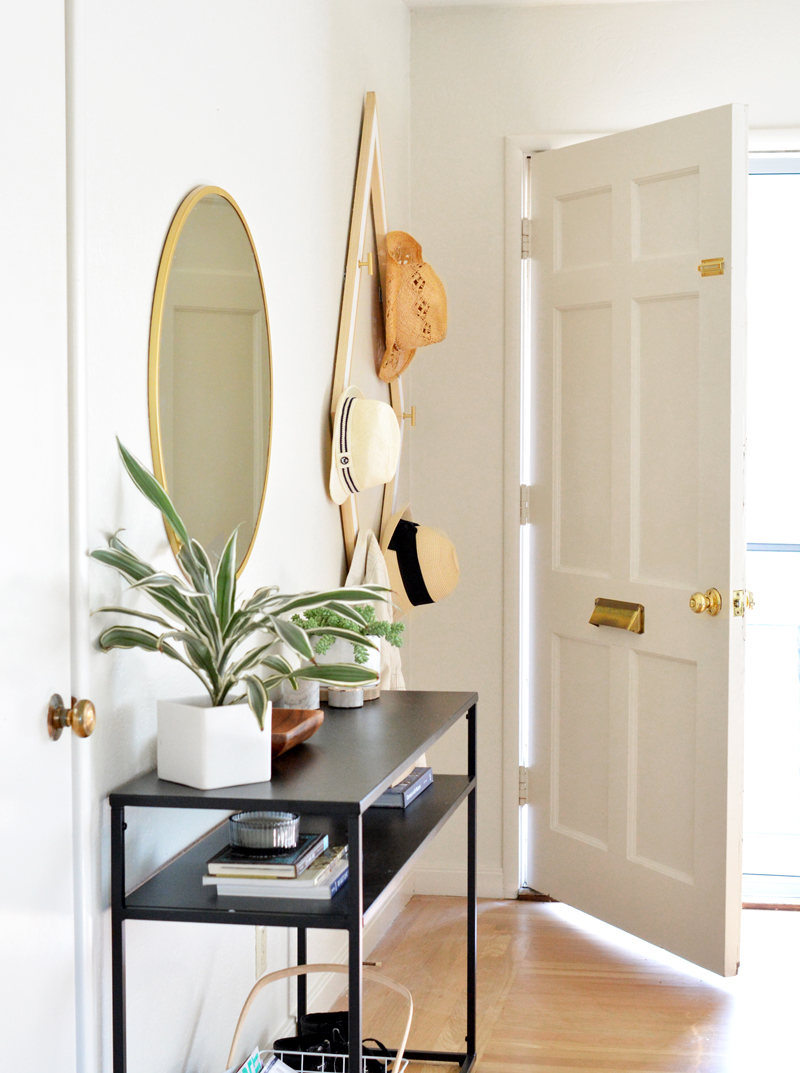
… but on ordinary days, I’m a backpack and baseball cap girl, so this is a more real picture of how I use it!

I’m so pleased with how it turned out, and its slim profile that hides behind my entry door!
Practical, pretty, and unique!
.


This is awesome!! Thanks. Just what I need.
When is the couch table from?
It’s from Target, I linked to it here:
https://centsationalstyle.com/2019/03/slim-console-tables/
:)
Where*
Best looking hat + coat rack ever! It’s simple but catches your eye. But if I may ask, where’d you get the plate for the keys? that brown one next to the plant. Thanks!
Hi! That’s a koa wood bowl/tray I found in Hawaii!
Thanks!