Last week we began this operation window seat project with the idea to build a bench under the window in the playroom as we transform it into a study. I mentioned the idea was to construct a window seat in here so we can pull up a table in front of it for reading, studying, etc. I was inspired by Aubrey + Lindsay’s window seat and we lucked out with the size of the 15” tall x 36” wideAkurum cabinets we found at IKEA that fit the width of our room.
Over the weekend we constructed the base, installed the doors, and I also primed and painted the cabinet frames too (since we *accidentally* grabbed birch frames instead of white, oops!). I still need to sew the long cushion that will sit on top and add a bunch of pillows, but here’s how our window seat from IKEA cabinets looks so far!
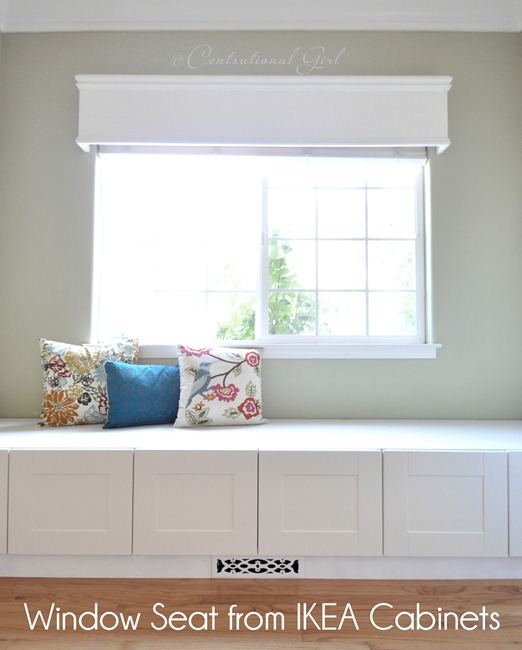
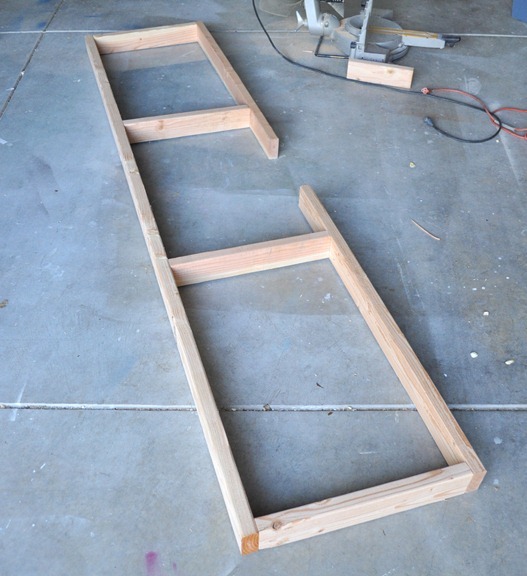
Here’s the quick play by play on how it came together. To support the cabinets and raise them up off the floor, we found some inexpensive lumber at Lowe’s and brought it home and built a frame, securing it together with wood screws, but you can use framing nails too.
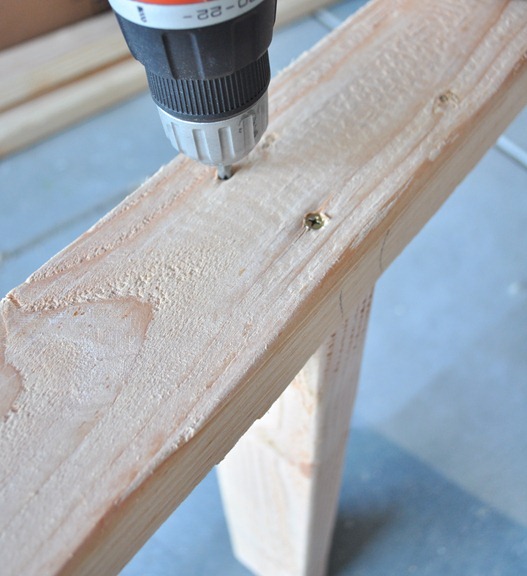
For the depth, the frame design had to allow plenty of room for the toe kick and new vent to sit in front, so we calculated those measurements into the final base structure. We ended up using thin ¼” x 3.5” x 4’ boards instead of toe kick to hide the rough lumber, but it all worked out.
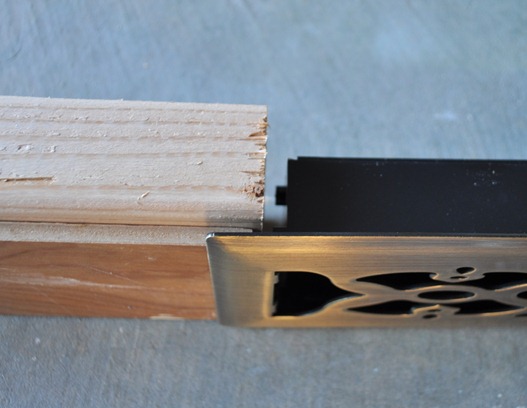
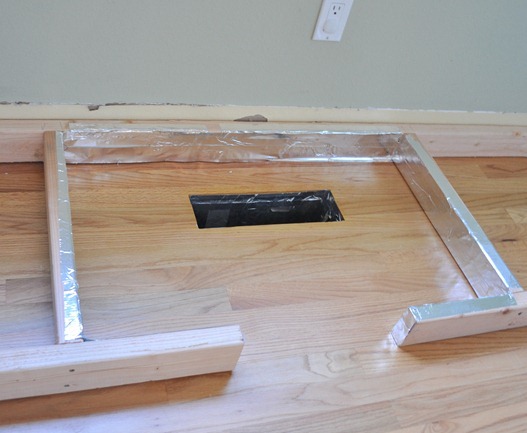
I found this skinny 3.5” tall floor register to fit inside the new frame, perfect! All it needed was a quick prime + paint job.
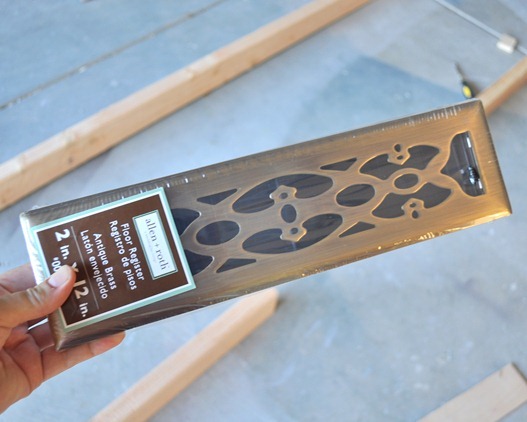
The new frame we built measures 96” x 23.5” and we allowed a space to accommodate the new air flow vent. The rough lumber boards were 3.5” tall which was the perfect height for elevating the 15” tall refrigerator cabinets to a comfortable 18.5” seat height.
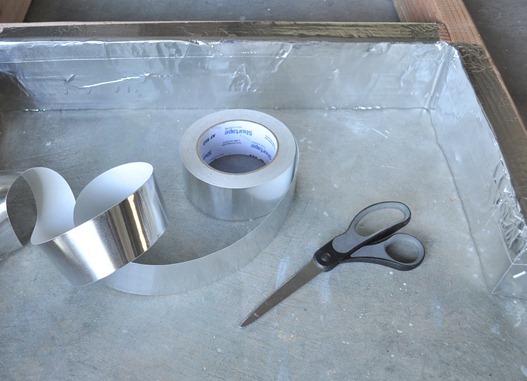
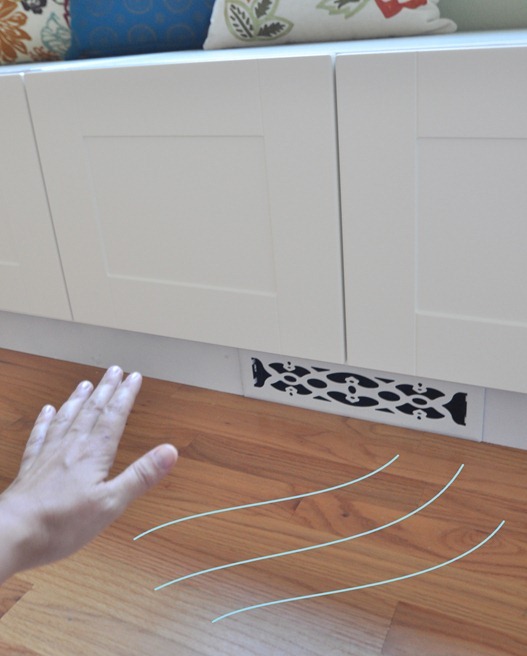
For airflow from the heating vent, I created a makeshift metal chamber with aluminum tape (used for sealing ducts in heating/cooling). We also removed the rear baseboard so the frame and cabinets would sit up against the back wall.
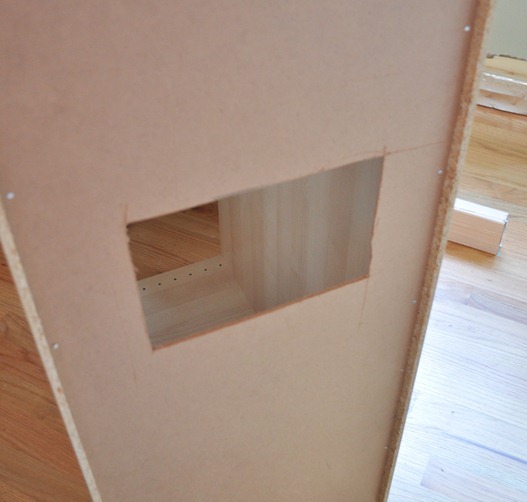
To make way for the electrical socket on the wall, we simply notched out a rectangle in the back of the middle cabinet. It’s hidden behind the doors along the back so we weren’t terrible concerned with absolute precision.
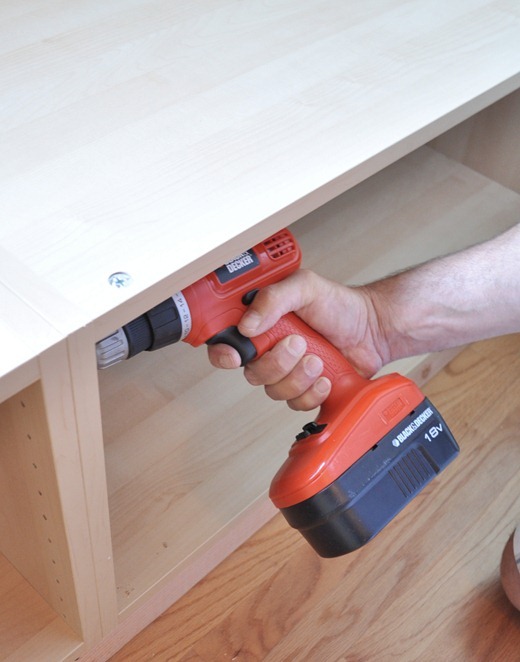
Then Matt screwed the three cabinets together so the fronts were flush.
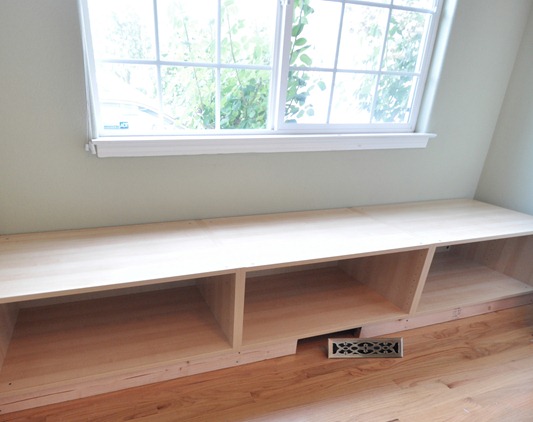
Here’s a peek at the cabinets installed in the room on top of the new frame and before they were primed and painted. The cabinets are finished on the sides, so if you want to squeeze this kind of project anywhere in your house (entry, dining room, bedroom) you really can.
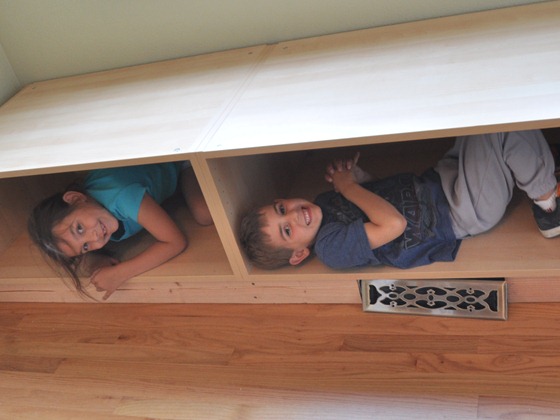
The kids liked playing in their new “houses” for a little while. :)
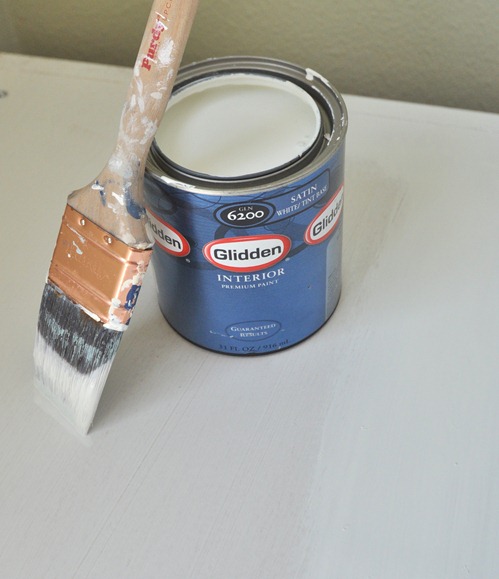
The next day I primed and painted the surface and the fronts of the cabinets while Matt installed the doors. To avoid this part, simply triple confirm with the stock clerk at IKEA that you are getting the white (not birch) cabinets. By the way, those are some nice hinges too and easy to install, compliments to IKEA!
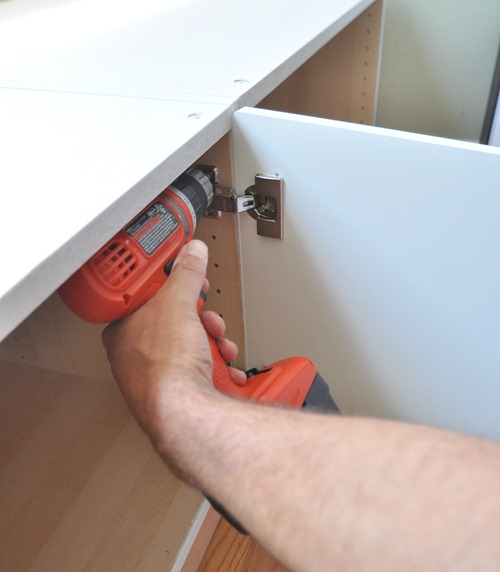
Here’s a glimpse how they all lined up!
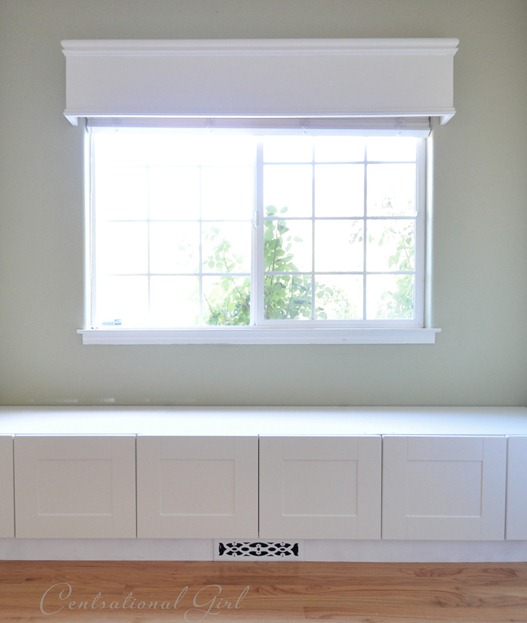
How does that new air vent work? Answer: perfectly!
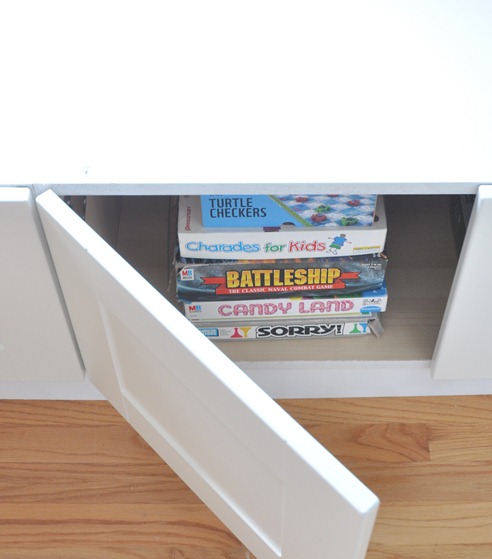
Having these cabinets is so great for both seating and for storage, and we need that storage!
Still gotta sew a cover for that looooooong cushion for the top.
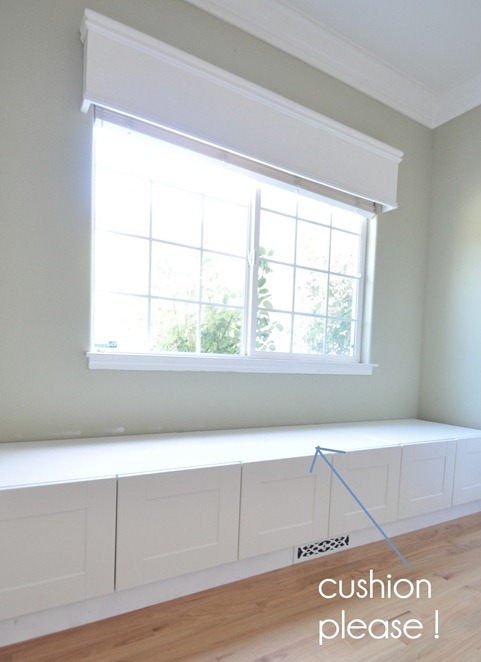
The total cost for three cabinets + hinges from IKEA = $315 (that does not include the cost of the lumber for the frame.)
Now that the bench is installed, I’m thinking of pulling in some more global inspired accents in the form of a pendant light and pillows on top of a new cushion. I’m also considering replacing the existing cornice with a woven shade, kinda like this.
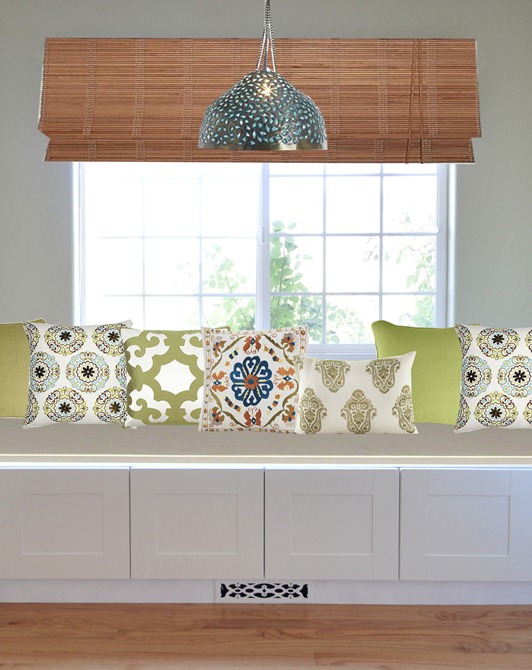
Thoughts?
Pillows and pendant light from here: 1/2/3/4/5/6
To see a full update on how this window seat looks finished see our study complete and this simple sew box cushion cover.
.
.

Looks awesome, Kate!! Taking the cornice down and replacing it with a woven or bamboo shade would make it seem more cozy, in my opinion. I love them and their texture. Like a basket on a string. haha ; ) Can’t wait to see it all complete with a cushion.
~ Catie
It came out great! I love the idea of the little vent also. I have baseboard heat that I am trying to figure out something similar to work around. Oh and love your animated little picture show mood board thingy ( I forget what it’s called and I’m being to lazy to go back and look) you post from earlier today. That was cool!
This looks fantastic! And really comfy: i’d totally curl up there with a book :) Nice work!
It looks great Kate! I’ve always loved window seats… perfect for coffee & reading!
That looks amazing. Window seats are amazing especially when they have storage built underneath them! I love your idea of replacing the cornice with a woven shade!
Looks great! Love the texture of the woven roman shade – really warms up the space. Perfect pillow combination too!
We have a window vent in the area that I want to do a long window seat to and I’ve always hesitated b/c of the vent directly in the center of the window. Thanks for offering a solution and the experience to show it can work!
Looks fantastic! Beautifully done…(brilliant to include the vent!)
Kate, this is really fantastic! I know it was probably a ton of work, but the results were worth it it looks terrific. Can’t wait to see your final cushion.
Thanks so much for sharing, you’re an inspiration.
Wow, that looks great, and wonderful storage! love it. good job. Little Bit
Turned out great! When it comes time to do the cushion make sure to make several to cover that long area. It will be easier to work with several pieces than covering one long piece of foam. Also, do yourself a favor and go for the good (expensive) foam rather than the cheapie stuff. You saved money on the cabinetry but if you don’t use quality foam even the best upholstery job won’t be able to hide it. Excellent job!
This looks so good I absolutely love window seats, one day I’ll have a house with this layout so I can build my own window seat! Looks like the kids love it too :)
So pretty! But I have to caution against the treatment of the air vent. We took the same approach in our dining room and while yes, you can still feel airflow coming out of the new vent, our room is now overall *much* colder in the winter than before we made that change. I strongly recommend attaching a section of duct to connect the original vent to conduct heat to the new vent. You just lose way too much heat in that cavity.
Must say though, it looks great!
Great tip Lyssa, especially for rooms that really need heat! We didn’t really use that vent much before, but like you said for those who really rely on it heavily for heating in winter or cooling in summer, might be worth thinking about! We were pretty pleased with how much the air was forced out when we turned the heater on, works great for us!
Kate
This is fantastic! I can’t wait to tackle my own one day. :)
Looks great! I always like getting extra bits of seating and storage in the house – seems like there’s never enough of either.
I like the clean clear white with colorful cushions!
It looks really wonderful, Ikea is so great for projects like this! I think the accents you are considering are fab, too.
It looks fantastic Kate!
Nice hack! I think that the adel cabinet fronts are the same color as their lidingo. If so, Benjamin Moore “Dove White” supposedly matches the paint color perfectly. The white look a little different in your photos – not sure if you care enough to change it again!
Also, the IKEA kitchens use Blum hardware, which is why it’s so nice!
Good eye Jen! I painted the top with Glidden’s ‘Muslin White’ which is a really close match, still have to paint underneath on that toe kick area, it’s only primer down there. :)
Hi CG,
Are the cabinets sturdy enough for sitting? I’m thinking of doing the same for my breakfast area but they looked pretty thin..I’m just wondering if they feel solid enough..I definitely don’t want anyone to fall through while eating their cereal!
Appreciate your thoughts!
Jo
Great question Jo! My hub is 220 lbs and he sat on it and we didn’t have any problems. If you expect weight more than that, I’d reinforce with a 2 x 4 standing up in the middle of the cabinets in an abundance of caution, but they’re sturdy enough for a group of kids and anyone under 200 lbs for sure!
Kate
Kate, You are such an inspiration to all – I will replicate this project! TYVM :)
Great job! I think they look fabulous! You might be able to find some outdoor cushions that would fit on there, even if you used about 4 of them it would be easier than making one long one. An outdoor cushion would be easy to spot clean too.
Great, great project!
Susan
Homeroad
Love it! Use at least 2 big cushions on either end of the seat so that when you turn and put your back up against the side wall to read, it’s REALLY comfy. Love your choice of textiles and the shade texture!
It’s AWESOME!! Love it! Thanks for sharing! :)
WOW..I’m so jealous, that looks amazing and so functional too! Nice work!
Love it! Have a fabulous day!
Looks amazing! We have poorly made built-ins in our office and I hope to actually put a bench in under the window.
Love!! However, the most exciting part of this post was seeing that you used SHURTAPE! My hubs works for Shurtape so anytime I see tape in a post, I immediately look at the core and if it’s not one of Shurtape’s brands, I click off immediately! Just kidding, but I really do love to see their amazing products in action!
It looks fantastic I love the pillows and images of the kids inside while building it. I had no doubt it would be great.
Cynthia
Kate,
You always amaze me…the window seat is so great and how practical to have some storage in a room used by the family. Good job.
Karen
beautiful! We have plans to add a window seat to our bow window. It’ll be far in the future, but I can’t wait!
Great job! I vote for the woven shades–I think the cornice is a bit formal, while the shade would give a more comfy/cozy vibe that would fit so well with a space for reading and relaxing.
Great job! The new bench looks terrific! I know you said that you’ll be sewing the cover for a long cushion, but I’d suggest busting it up into a couple of cushions. Partly because it’ll be easier to get foam for the cushions, but also because kids like using cushions for fort building and 2 or 3 smaller ones are more useful than 1 long one. Looking forward to seeing the space completed.
How lucky that those cabinets fit so well. We did the same sort of thing with our bathroom vent when we moved it from the floor to underneath the vanity- it works great. Your pillow selections are very pretty. Have you thought about doing three cushions instead of one looong one? Then they could also be used for floor pillows.
Looks awesome! Replacing the cornice sounds like a great idea and I love your replacement option. Are you going to make one long cushion, or several shorter ones? If you’re doing a long one, please, do tell where you find a piece of foam long enough. Thanks!
I am so jealous of your window seat. It is gorgeous and so long. Sadly, we have no place for one in our house since all our windows are too low (are only about 12 inches off the floor) or start at floor level. It is great for light, not so great for fulfilling my dream of a window seat. Can’t wait to see it all finished.
It turned out beautiful and adds so much storage and seating to a small space. I especially like the tip about the aluminum tape. We had a cupboard covering a heating vent in or last home. While they put in a vent, I don’t think they took that extra step. Everything on the shelves was toasty warm, but the room remained cold. Great advice.
I love it! I would not replace that cornice board; I think it looks spectacular with the window seat.
Love it all!!! This is why I love Ikea so much. We have cabinets of theirs in our Laundry Room. But I have always wanted a window seat like this. Oh maybe one day. ;) I really love your Photoshopped picture. I love the look. So inviting and comfortable looking. I would read and nap there for sure. ;) Can’t wait to see what you decide on for the area.
By the way, do you already have a table in mind? Are you going with a round pedestal one?
Hey there
Love your window bench seat out of the Ikea shelves. You need to send your idea to another great blog called ikeahackers.net I did an ikea hack this year and sent it in. She then moderates everything and if it fits her criteria she pops it on with a link back to your website.
Its also great to see all the other awesome things people think of too.
Turned out great, especially the smiling kids part.
~Bliss~
I love it! We built a window seat last summer with drawers rather than cabinets. We had the same issue with venting, too. A pain, isn’t it?
Anyway, At first I was going to sew a cushion seat as well. But we ended up installing a dark wooden top that was so pretty we didn’t want to cover it up with a cushion. I ended up saving myself a lot of work with that approach! Staining is a lot easier than sewing cushions – at least for me.
If you want to check it out, here is the first post: http://www.4inspirationsphotographyblog.com/suzanne-mcgrath-photograp/2011/08/thrifty-thursdaya-built-in-window-seat.html
Awesome post… The hinges can really add up in cost, so that’s great you were able to get them at IKEA!
Kate, LOVE IT! I will be copy-cating very soon Friend!
Brilliant and fabulous!!!!!!!!!
Love it! You’re so good at taking IKEA basics and turning them into something special. Well done!
ROCK STAR!!!
Wow, that is really nice. I love it. Great job. Can’t wait to see it finished with the pillows.
Awesome awesome awesome! I am so inspired to try that right now…if we live in our current house for longer than a year, I am going to have to do this for sure. As far as the window treatment goes…they both look really nice. Cornice looks clean and airy, the woven shade looks cozy and eclectic. A global look is kind of a big deal though, it might really bug you if it doesn’t look like the rest of the house. I personally think that the woven shade with the style of pillows you have set up in the first picture would look really pretty and homey and eclectic, without committing to a “global” theme.
Awesome!!! You’ve made it look so easy :)
I’ve wondered how to do a window seat with a vent. I love window seats but won’t get one in this house. Looks lovely!
It’s beautiful! Congrats. I love the global inspired pillows…I say go for it.
Please, when you get to the cushion, do a tutorial. I have to make a 7-foot one and don’t know where to get the requisite loooong zipper, and whether to deal with cording.
I’m about to close on my first place and I have dreams of a window seat in my dining area! Love this!
You guys never fail to impress. If WE attempted this project it would take months. :P It looks gorgeous, and I love that it was made out of inexpensive cabinets! I know whatever you decide for the pillows/window treatment/light will look fabulous.
Kate, it turned out awesome! I just love the vent that you ended up with! I really like the cornice that you have, it looks perfect with the seat. You could always add a simple matchstick blind under it or maybe add a roman shade to match the seat or pillows.
I’ve always wanted a window seat and this one looks amazing. So sleak with the clean lines. I think I’ve spotted that light fixture at World Market, no? I’ve been stalking it a little, wondering where I’d put it. Thanks for sharing!
Beautiful as always! Enjoy your new window seat:)
Hacking IKEA furniture is one of my favorite things to do, it’s so inexpensive and versatile. Your project turned out incredible, can’t wait to see more! :) My favorite part is that everything is nice and concealed.
xoxo,
Jen
Beautiful job. I’ve done some IKEA hacks as well. Nothing like some solid IKEA furniture and pieces of wood to get the job done!
Absolutely love it, Kate! You did an amazing job. Can’t wait to see what you stitch up for pillows : ) Now thinking of where I could put that in my house, ha ha.
Can you send that cornice over to me?!? I absolutely love it! Don’t get rid of it! I live in the Midwest and the windows here seem to all be higher on the wall. I would love a window seat, I just don’t know how I can do it. I think yours came out beautifully; then again, I did not expect anything else. I am looking forward to meeting you at Haven! You’ve achieved Rock Star Status in my head since I started reading you about two years ago!
What a great idea. It looks fabulous. I wish I could make a window seat in my house, but we have baseboard heaters beneath every window. Enjoy your beautiful window seat.
FANTASTIC Kate, I wish we worked at your pace…..we suffer from turtle -iosis………
Can’t wait to show hubby this project……
All the best,
Kathy :)
Wow! I’ve been out of town for a few days, but I had to comment and tell you how awesome this looks! Great job. :)
Looks great! I just bought a house and I really want to combine your Billy built-ins with the “window seat” for our entertainment center. Which Ikea cabinet did you use for the window seat? How tall is it?
Hi Lexy, the refrigerator cabinets I linked to are 15″ tall and 24″ deep and 36″ wide!
Kate
I was just watching episode 4 of the newest season of Sarah 101 and she made a dining room bench out of Ikea kitchen cabinets. Great minds!
Oh now that looks beautiful! Isn’t it funny how kids can find the most unusual things to entertain themselves! I feel for you making that cushion…not something I would want to tackle, but I am sure you will get it done like a pro!
Kate! Thank you SO much for this post!! We are 8 weeks into our house addition on our 1940s Cape Cod cottage (new basement, expanding our teeny tiny kitchen, and gaining a bedroom above). Most of our budget has been put into gaining the new space, so the kitchen is being done with a very slim budget and lots of sweat equity and creativity (I LOVE the blogosphere!). We are painting our existing maple cabinets white, using the Rojo Tall Cabinet from C&B as a pantry, and using an ancient workbench that was in our basement as our island. I have planned to build the IKEA bench all along, but was stumped on how exactly to proceed when I realized there is a vent smack dab in the middle of the space the banquette is supposed to go. We are not particularly handy people, but you make it look so easy. Your post is like divine intervention for us handtool-challenged Midwesterners. Thank you!!!
So thrilled it was helpful to you Maribeth! If you can find someone or somewhere to cut the wood all you need is a drill to piece it together, good luck and send me pics when you do yours!
Kate
I will be sure to send you pictures, Kate! I can’t wait for my “after” to be my present (going on three weeks with no kitchen…) One question…did you attach the cabinets to the frame or just set them on top?
I love this idea! I do like the current window covering you have. Did you make that as well?
Hi Robyn, I haven’t made a seat yet, that last image is good ol’ PHotoshop!
Kate
Hi Kate. I was referring to your current window treatment, the white box toward the top of the window. I do like the look of the other window treatment you are considering (photo shop pic) Thanks Robyn
Ha, sorry Robin, read that wrong! The cornice was a DIY project, here’s the link!
http://www.centsationalgirl.com/2010/07/playroom-color-cornice/
Kate
Looks great!
Why did you use the aluminum tape? The air vent at the bottom of our kitchen sink does not have a tube directly from the air source to the vent. So we have a similar situation that you did with these cabinets. Did you also put the aluminum tape on the bottom of the cabinets?
amy
Hi Amy, I’m not sure the aluminum tape was even necessary, since we’re only talking about warm and cool air (if you have A/C) but since ducts and venting are metal, we were simply mimicking that finish.
Great job, love the finished inspiration pic! I want to do this exact project and wondered about the vent…thank you! love your blog!
Love this! What’s the source for the bird pillow shown in the original pic?
HI Jaimee, I found that at World Market a month ago, just checked their site though, it’s no longer avail, maybe in stores?
Kate
I just made pillows with that fabric on the left. Love it!
Hi Kate, I absolutely love your blog! There’s a bathroom vanity I love from IKEA, but it doesn’t come in the black colour that I prefer. After reading this post, I’m convinved I can just paint it now! I was a little nervous before, concerened with the shiny exterior. I was wondering if you could tell me a little more about your painting process. Did you sand the parts you were going to paint before? What kind of paint did you use? How is it holding up? Thanks so much for your help!
Hi Ashley, if you’re paiting a laminate or particle board surface (common with IKEA) then you need to use a really good adhesion primer. I prefer Zinsser Cover Stain, and then you can follow it up with any latex paint.
Kate
Love your blog! Great idea for the air vent. I’ve been wanting to do some built-ins on the long wall in our living room, but there are two air vents on the floor next to the wall. Thinking now I could do some cabinets/seats (like your window seat) on either side of a massive “built-in” bookshelf. I am really inspired :)
<3 it! I have been wanting to do a built-in Billy for a VERY long time however, I didn't have a clue about what do with the floor vents…Tah-dah! This is going to be my birthday present to myself. ThanQ, thanQ and ThAnQ!
Any issues with the cabinets not being strong enough to support the weight of people sitting on them?
Hi Brandy, we addressed that in some earlier comments, nothing so far, but it’s a seat for kids. If concerned you can reinforce the middle with 2 x 4s.
Kate
Hi Kate, we are about to tackle this project and I had a question about your cost breakdown. On Ikea’s site these cabinets are listed for $131.00 each now, which before taxes for just 3 cabinets is $393.00. I’m hoping to get as good a deal as you did and I’m wondering did you catch them onsale or use a coupon?
Thanks for the great project and instructions!
You have inspired me to do this at the weekend! Was the vent necessary or could we do without raising it up ( we have a low window)? How’s the cushion going?
Cushion is done Tonia, I’ll be writing about it soon…. not sure how to work with a floor vent without raising it up… send me a picture!
Kate
Did you attach your “base” (the 2x4s) to the wall or floor, or just set it in place and put the cabinets on top? Did you attach the cabinets to the wall (and or the base)?
We attached the 2 x 4″ frame to the wall Dayna, I should have mentioned!
Thank you! And, the cabinets are then attached to the base too, or just the wall (or I suppose) just screwed to each other and sitting by gravity on the base)?
Do the benches sag when you sit on them? The sides are just 1/2 thick. I’ve had the experience with Billy bookcases that the wider ones sag just with the weight of a book on them. How do these do with an adult sitting on them?
They do just fine with an adult under 200 lbs Kateryna, if concerned I’d stabilize with a 2 x 4″ standing inside for additional support.
Thanks! It does seem too good to be true – doesn’t it?! I love it!
I’m really late to this party, but this is amazing! (I stumbled on it looking for banquette instructions, so thanks–even though I read you regularly and somehow missed this.) Did you put in this floor? If so, can I ask what it is?
Thanks!