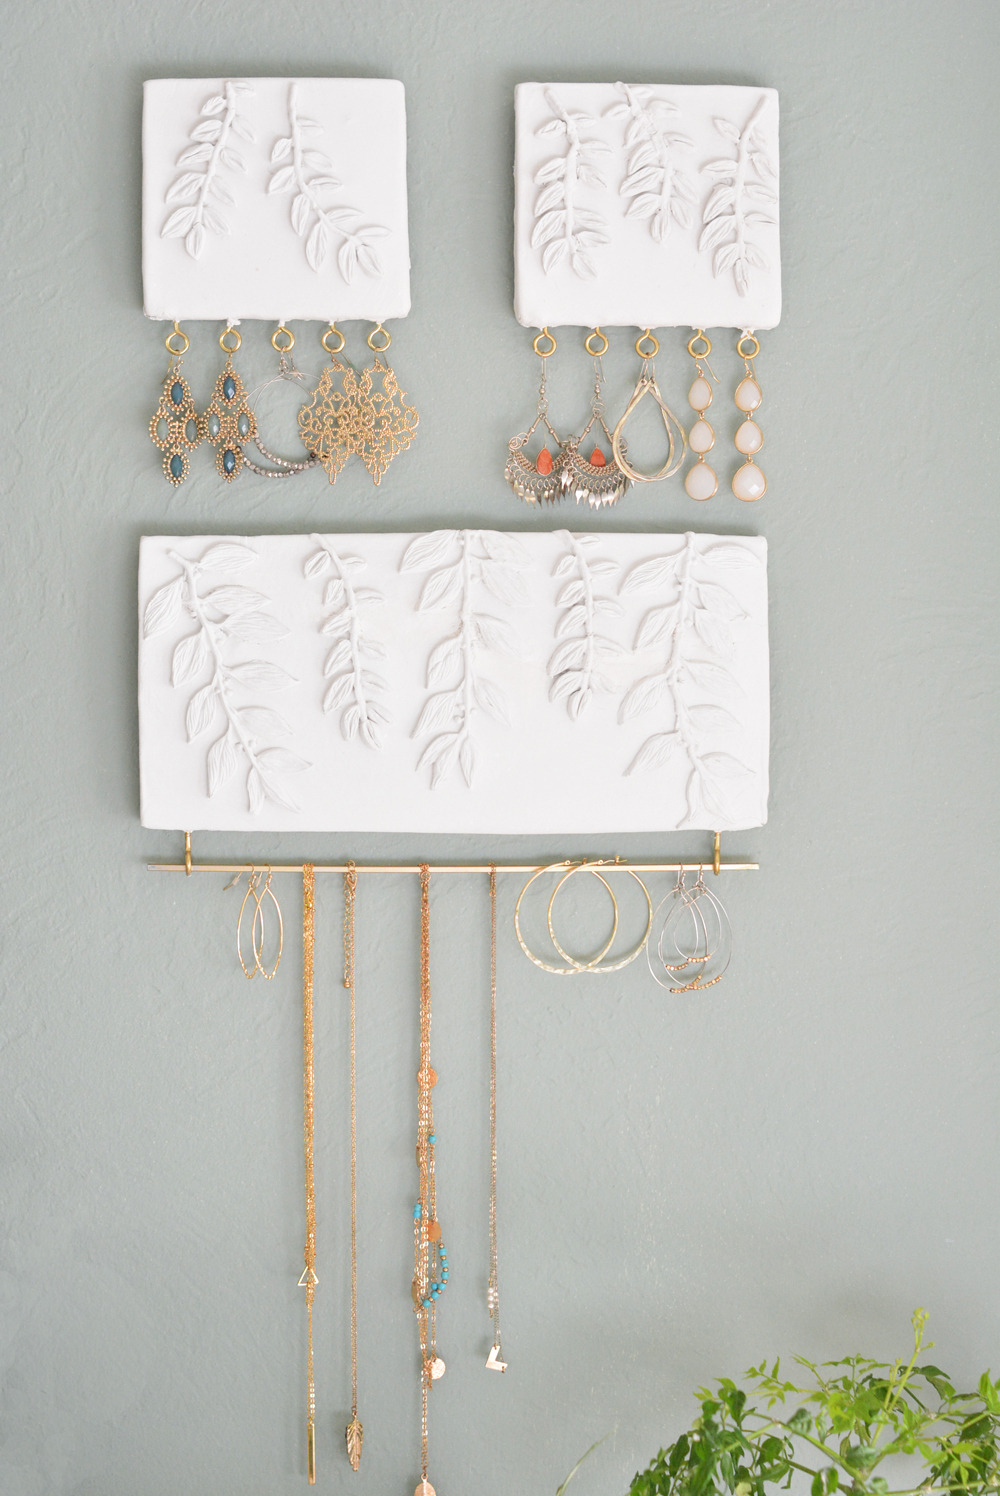
I’ve admired bas relief sculptures for so long, I really love the sculptural aspect of any plaster or clay form where the designs are dimensional in shades of alabaster or white. Relief art uses techniques where the figures or design elements are raised and more prominent than the flat background.
Relief sculpture is as old as humanity, dating back to the Egyptians, Greeks, and Romans. I’ve wanted to try to create my own mini versions of bas relief, so I created small scale botanical versions to use as jewelry holders. Instead of plaster, I used air dry clay and silicone molds to create a decorative and functional jewelry display.

Not all my DIY experiments turn out well, but this one thankfully went according to plan. How I made them and supplies to recreate listed below!
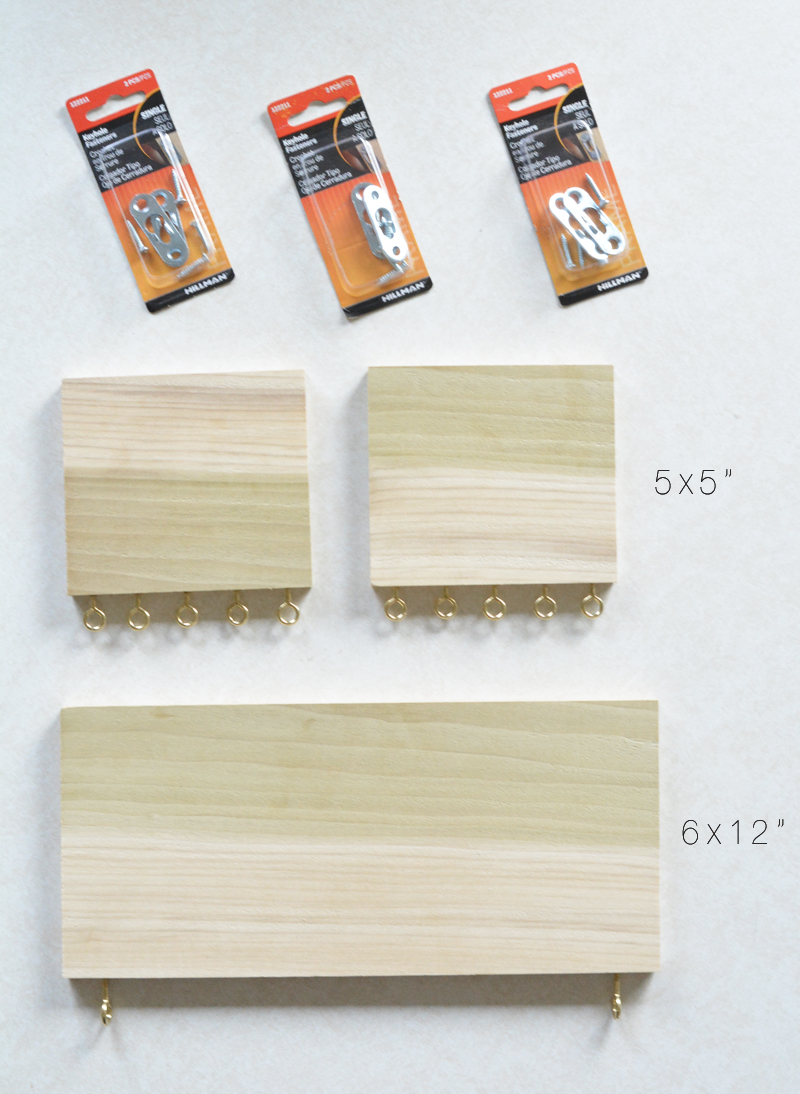
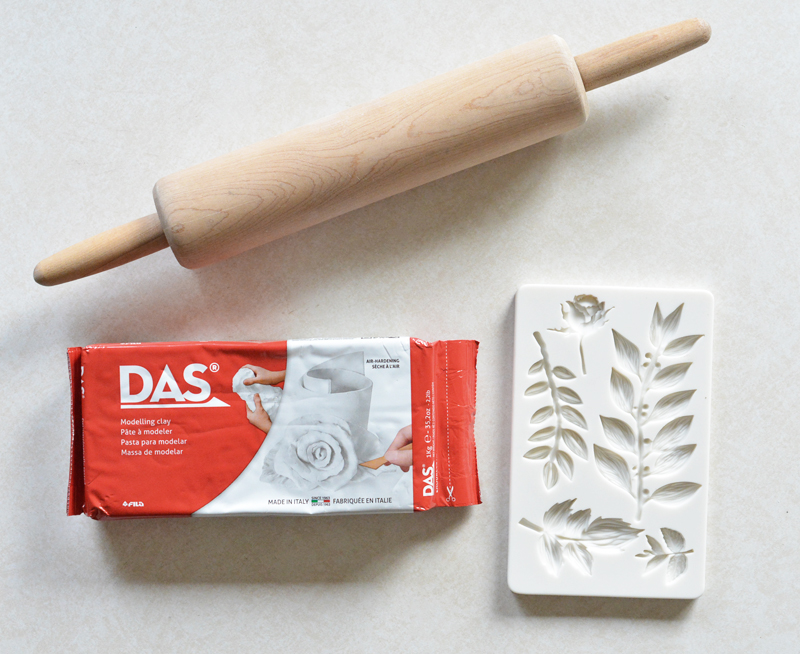
Supplies: keyhole fasteners, wood cuts (see dimensions below), eye hooks, metallic spray paint, air dry clay, leaf silicone mold, metal bar (for necklaces and bracelets), tacky all purpose glue.
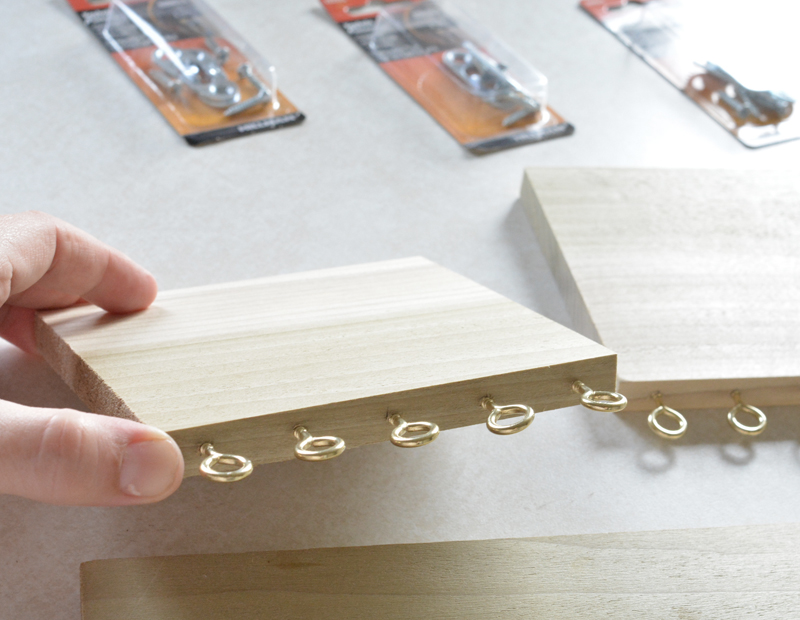
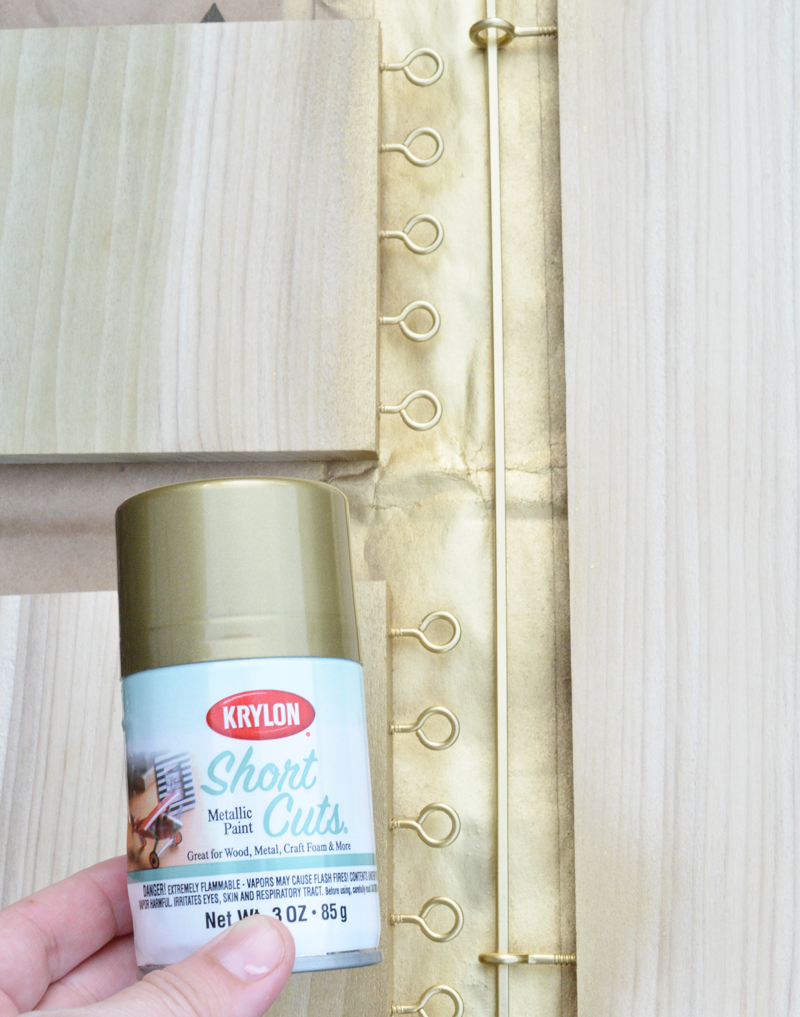
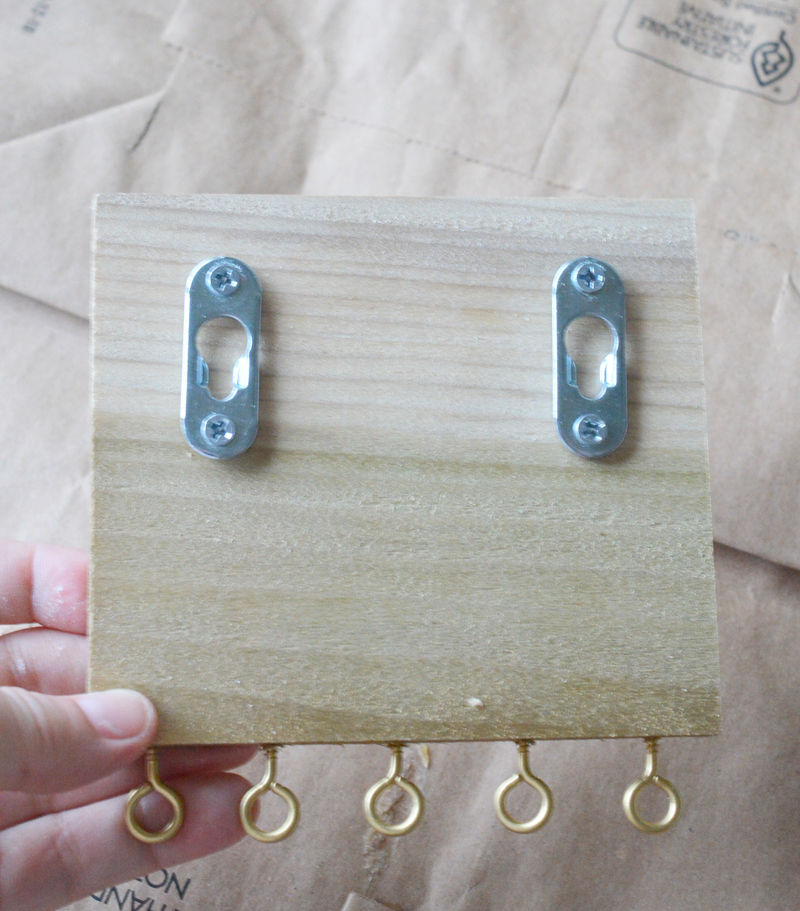
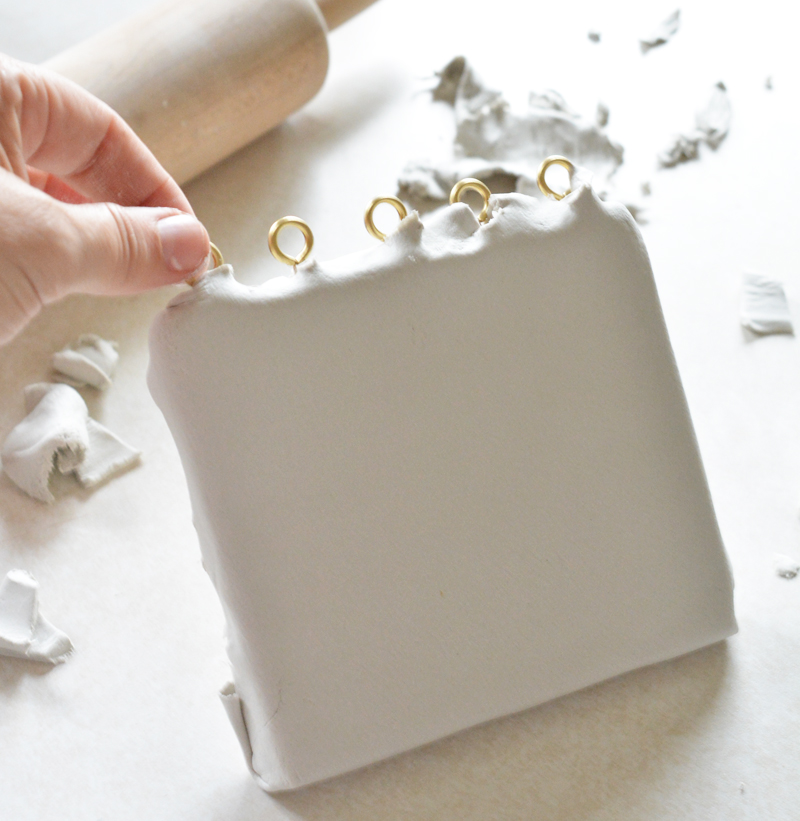
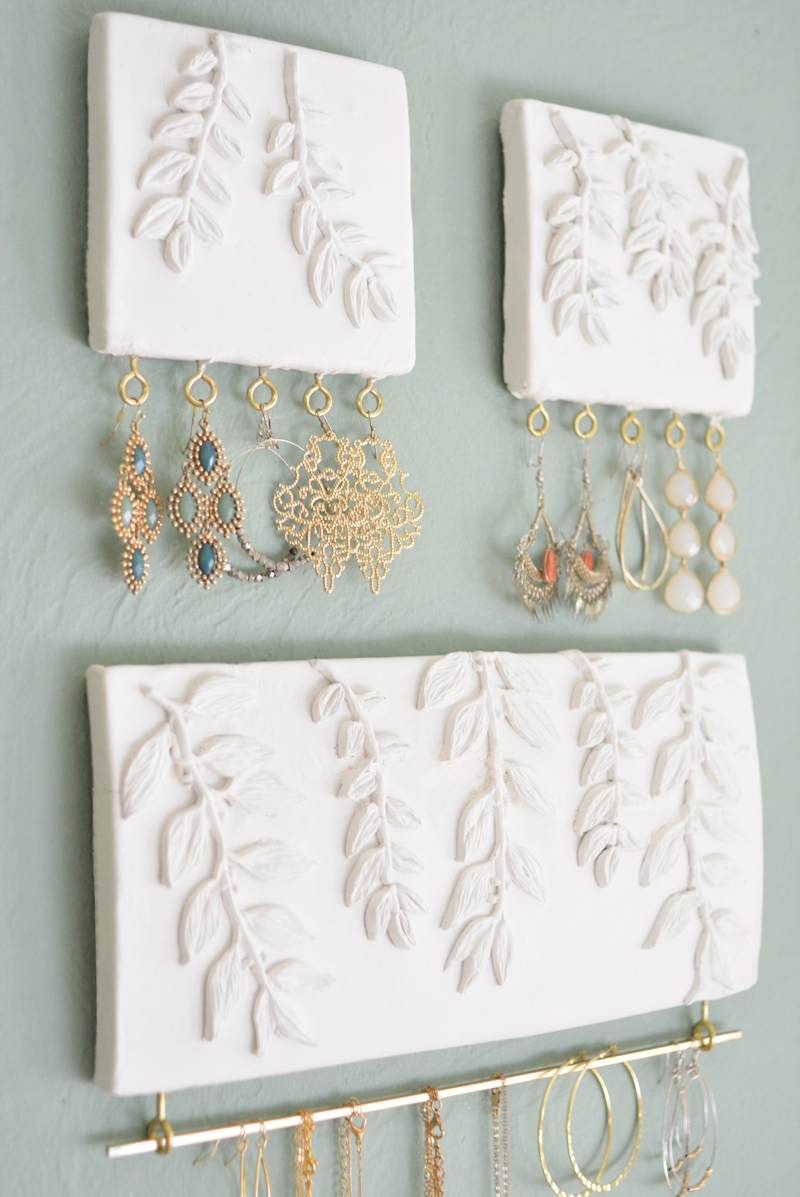
First, cut the wood to your dimensions of choice. I used 3/4” thick planks I found at Lowe’s and cut them to 5×5” and 6×12”. Next, insert the screw hooks into the base. Mine are spaced 1” apart for the earring holders.
Spray paint the hooks and bar so they are the same color with either silver, gold, or rose gold spray paint.
When dry, attach the keyhole fasteners to the back of the wood forms.
Now it’s time to create the clay reliefs with the silicone molds!
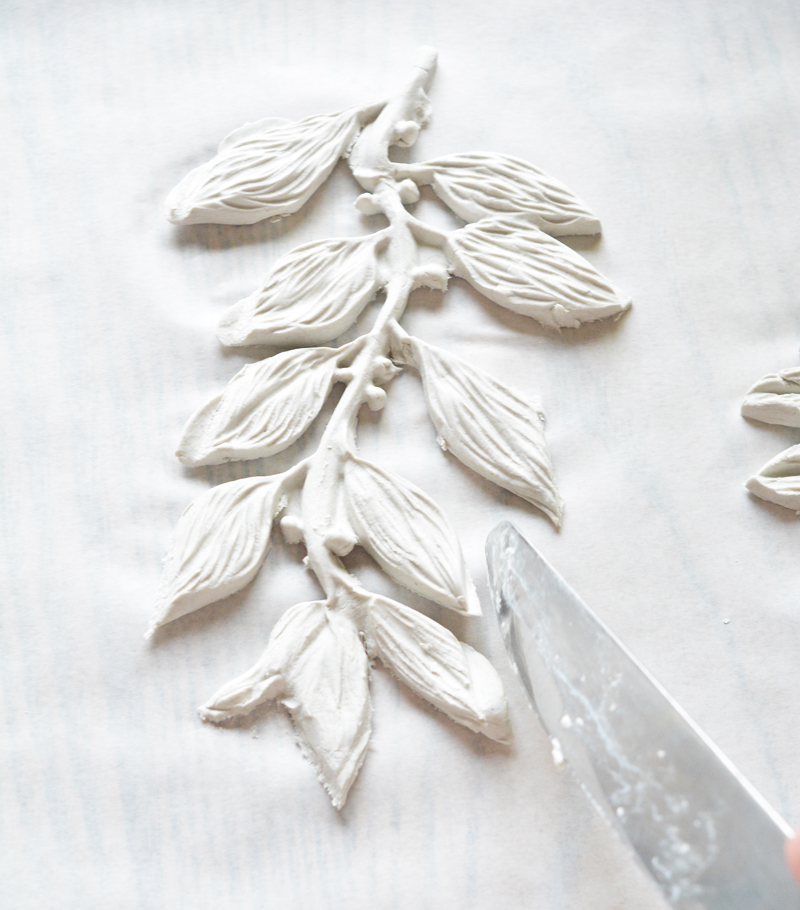
Press clay into the silicone mold to form the leaves. I found using the rolling pin to press the clay into the mold helped gain full detail of each leaf. Cut away the excess with a knife so the forms can lay flat.
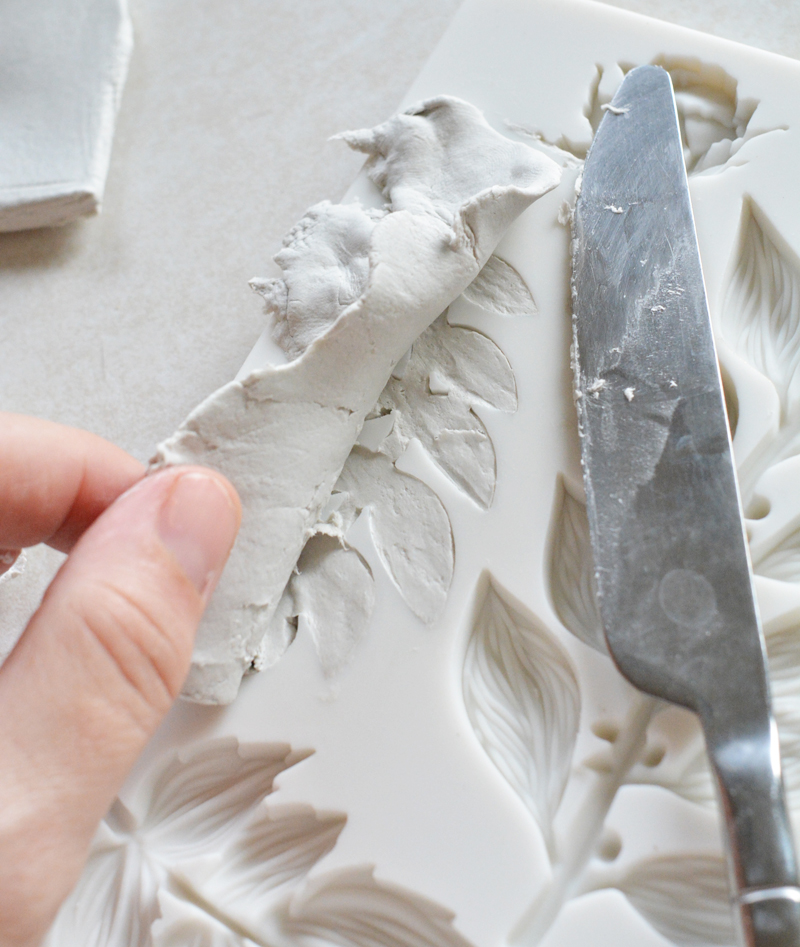
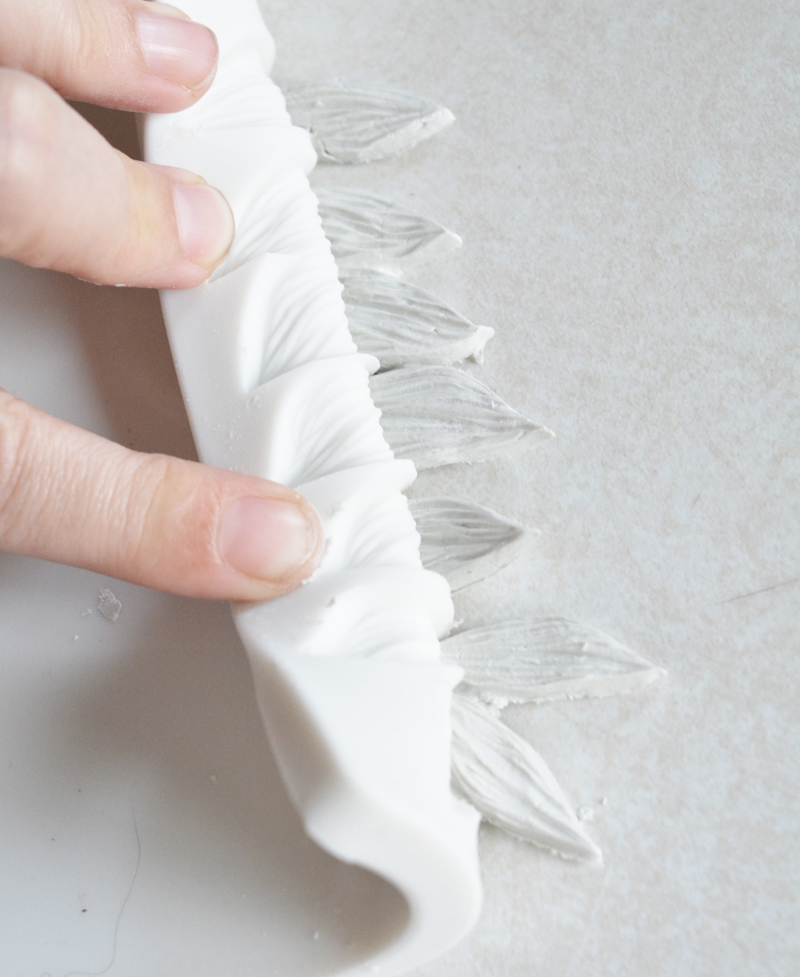
Separate the leaf forms on wax paper. Use the knife to cut away any excess.
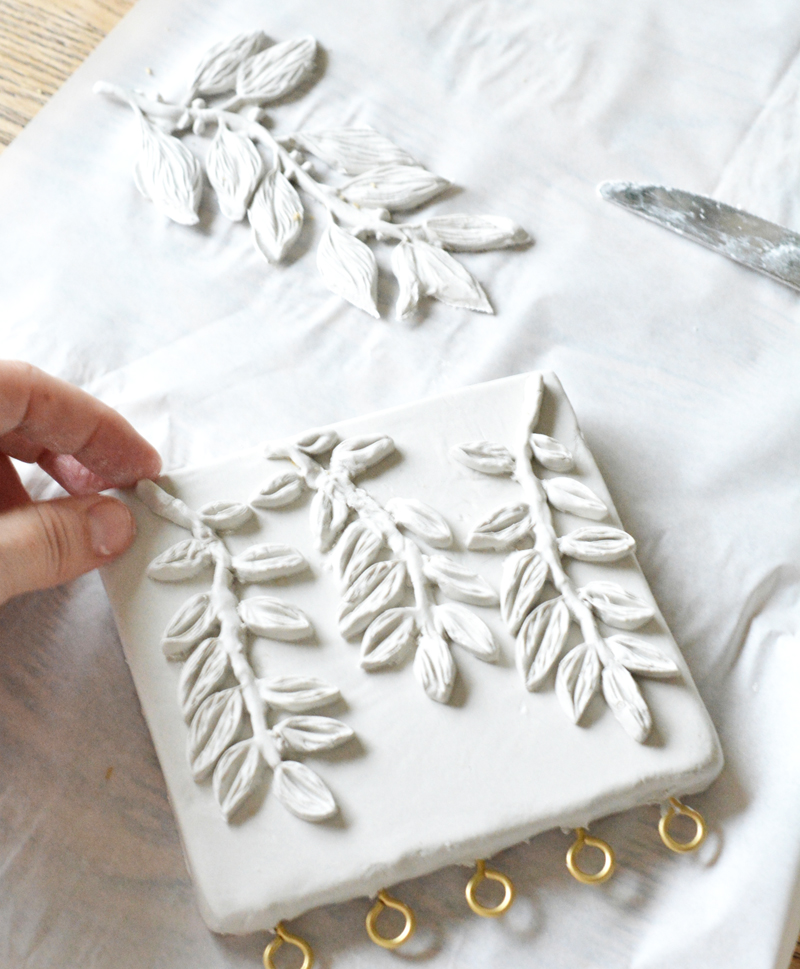
Add a thin layer of tacky all purpose glue to the front and sides of the wood to help the clay adhere to the wood. Wrap each piece of wood one by one with a flay layer of clay, cut away excess on the back, then layer the leaf forms on top to create unique designs.

The larger wood piece bowed slightly, I believe it was due to the moisture in the clay (or maybe the air) and ended up with fine cracks in a few places, but I mended it with lightweight spackling.
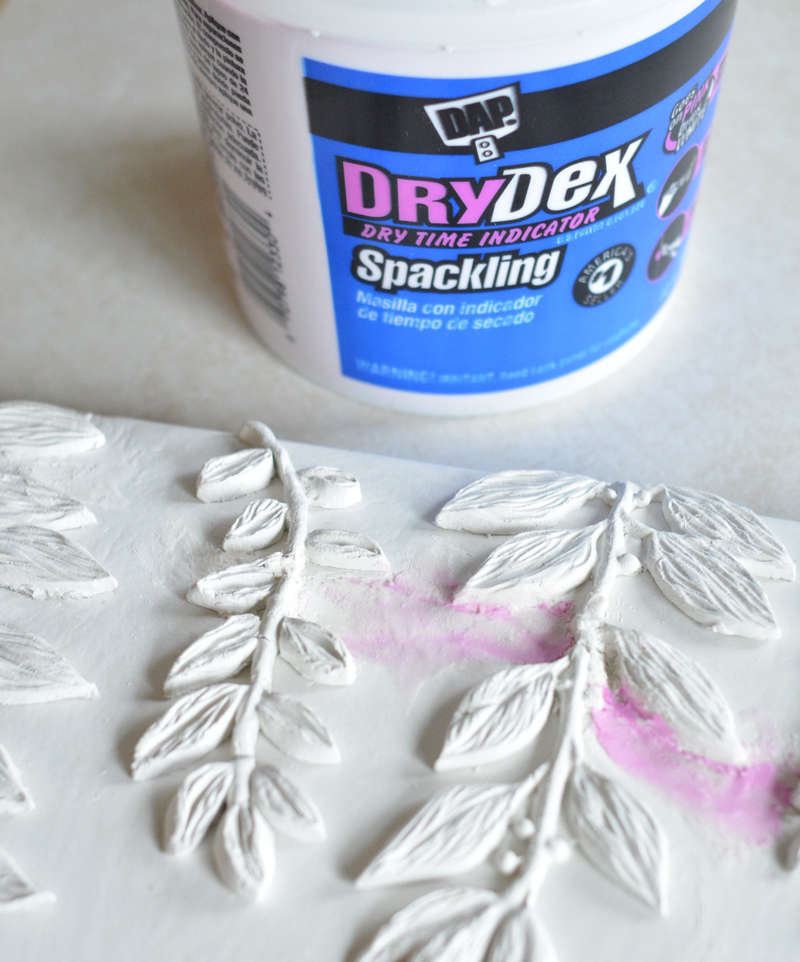
Before hanging, I gave each clay relief a light coat of water based Zinsser 1-2-3 primer for even color and to maintain the matte finish. You can use this same technique to create artistic plaques too!
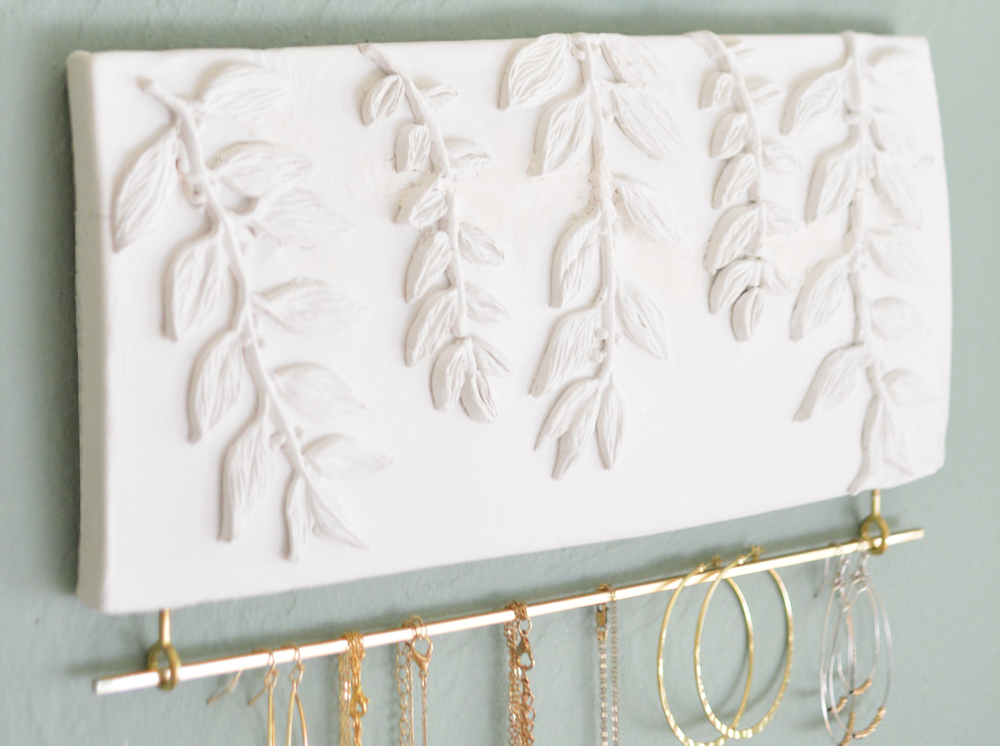
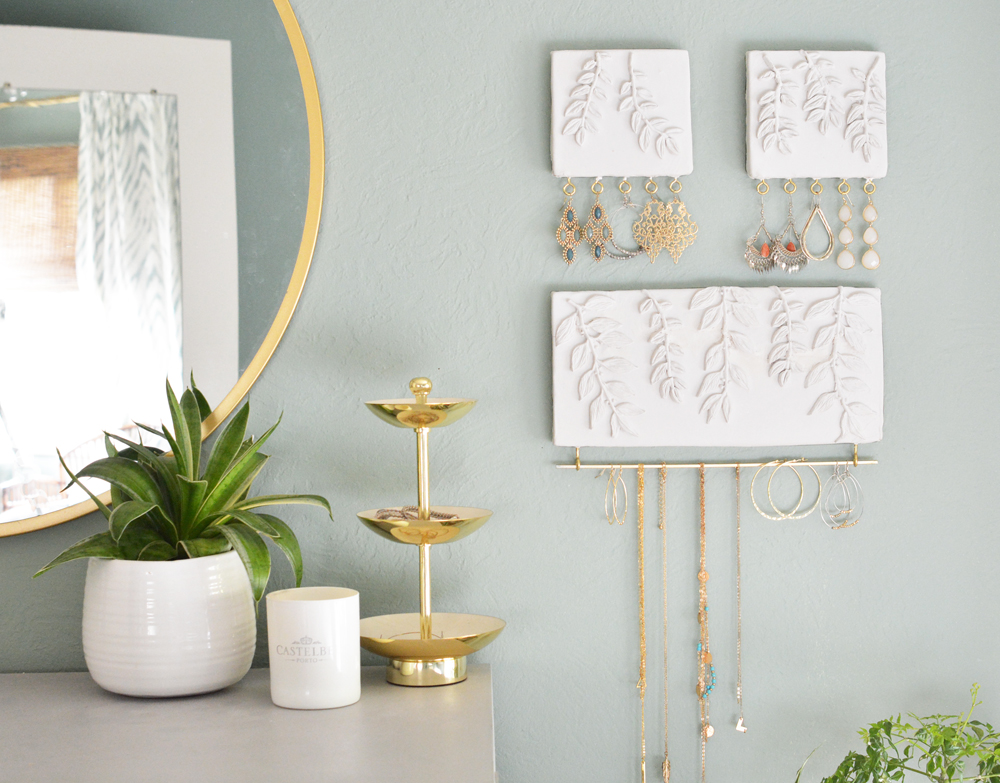
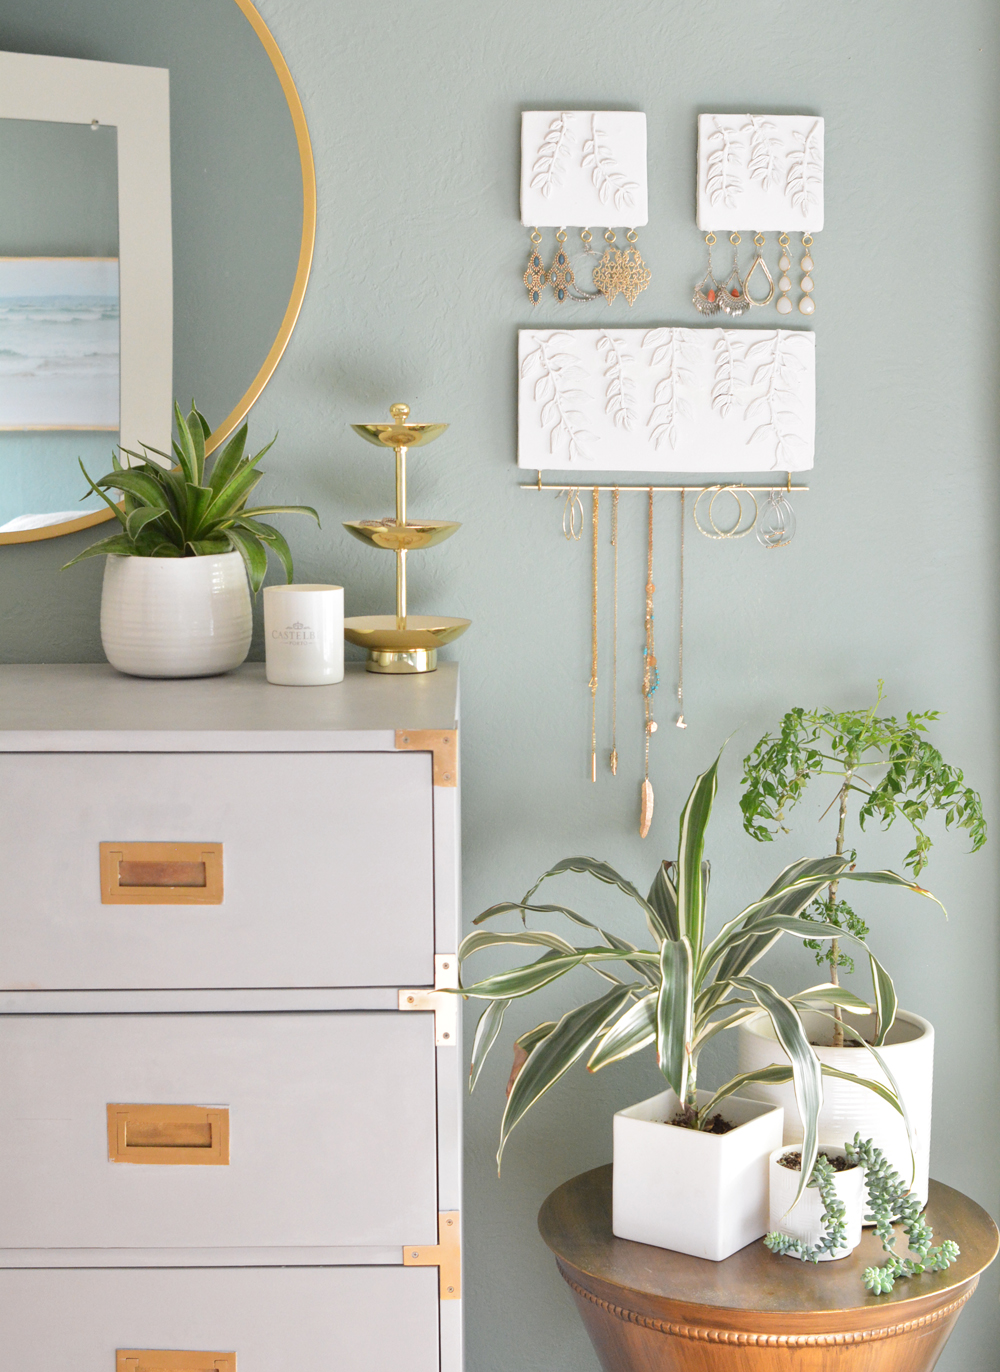
I’m really happy with how they turned out! They are a uniquely beautiful way to display chandelier earrings and necklaces.


These are gorgeous! You come up with the best stuff!
jewelry for jewelry! very pretty!
absolutely stunning! i was scrolling down hoping i could buy these from you haha! that is really classy of you to give such good instructions to do this.
but as i don’t have space in my cozy unit, i would still buy these from you…just saying :}