Greetings everyone! Today I’m on a flight to the SNAP Conference in Utah where I’ll be mixing with other bloggers and also speaking on Saturday on a panel with Ana, Shelley, and Emily on ‘Discovering and Defining your Personal Style’. Can’t wait to meet all of you that are attending!
While I’m away, I have a very special guest for you. I’ve long admired Heather Bullard, a talented stylist with impeccable taste. Heather is a Contributing Editor to Country Living magazine, and she also produces and styles editorial stories all over the country. Heather recently launched her publication Souvenir Magazine, filled with inspiration on all things home and garden. I admire her talents so much I asked her to share a few styling secrets with you.
Here are Heather’s Five Tips for Styling Better Photos!
“Hi Centsational Girl readers! So happy to be visiting you here today. I thought I’d share a few of my styling tricks and tips with you. Whether you’re working on an entire room, a small vignette in your home or want to style better blog photos here’s five tips to help make things easier!
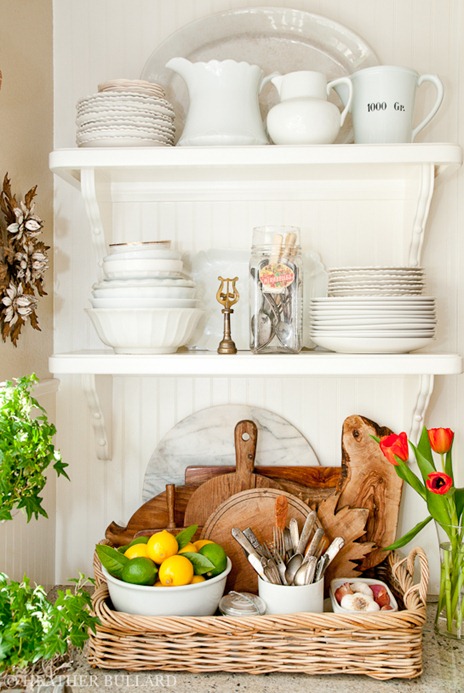
1. Contrast. When styling, think in terms of adding items that counter balance one another. The bright whites and warm woods in this photo of my kitchen corner, are a great example. Also notice there is additional contrast in the breadboards and the texture of the basket tray. And even hints of subtle contrast in the various colors and textures of the ironstone.
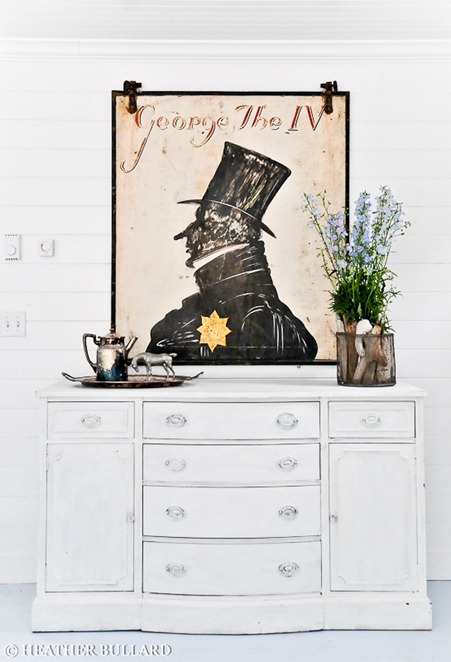
2. Use a Statement Piece. The bold graphic artwork in this mainly white home makes this room stand out. Because the artwork was the focal point, I kept the other styling elements minimal and neutral. In this case, less is more.
3. Real Life Styling. Keeping props and styling realistic is what makes a space or image feel lived in and gives it a warm, inviting atmosphere. For this kitchen, I added what the homeowner might naturally have, such as a small collection of cookbooks, vegetables at the ready and the cooks favorite utensils. Even with all the added props, the styling remains simple and comfortable.

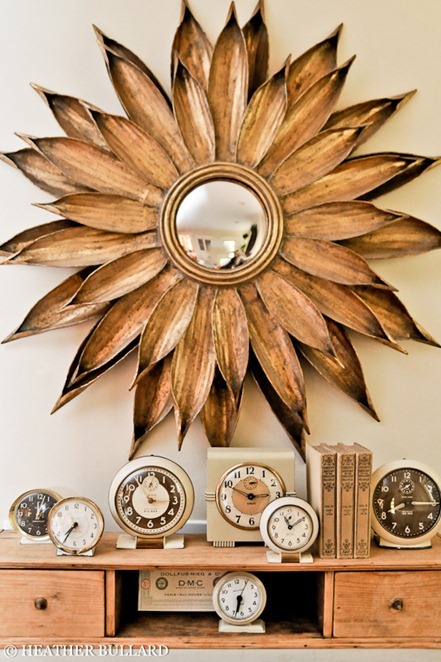
4. Group Like Items. A collection of like objects can be a stylists best friend. For this vignette, the only additional props added were a few vintage books in similar colors to accent but not overpower the clock collection. Letting the collection remain the true focus.

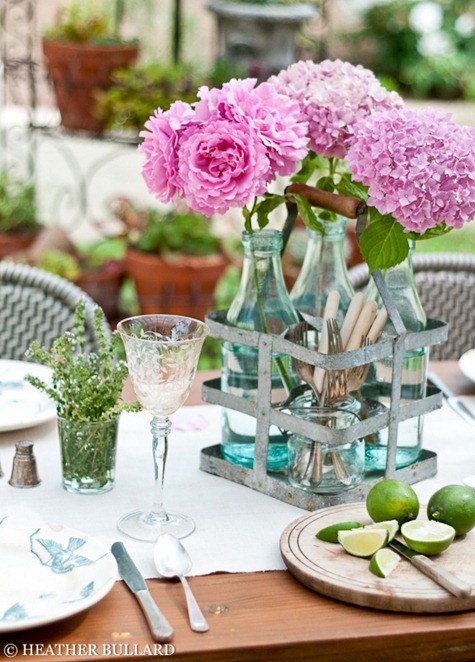
5. A Touch of Nature. Adding just a few sprigs of greenery or simple bouquet can give such life to any styling project. Beautiful florals and natural elements bring fresh perspective and help to add color and life a setting. These are a stylists mainstay and I can’t imagine working on a project without fresh flowers!
Thanks for inviting me to guest post today, Kate! I hope you and your wonderful readers learned a few Tricks of a Stylists Trade! Feel free to stop by and say hello anytime!”
Thank you so much Heather, you’re so inspiring! I love all of these tips and she’s so right. Incorporating at least one of these suggestions into your next photo shoot is sure to make for a simple yet well composed image.
Be back tomorrow with one more post to finish out the week!
.


Awesome post. I need a lot of help in this area!!
Thank you for the tips. Your photos are great!
Excellent tips, thank you!
What wonderful tips and beautiful photographs Heather. I’m always looking for new ways to improve my photography skills. I like the idea of adding realistic props. Lesley
Thanks so much for the great tips! I’m learning everyday.I love all your beautiful photos.
Kathy
Gorgeous pictures!! Thanks for the tips, I love your work Heather!
I’m visiting from Heather Bullard’s blog. These are great photo tips. I’m going to bookmark this so I don’t forget them :) :) :)
Love and hugs from the ocean shores of California, Heather :) :) :)
Thanks everyone! So happy to be guesting here today. Hope you enjoyed the tips and happy styling & shooting!
These photos are gorgeous! Love the way the color pops in that first one.
I’ve taken up photography classes in my day and I’d like to add another tip: the rule of the third. Instead of lining up elements in a straight line, tilting it a bit either left or right can give a whole new aesthetic dimension, especially when it comes to landscape images. Hope that helps. Thanks for sharing this.
Great tips, and I especially appreciate the clear, concise writing that accompanies your gorgeously styled shots. Thanks!
Thanks Heather and Kate. Good to know. I like the part about Making the space feel lived in and inviting.
Thanks for the tips. I really enjoyed this post.
I love the photography and styled images but always wonder how to get these beautiful soft “white” images, if I try it, it looks overexposed. Any suggestions please.
Thanks for stunning ideas.
Hi Jane, I think it takes a lot of trial and error with your camera, and lowering the aperture to allow more light in for that softer more blown out look, but you still want depth and detail in the image. If your familiar with your camera’s manual settings, try experimenting that way first. There are other ways to do editing with curves and levels in Photoshop too, but you want the camera to do most of the work for you with the original shot. Just my two cents!
Great tips! I always like how it looks when done by someone else :) I agree the photography is beautiful. I really like the first picture although, I didn’t even notice the beadboard until she pointed it out :) That is probably why I was drawn to it! Hope you had a great time at SNAP!
This is so helpful as I always feel at loose ends when it comes to styling my photos. Thank you so much for sharing. Beautiful pictures by the way, they made me feel so good!
great tips. i just started blogging about my new apartment so I will definitely be employing these points. Houseofthebonestorm.blogspot.com
completely gorgeous – what a wonderful SHARE – thank you! xo
would love to have ya pop by for a visit sometime – giveaway going on now!
NorthernCottage.net
I love the sunflower clock can you tell me where you bought it?? Thanks