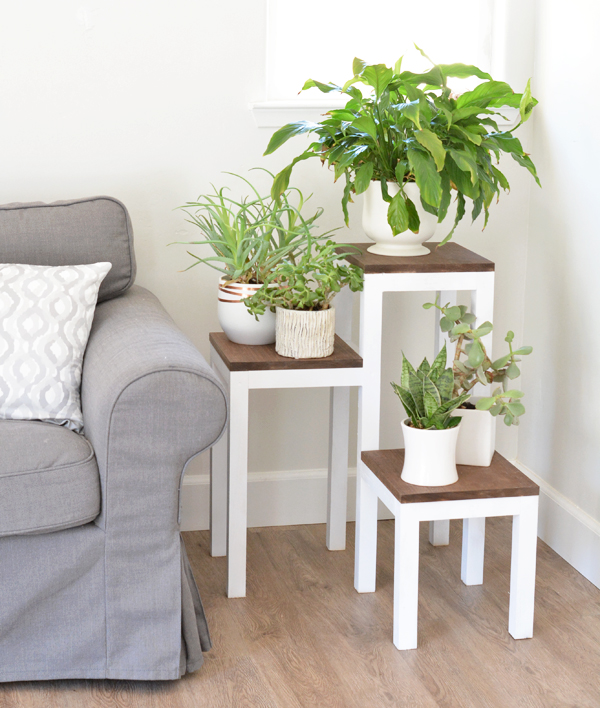
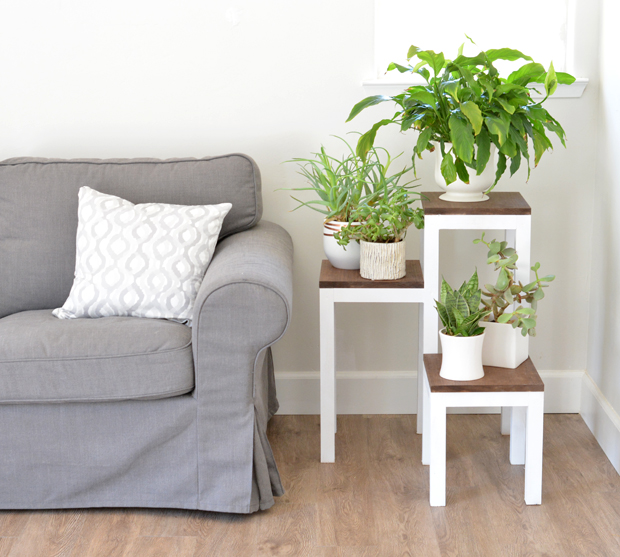
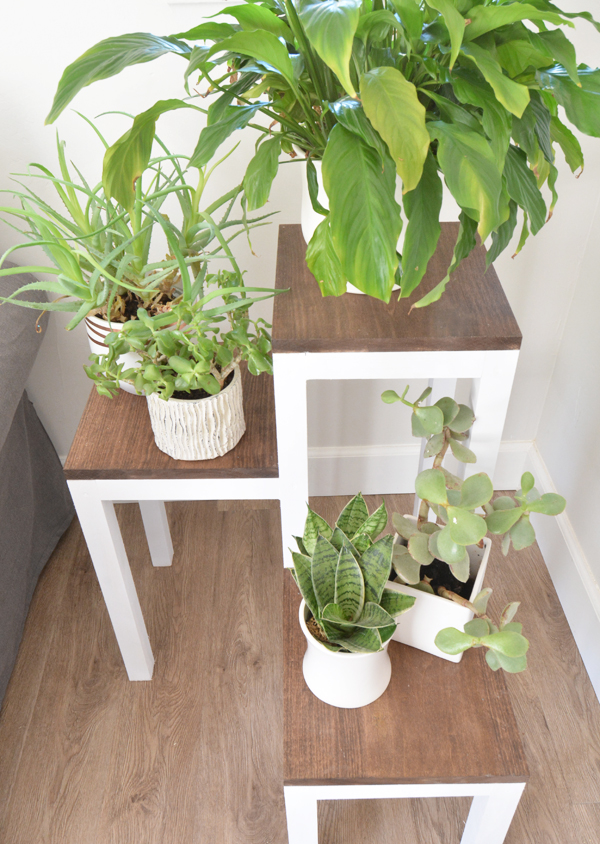
You know every house has an empty corner that could use some decor. Here’s an idea: fill one of those corners with greenery by building a DIY tiered plant stand.
This is my second project in partnership with Arrow Fastener where I’m using their tools to create something to inspire and I love how this one turned out. This month’s project was a tiered wood and white plant stand that sits nicely in a corner adding a fresh dose of botanicals to your space. Also handy as a perch for your coffee cup!
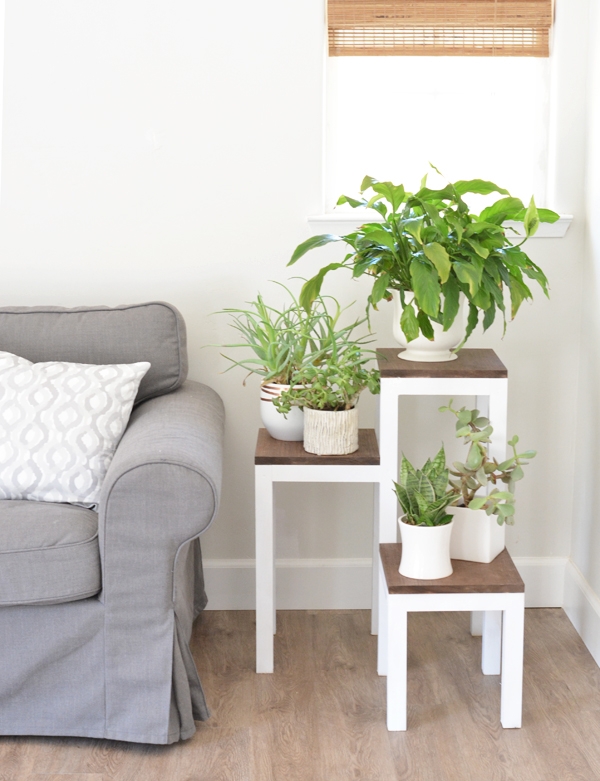
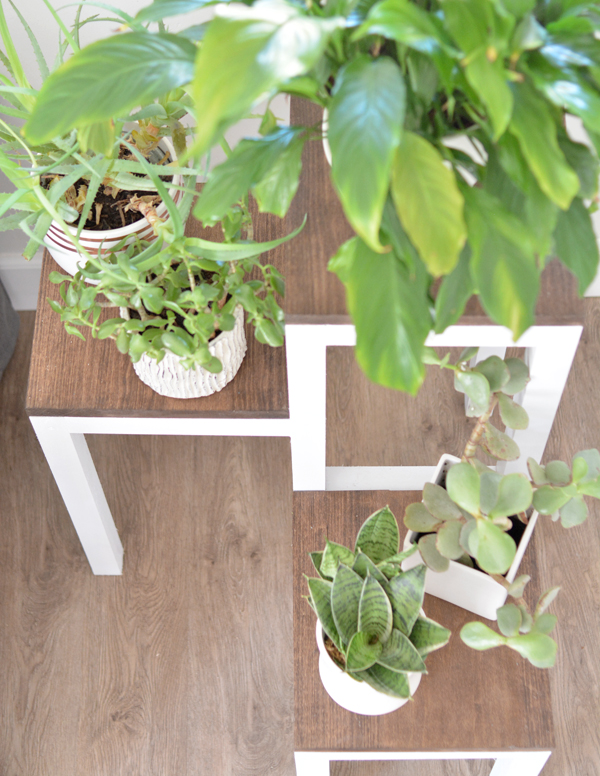
I love its clean lines, modern style, and the contrast created using both white paint and walnut stain.
To make own of your own you’ll need the following: two 24” x ¾” poplar boards, ten 2×2” x 3’ poplar legs, Arrow Fastener electric brad nailer, miter saw, clamps, drill bits, power drill, 2 ½ wood screws, stain, primer + paint spray paint, spackling, sandpaper, sharpie, painter’s tape, clear wax or polycrylic.
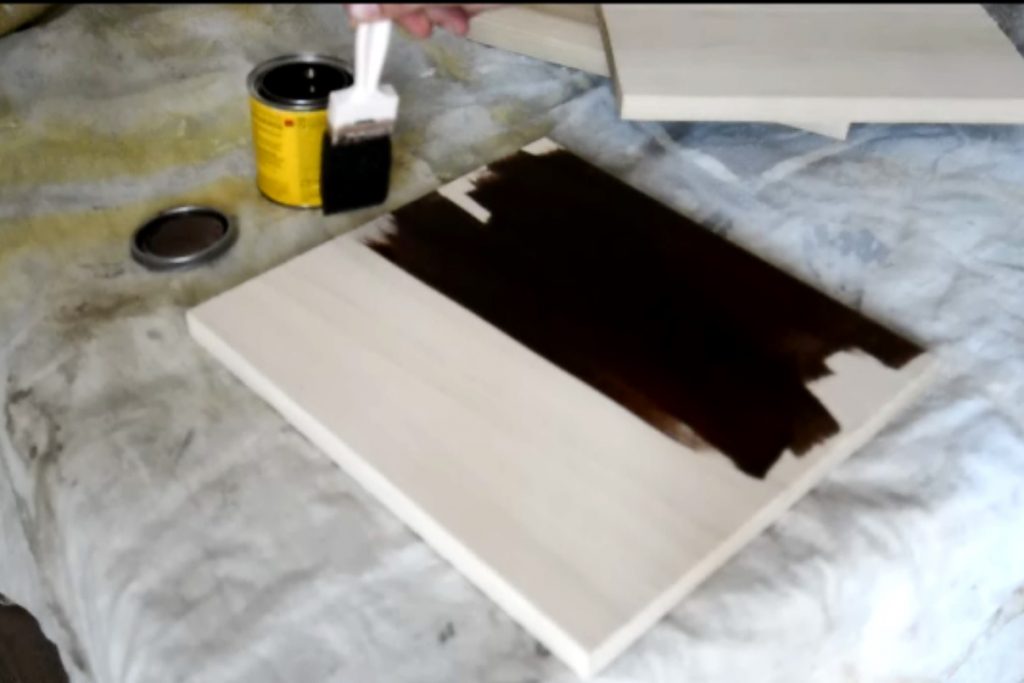
First thing, cut your 24” x ¾” poplar boards in half to form the tops with a miter saw. Sand away any rough spots and stain with color of choice, I used walnut.
(I apologize for the quality of some of these step-by-step photos, they’re screenshots from video, lesson learned to not rely on video and to pause and take actual images!)
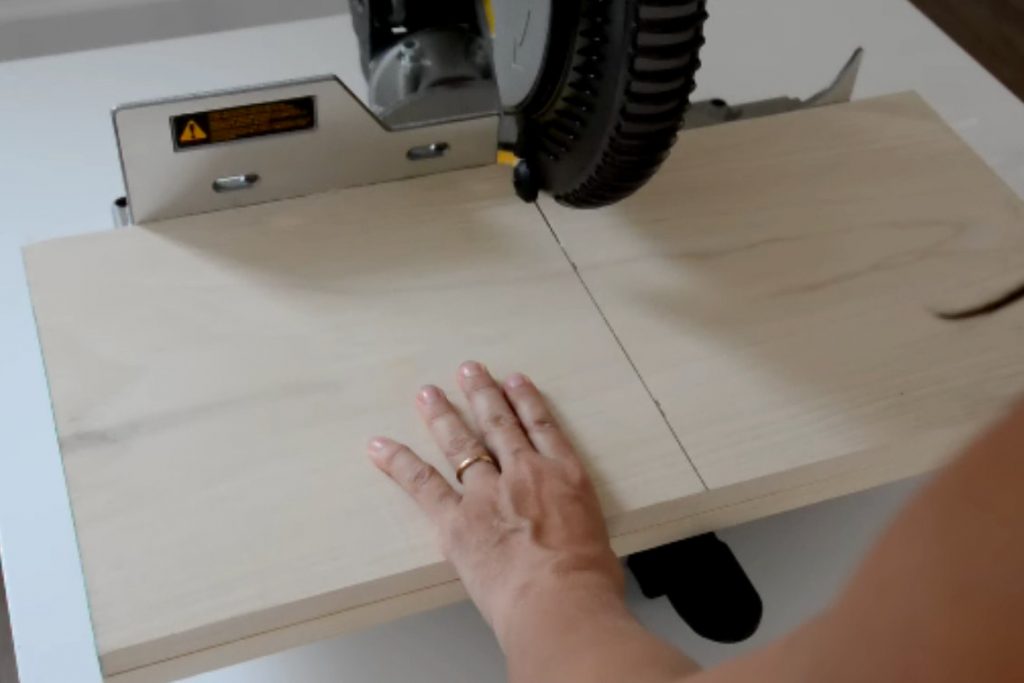
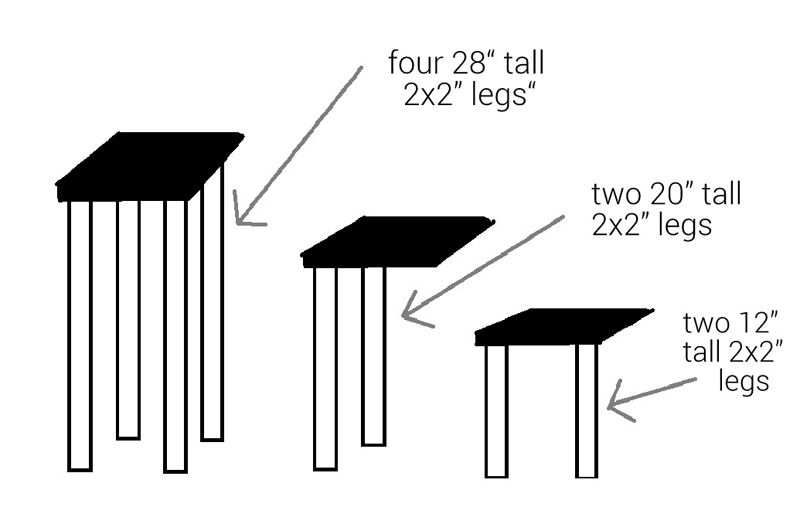
Next step, cut legs for all three tiers. (Because I can’t figure out how to sketch something worth anything in SketchIt this is the best you get to show you the height of the legs. Lame I know but you get the idea.) Note this diagram shows only the leg height it does not show the supports underneath, more on that later.
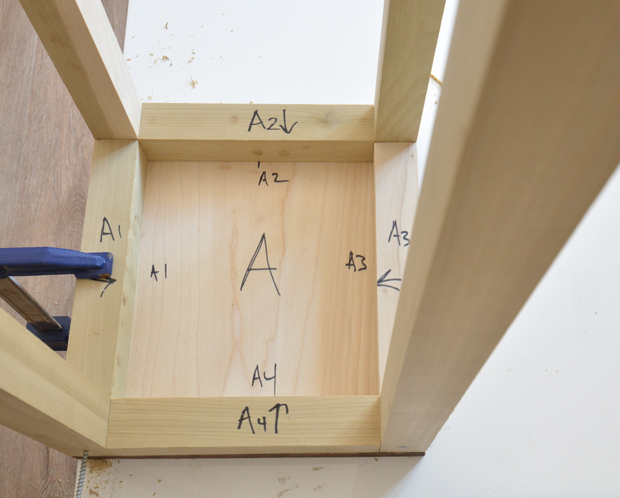
Next, cut stabilizing frame pieces with the 2×2” wood to support the three tops underneath. Use the legs in corners as your guide for the width of the cuts and mark their location on the underside with a sharpie. Cut four pieces for each tier. Mine looked like the image below.
The first thing you’ll construct is the top tier. Using a clamp, secure the stabilizing support pieces to the stained top tier piece. Drill pilot holes and secure four legs to support pieces (A1 – A4) with 2 ½” wood screws.
The supports for the medium and lowest tier look slightly different underneath. Each one of these tiers has only two legs so the support pieces attach to 1) two of the legs of this tier and 2) the tallest A tier.
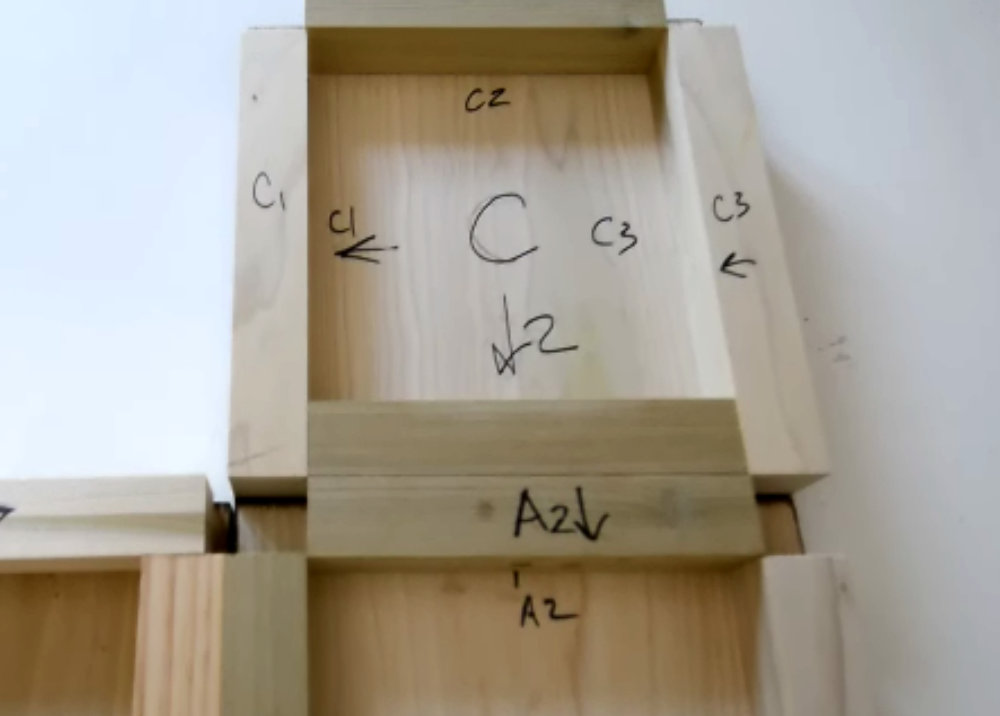
You’ll cut the same four pieces as you did for the top tier just like in the image above showing A1-A4. Note one of the pieces for the B tier and C tier will act as a leg stabilizer and that piece will be attached to the legs of the top A tier to act as a sheer the A tier legs.
Notice the C1, C2, and C3 tiers attach to the stained board top above and also this tier’s two legs. The unmarked support piece (the one that’s the same size as C2) will act as sheer to stabilize the tallest A tier and actually attach in between the legs of that tallest A tier.
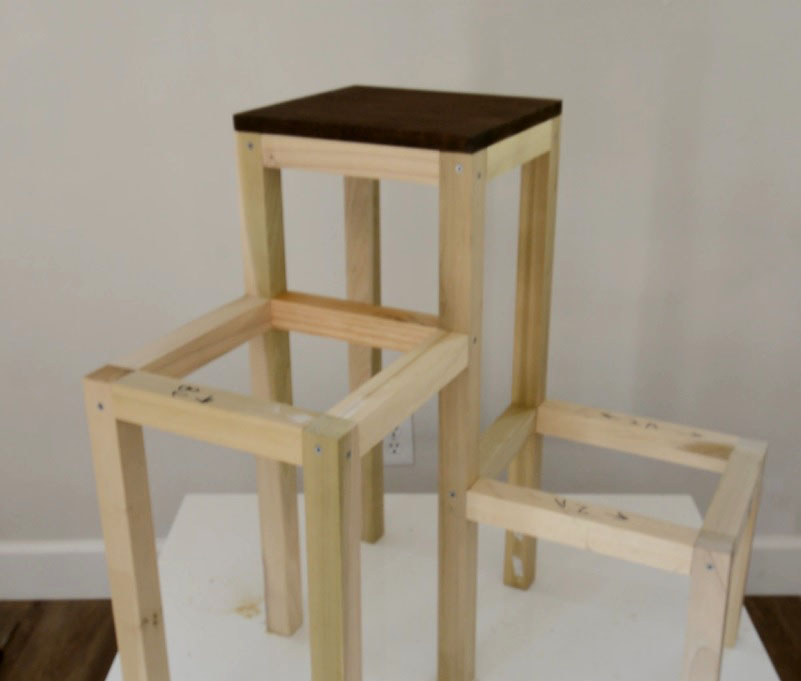
Drill pilot holes before screwing tiers together. Assemble A first, then B then C, then attach B tier to A tier and then C tier to the A tier to create the plant stand. One tip when screwing pieces together, since you’re screwing into the wood from two sides, pilot hole a little lower on one side then a little higher on the other so the crossing screws don’t run into each other.
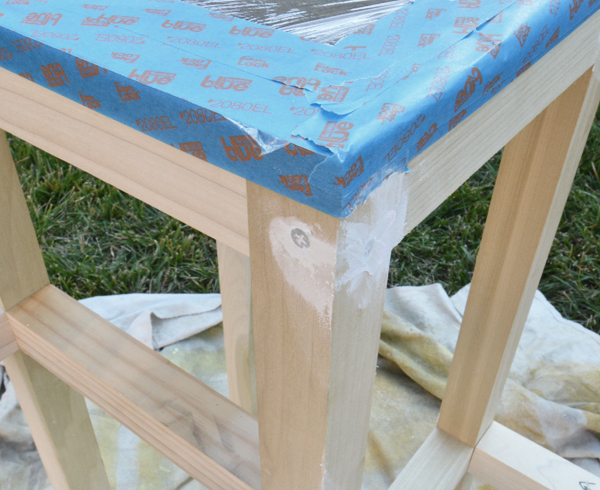
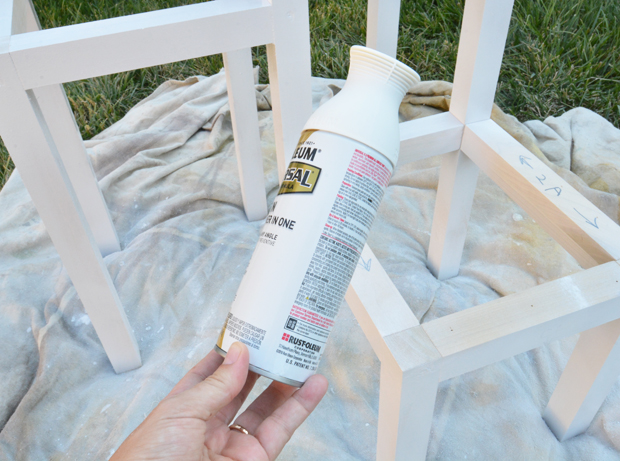
To finish, patch the gaps created by the wood screws with spackling. Sand any residue when the spackling is dry. Tape off the top tier’s stained wood top to protect it, then spray paint base. (I used a primer + paint formula in white.)
Using the Arrow Fastener electric brad nailer, secure wood tops to middle and lower tiers.
![]()
Once the spray paint is dry, add a coat of clear wax or polycrylic to protect the stained tops.
![]()
Enjoy your new tiered planter!
*This project brought to you in partnership with Arrow Fastener tools as part of a series to inspire projects around the home. Thank you for supporting the brands that support this blog, all opinions are my own.
** This is my last official week of summer before the kids go back to school so I plan to enjoy it! I’m in Vegas this week working on the flip and enjoying time with my extended family, I’ll be back later with another round of favorite links for the weekend, then I’ll return to more frequent blogging next week. Cheers!
.


Very nice! What a fun and satisfying project!
I love it! It is so simple but it’s beautitful. I’m totally making that soon. I have a corner in my bedroom where that would look perfect.
I love it and think I might actually be able to do. Thanks for sharing.
I LOVE this! Where did you guy the poplar legs? Any old home improvement store?
I like it so much i’ Going to make one for my plants
I am wondering the dimensions of the tabletop boards? In the instructions it just says, “ two 24” x ¾” poplar boards” and “cut in half” are they 12”x12” tabletops? Help!!
Yes they are 12×12